Ganz Security LED-19 LED Series Maunal - Page 4
Introduction, Features, Assembling the monitor
 |
View all Ganz Security LED-19 manuals
Add to My Manuals
Save this manual to your list of manuals |
Page 4 highlights
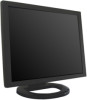
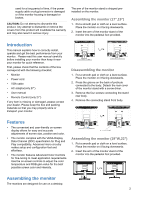
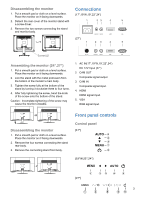
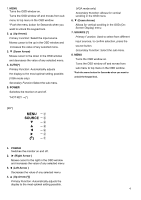
used for a long period of time, if the power supply cable or plug/connector is damaged or if the monitor housing is damaged or broken. CAUTION: Do not attempt to dismantle this product. Any attempt to dismantle or remove the covers from this product will invalidate the warranty and may also result in serious injury. The arm of the monitor stand is shipped preinstalled on the monitor. Assembling the monitor (17",19") 1. Put a smooth pad or cloth on a level surface. Place the monitor on it facing downwards. 2. Insert the arm of the monitor stand of the monitor into the pedestal foot provided. Introduction This manual explains how to correctly install, operate and get the best performance from your monitor. Please read this user manual carefully before installing your monitor then keep it near your monitor for quick reference. First, please check that the contents of the box correspond with the following checklist: • Monitor • Power cord • VGA cable • AC adaptor(only 27") • User manual • Remote Control (only 27") If any item is missing or damaged, please contact your dealer. Please keep the box and packing materials so that you may properly store or transport your monitor. Disassembling the monitor 1. Put a smooth pad or cloth on a level surface. Place the monitor on it facing downwards. 2. Press the groove on the back of protrude connected to the body. Detach the rear cover of the monitor stand with a screw driver. 3. Remove the four screws connecting the stand rear body. 4. Remove the connecting stand front body. Features The convenient and user-friendly on-screen display allows for easy and accurate adjustments of screen size, position and color. The monitor complies with the VESA Display Data Channel (DDC) specification for Plug and Play compatibility. Advanced micro circuitry makes setup and configuration fast and effortless. The monitor features Advanced Color Controls for fine-tuning to meet application requirements. Use the on-screen controls to adjust the color temperature and RGB gain value for the best possible screen color and intensity. Screw(x4) Assembling the monitor (19"W,22") 1. Put a smooth pad or cloth on a level surface. Place the monitor on it facing downwards. 2. Insert the arm of the monitor stand of the monitor into the pedestal foot provided. Assembling the monitor The monitors are designed for use on a desktop. 2
-
 1
1 -
 2
2 -
 3
3 -
 4
4 -
 5
5 -
 6
6 -
 7
7 -
 8
8 -
 9
9 -
 10
10 -
11
-
12
-
13
-
14
-
15
-
16
-
17
-
18
-
19
-
20
 |
 |
