Garmin GPS 24xd Installation Instructions - Page 3
Connecting the Antenna, Heading Calibration
 |
View all Garmin GPS 24xd manuals
Add to My Manuals
Save this manual to your list of manuals |
Page 3 highlights
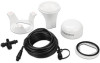
If the included drop cable is not long enough, you can add a drop cable extension up to 4 m (13 ft.). If more cable is needed, add an extension to your NMEA 2000 backbone, based on the NMEA 2000 guidelines. 8 With the antenna installed on the pole mount, fill the vertical cable slot with a marine sealant (optional). 9 Route the cable away from sources of electronic interference. Mounting the Antenna Under a Surface NOTICE Verify that the supplied screws will not penetrate the surface before you install the under-deck mounting bracket. If the supplied screws are too long, use surface-appropriate screws instead. Because the antenna cannot acquire signals through metal, it must be mounted under a fiberglass surface only. 1 Determine and test the location under a fiberglass surface where you want to mount the antenna (Testing the Mounting Location, page 1). 2 Place the adhesive pads on the under-deck mounting bracket . 3 Place the antenna in the under-deck mounting bracket. 4 Adhere the under-deck mounting bracket to the mounting surface. 5 Secure the under-deck mounting bracket to the mounting surface with screws. 6 Connect the cable to the antenna . 7 Route the cable away from sources of electronic interference. Connecting the Antenna NMEA 2000 Network Connection If you do not have an existing NMEA 2000 network, you must install a NMEA 2000 network on your boat. For more information on NMEA 2000, go to garmin.com/manuals/nmea_2000. The antenna is packaged with a NMEA 2000 T-connector and a NMEA 2000 drop cable. You will use these two components to connect the antenna to your existing NMEA 2000 network. Antenna NMEA 2000 drop cable NMEA 2000 T-connector NMEA 2000 backbone Heading Calibration After installation is complete, you must calibrate the heading and perform the auto heading alignment to receive magnetic heading data. Depending on the types of devices connected to the NMEA 2000 network, you can calibrate the antenna using either a menu-based method or a basic method. If you connect the antenna to a NMEA 2000 network with a compatible Garmin chartplotter, you can perform either the basic calibration or the menu-based calibration (Performing MenuBased Calibration, page 3). If you connect the antenna to a NMEA 2000 network without a compatible Garmin chartplotter or with a third-party device, you must perform basic calibration instead of menu-based calibration. Performing Menu-Based Calibration Before you can perform menu-based calibration, you must connect the antenna to the same NMEA 2000 network as a compatible Garmin chartplotter. 1 Select Menu > Settings > Communications > NMEA 2000 Setup > Device List. 2 Select the GPS 24xd NMEA 2000 from the device list. 3 Select Review > Compass Cal. > Begin. 4 Follow the on-screen instructions until the compass calibration is complete, taking care to keep the boat as steady and level as possible. The boat should not list during calibration. When the compass calibration is complete, a value appears near the Compass Cal. setting. A value near 100 indicates the antenna was installed in a perfect magnetic environment and calibrated correctly. If the heading performance is unacceptable, and the value is closer to 0 than it is to 100, you might need to relocate the antenna and calibrate the compass again. NOTE: The antenna compass must be calibrated successfully and maintain a valid GPS position, which requires the antenna to have a clear, unobstructed view of 3
-
 1
1 -
 2
2 -
 3
3 -
 4
4 -
 5
5 -
 6
6
 |
 |
