Garmin Vector 3/3S Owners Manual - Page 9
Apply a layer of bike grease to the spindle.
 |
View all Garmin Vector 3/3S manuals
Add to My Manuals
Save this manual to your list of manuals |
Page 9 highlights
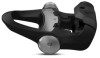
3 Set the battery cover and batteries aside. 4 Use a small Phillips screwdriver (PH 00) to remove the two screws from inside the battery carriage . 5 Remove the battery carriage. 6 While securely holding the wrench flats with a pedal wrench, use the 12 mm socket wrench to unscrew the spindle nut . NOTE: The right pedal has a black spindle nut and a reverse thread. The left pedal has a silver spindle nut. The left spindle has a line on the wrench flats. 7 Slide the spindle out of the pedal body. 8 Remove the inner seal and outer seal from inside the pedal body. NOTE: Both seals are cone shaped to fit the tapered spindle. 9 Remove all old grease from the components. 10Insert the inner seal into the pedal body. You should press it down so it is flush with the bearing. 11Slide the outer seal on to the spindle. 12Apply bike grease to the bearing inside the pedal body. 13Apply a layer of bike grease to the spindle. 14Insert the spindle into the pedal body. If the outer seal moves, you should press it down so it is flush with the top of the spindle. 15Replace the spindle nut. 16While securely holding the wrench flats with a pedal wrench, use the 12 mm socket wrench to torque the spindle nut to 7 lbf-ft. (10 N-m). WARNING To ensure that the spindle nut stays in place, you must tighten it to the recommended torque specification. Failure to properly tighten the nut could cause the pedal to fall off during a ride, which could result in property damage or serious bodily injury or death. 17Replace the battery carriage and two screws. 18Replace the batteries and battery cover, and hand tighten it. NOTE: Do not damage or lose the O-ring gasket. Device Information 5
-
 1
1 -
2
-
3
-
 4
4 -
 5
5 -
 6
6 -
 7
7 -
 8
8 -
 9
9 -
 10
10 -
 11
11 -
 12
12 -
 13
13 -
 14
14
 |
 |
