Garmin Vector S Owner's Manual - Page 9
Vector Storage, Vector Specifications, USB ANT Stick™ Specifications, Battery Information, - vector sale
 |
View all Garmin Vector S manuals
Add to My Manuals
Save this manual to your list of manuals |
Page 9 highlights
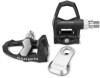
9 Apply a layer of bike grease to the spindle. 10 Insert the spindle into the cartridge. 11 Wipe away any excess grease. 12 Install the new washer and nut on the end of the spindle. NOTE: The nut for the right spindle has a left-handed (reverse) thread. 13 Use the hex nut driver to tighten the nut. WARNING Garmin recommends torque of 7 lbf-ft. (10 N-m). Failure to properly tighten the nut could cause the pedal to fall off during a ride, which could result in property damage or serious bodily injury or death. 14Install the new pedal by screwing it onto the cartridge until there is no gap. NOTE: The right pedal has a left-handed (reverse) thread. 15Replace the pedal pods and pedals according to the installation instructions (Installing the Pedal Pod and Pedal). 16Rotate the crank arm to check for clearance and smooth pedal rotation. After you replace the pedals and cartridges, you must recalibrate the system. Vector Storage If you are transporting your bicycle or not using Vector for an extended period of time, Garmin recommends removing Vector and storing it in the product box. Vector Specifications Battery type User-replaceable CR2032, 3 volts Battery life Minimum 175 hours of riding time NOTE: The pedal pod used on the right crank will drain the battery faster than the left crank. Operating From -4° to 122°F (from -20° to 50°C) temperature range Water resistance IPX7 NOTICE Do not submerge or pressure wash the components. Radio frequency/ protocol 2. 4 GHz ANT + wireless communications protocol USB ANT Stick™ Specifications Power source USB Operating temperature range From 14° to 122°F (from -10° to 50°C) Radio frequency/protocol 2. 4 GHz ANT + wireless communications protocol Transmission range Approximately 16. 4 ft. (5 m) Battery Information Vector monitors the battery level of both pedal pods and sends status information to your Edge device. When you receive a low battery warning, you have approximately 10-20 hours of operation time remaining. Replacing the Pedal Pod Battery WARNING Do not use a sharp object to remove user-replaceable batteries. Contact your local waste disposal department to properly recycle the batteries. Perchlorate Material - special handling may apply. Go to www.dtsc.ca.gov/ hazardouswaste / perchlorate. NOTE: Always replace both batteries at the same time. 1 Locate the circular battery cover on the back of the pedal À pod. 2 Use a coin to twist the cover counter-clockwise, moving Á the arrow from the locked to unlocked . Â Ã 3 Remove the cover. You can use a piece of tape or a magnet to remove the Ä battery from the cover. 4 Wait 30 seconds. 5 Insert the new battery into the cover, observing polarity. 6 Replace the cover, making sure the arrow points to unlocked. 7 Use a coin to twist the cover clockwise back into place, making sure the arrow points to locked. 8 Wait 10 seconds. After you replace the pedal pod battery, you must set the installation angle on your Edge (Setting the Installation Angle). Appendix Registering Vector Help us better support you by completing our online registration today. • Go to www.garmin.com/ vectorowner. • Keep the original sales receipt, or a photocopy, in a safe place. Edge 810 and 510 Device Instructions Pairing Vector with Your Edge 810 or 510 Device 1 Bring the Edge device within range (3 m) of the sensor. NOTE: Stay 10 m away from other ANT + sensors while pairing. 2 Turn on the Edge device. 3 From the home screen, select > Bike Profiles. 4 Select a profile. 5 Select . 6 Enable the sensor, and select Search. 7 Rotate the crank arm a few times. Appendix 5
-
 1
1 -
2
-
3
-
 4
4 -
 5
5 -
 6
6 -
 7
7 -
 8
8 -
 9
9 -
 10
10 -
 11
11 -
 12
12 -
 13
13 -
 14
14
 |
 |
