Garmin dezl Owners Manual - Page 23
Logging Service History
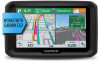 |
View all Garmin dezl manuals
Add to My Manuals
Save this manual to your list of manuals |
Page 23 highlights
extend the duration of the Dispatch and Track sharing session, or you can stop sharing at any time. Stopping Dispatch and Track Sharing You can stop Dispatch and Track sharing at any time using your dēzl device or the Smartphone Link app. • On your dēzl device, select Apps > Dispatch and Track > Stop. • On your smartphone, open the Smartphone Link app, and select Dispatch and Track > Stop Dispatch and Track. Viewers receive a message that the Dispatch and Track session has ended, and they can no longer track your location. Sending a Dispatch Message to a dēzl Device Before you can send a dispatch message, the driver must set up the Dispatch and Track feature (Setting Up Dispatch and Track Sharing, page 16). You can send a dispatch message directly to a dēzl device using the Dispatch and Track feature. This can be useful for sending updated information to a driver. NOTE: This feature is not compatible with all smartphone messaging apps. 1 Prepare an email or text message with updated dispatch information. 2 Include the word "dezl" anywhere in the subject line or body of the email or text message. NOTE: The word "dezl" is not case sensitive. 3 Send the email or text message to the driver's smartphone. The message displays on the driver's dēzl device and can be viewed while the vehicle is moving. Starting a Route Using a Dispatch Message When you receive a message from your dispatcher, you can start a new route using received address information, if available. 1 Select the message notification. 2 Select the address link from the body of the message. The device searches for the address. 3 Select a location. 4 Select Go!. The device calculates a route to the destination and starts a new Dispatch and Track session. IFTA NOTE: This feature is not available in all areas. Before you can use this feature, a truck vehicle profile must be active. You can record data needed for International Fuel Tax Agreement documentation (IFTA), such as fuel-purchase data and miles driven. Entering Fuel Data 1 Select Apps > IFTA > At the Pump. 2 Enter the fuel price per gallon. 3 Select the Fuel Used field. 4 Enter the amount of fuel purchased. 5 If necessary, select the fuel type: • To record the amount in liters, select Gallons > Liters > Save. • To record the amount in gallons, select Liters > Gallons > Save. 6 If necessary, select the Tax Included check box. 7 Select Next. 8 Select an option to record the fuel station where you refueled: • Select a nearby fuel station from the list. • Select the text field, and enter the fuel station name and address. 9 Select the fuel purchaser. Editing Fuel Data 1 Select Apps > IFTA > Fuel Journals. 2 If necessary, select a vehicle profile. 3 If necessary, select a quarter. 4 Select a fuel record. 5 Select an option: • Select a field to edit the information. • Select > Yes to delete the record. Viewing and Exporting a Jurisdiction Summary The jurisdiction summary lists data for each state or province in which your vehicle has operated during each quarter. The jurisdiction summary is available in some areas. 1 Select Apps > IFTA > Jurisdiction Summary. 2 If necessary, select a truck. 3 If necessary, select a quarter. 4 Select > Export > OK to export a jurisdiction summary. The device exports the summary to a .csv file and stores it in the Reports folder on the device. Editing and Exporting Trip Reports 1 From the main menu, select Apps > IFTA > Trip Reports. 2 If necessary, select a truck. 3 If necessary, select a quarter. 4 Select a report. 5 Select an option: • Select > Delete, and select the check box to delete a report. • Select > Combine, and select the check boxes to combine reports. • Select > Export > OK. The device exports the report to a .csv file and stores it in the Reports folder on the device. Viewing Exported Jurisdiction Summaries and Trip Reports NOTICE If you do not know the purpose of a file, do not delete it. Your device memory contains important system files that should not be deleted. 1 Connect the device to your computer. 2 From the file browser on your computer, browse to the internal device storage, and open the Reports folder. 3 Open the IFTA folder. 4 Open the .csv file. Logging Service History You can log the date and odometer reading when service or maintenance is performed on your vehicle. The device provides several service categories, and you can add custom categories (Adding Service Categories, page 18). 1 Select Apps > Service History. 2 Select a service category. 3 Select Add Record. 4 Enter the odometer reading, and select Next. 5 Enter a comment (optional). Vehicle and Driver Tools 17
-
 1
1 -
2
-
3
-
4
-
5
-
6
-
7
-
8
-
9
-
10
-
11
-
12
-
13
-
14
-
15
-
16
-
17
-
 18
18 -
 19
19 -
 20
20 -
 21
21 -
 22
22 -
 23
23 -
 24
24 -
 25
25 -
 26
26 -
 27
27 -
 28
28 -
29
-
30
-
31
-
32
-
33
-
34
 |
 |
