Garmin eTrex Legend C Owner's Manual - Page 13
Battery, Installation and, Backlight/Contrast - hard reset
 |
UPC - 753759045555
View all Garmin eTrex Legend C manuals
Add to My Manuals
Save this manual to your list of manuals |
Page 13 highlights
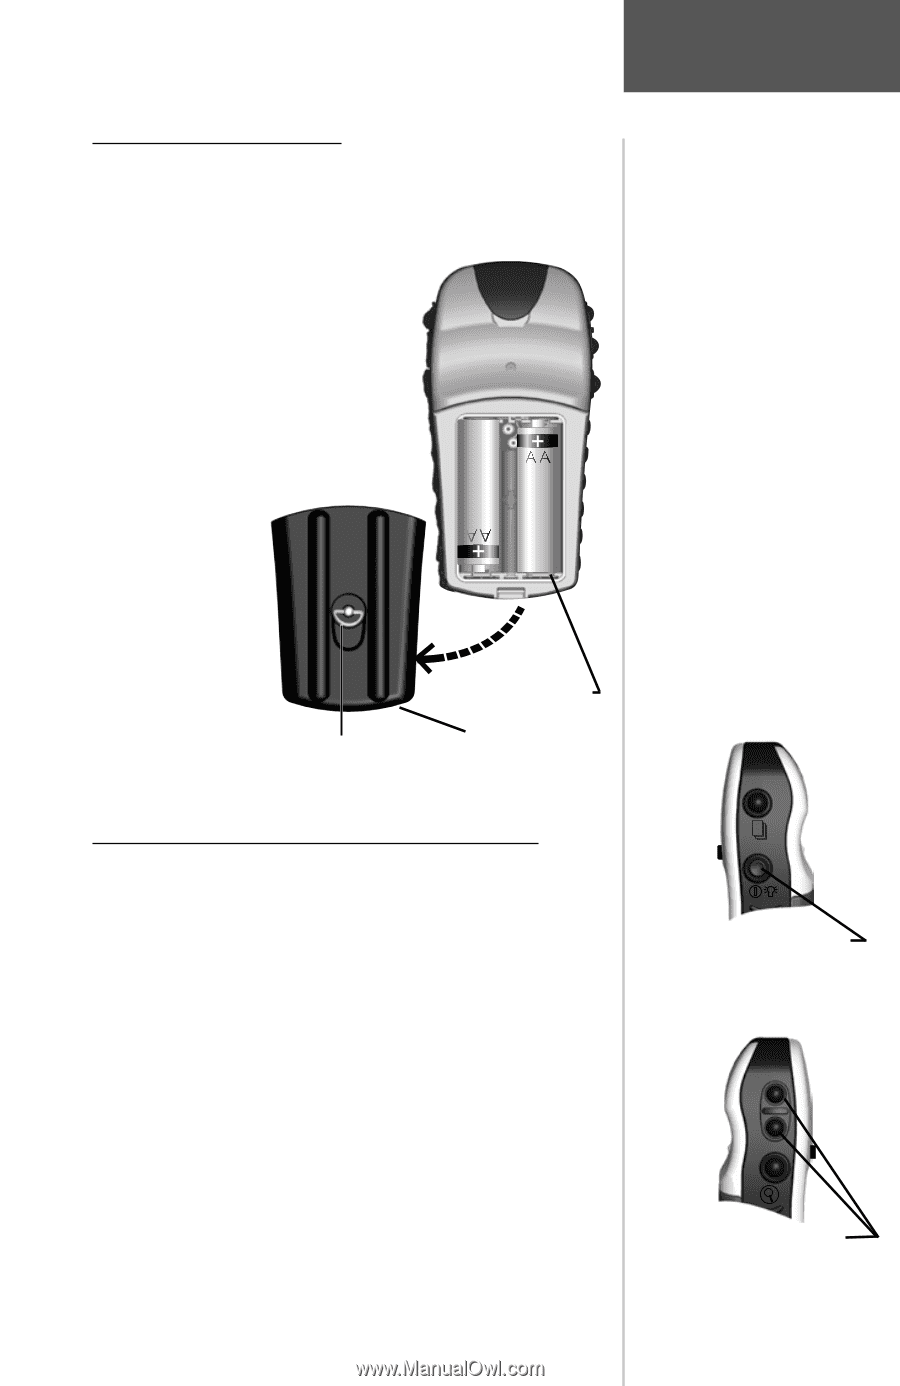
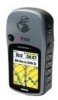
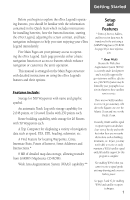
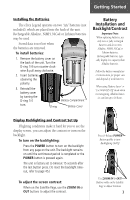
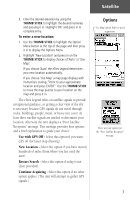
Getting Started Installing the Batteries The eTrex Legend operates on two "AA" batteries (not included), which are placed into the back of the unit. Rechargeable Alkaline, NiMH, NiCad or Lithium batteries may be used. Stored data is not lost when the batteries are removed. To install batteries: 1. Remove the battery cover on the back of the unit. Turn the D-ring 1/4 turn counter-clockwise & pull away clockwise. 2. Insert batteries observing the polarity. 3. Reinstall the battery cover by turning the D-ring 1/4 turn. Battery Compartment D-ring Battery Cover Battery Installation and Backlight/Contrast Important Note: When replacing batteries, use only new or fully recharged batteries and do not mix Alkaline, NiMH, NiCad or Lithium batteries. Rechargeable batteries typically display less capacity than Alkaline batteries. Follow the battery manufacturer's instructions for proper care and disposal of used batteries. When using 'Battery Saver' or 'Use With GPS Off' mode when not navigating, Alkaline batter- ies can last up to 18 hours. Display Backlighting and Contrast Set Up If lighting conditions make it hard for you to see the display screen, you can adjust the contrast or turn on the backlight. To turn on the backlighting: Press the POWER button to turn on the backlight from any page on the unit. The backlight remains on until the set timeout period is completed or the POWER button is pressed again. The unit is factory set to timeout 15 seconds after the last button press. (To reset the backlight timeout, refer to page 45.) To adjust the screen contrast: When on the Satellite Page, use the ZOOM IN or OUT buttons to adjust the contrast. Press & Release POWER Button quickly to turn Backlighting On/Off Use ZOOM IN & OUT Buttons while on the Satellite Page to Adjust Contrast 3
-
 1
1 -
2
-
3
-
4
-
5
-
6
-
7
-
 8
8 -
 9
9 -
 10
10 -
 11
11 -
 12
12 -
 13
13 -
 14
14 -
 15
15 -
 16
16 -
 17
17 -
 18
18 -
19
-
20
-
21
-
22
-
23
-
24
-
25
-
26
-
27
-
28
-
29
-
30
-
31
-
32
-
33
-
34
-
35
-
36
-
37
-
38
-
39
-
40
-
41
-
42
-
43
-
44
-
45
-
46
-
47
-
48
-
49
-
50
-
51
-
52
-
53
-
54
-
55
-
56
-
57
-
58
-
59
-
60
-
61
-
62
-
63
-
64
-
65
-
66
-
67
-
68
-
69
-
70
-
71
-
72
-
73
-
74
-
75
-
76
 |
 |