Gastroback 40119 User Manual - Page 12
Disassembling your Design Juicer Basic
 |
View all Gastroback 40119 manuals
Add to My Manuals
Save this manual to your list of manuals |
Page 12 highlights
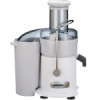
Disassembling your Design Juicer Basic WARNING: Always turn the appliance 'OFF' and pull the plug when the appliance is not in use or when disassembling, moving or cleaning the appliance. Never let water or other liquids run into the motor block. Never clean the line cord or the motor block in the dishwasher, poor liquids over the appliance or douse or dip it in water or other liquids. Step 1: Push the 'ON/OFF' button on the juicer to 'OFF' and then switch 'OFF' at the power outlet and 1 unplug. IMPORTANT: Wait for the filter basket to stop spinning before continuing to step 2 Carefully remove the pulp container by tilting the pulp container slightly to the right and unlatch it from under the juicer cover and the container support extending from under the motor base (picture 1). Step 2: Pull the locking arm back over the grooves on 2 either side of the juicer cover (picture 2/3). Move the locking arm down. 3 Step 3: Lift the juicer cover off the juicer (picture 4). 4 12
-
 1
1 -
2
-
3
-
4
-
5
-
6
-
 7
7 -
 8
8 -
 9
9 -
 10
10 -
 11
11 -
 12
12 -
 13
13 -
 14
14 -
 15
15 -
 16
16 -
 17
17 -
18
-
19
-
20
-
21
-
22
-
23
-
24
-
25
-
26
-
27
-
28
 |
 |
