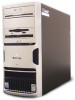
Gateway GT5238E 8511625 - Gateway Computer Hardware Reference (6-Bay Micro BTX - Page 20
Closing the case
 |
View all Gateway GT5238E manuals
Add to My Manuals
Save this manual to your list of manuals |
Page 20 highlights
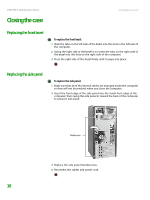
CHAPTER 3: Maintenance Basics Closing the case www.gateway.com Replacing the front bezel To replace the front bezel: 1 Slide the tabs on the left side of the bezel into the slots in the left side of the computer. 2 Swing the right side of the bezel in to insert the tabs on the right side of the bezel into the slots on the right side of the computer. 3 Press the right side of the bezel firmly until it snaps into place. Replacing the side panel To replace the side panel: 1 Make sure that all of the internal cables are arranged inside the computer so they will not be pinched when you close the computer. 2 Insert the front edge of the side panel into the inside front edge of the computer, then swing the side panel in toward the back of the computer to secure it into place. Thumbscrews 3 Replace the side panel thumbscrews. 4 Reconnect the cables and power cord. 16
-
 1
1 -
2
-
3
-
4
-
5
-
6
-
7
-
8
-
9
-
10
-
11
-
12
-
13
-
14
-
 15
15 -
 16
16 -
 17
17 -
 18
18 -
 19
19 -
 20
20 -
 21
21 -
 22
22 -
 23
23 -
 24
24 -
 25
25 -
26
-
27
-
28
-
29
-
30
-
31
-
32
-
33
-
34
-
35
-
36
-
37
-
38
-
39
-
40
-
41
-
42
-
43
-
44
-
45
-
46
-
47
-
48
-
49
-
50
-
51
-
52
 |
 |
