GE JAP02SNSS Use and Care Manual
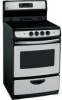
GE JAP02SNSS - 24 Inch - Electric Range Manual
 |
UPC - 084691169116
View all GE JAP02SNSS manuals
Add to My Manuals
Save this manual to your list of manuals |
GE JAP02SNSS manual content summary:
- GE JAP02SNSS | Use and Care Manual - Page 1
Cleaning 24--30 Installation Instructions. . . . 31--38 Troubleshooting Tips. . . . . . 39--43 Accessories 44 Consumer Support Consumer Support 45 Product Registration 45, 46 Warranty 47 Owner´s Manual and Installation Instructions Coil Top and Radiant Top Models Standard Clean Models JAS02 - GE JAP02SNSS | Use and Care Manual - Page 2
in an oven or near the cooktop. CAUTION: ITEMS OF INTEREST TO CHILDREN SHOULD NOT BE STORED IN CABINETS ABOVE A RANGE OR ON THE BACKSPLASH OF A RANGE-CHILDREN CLIMBING ON THE RANGE TO REACH ITEMS COULD BE SERIOUSLY INJURED. Consumer Support Troubleshooting Tips Installation Instructions 2 - GE JAP02SNSS | Use and Care Manual - Page 3
that are necessary for the range to operate properly with correct combustion. Air openings are located at the rear of the cooktop, at the top and bottom of the oven door, and at the bottom of the range under the storage drawer. Installation Troubleshooting Tips Consumer Support Instructions 3 - GE JAP02SNSS | Use and Care Manual - Page 4
mode malfunctions, turn the oven off and disconnect the power supply. Have it serviced by a qualified technician. s Take the shelves out of the oven before you begin the self-clean cycle or they may discolor. Care and Cleaning Installation Instructions Consumer Support Troubleshooting Tips 4 - GE JAP02SNSS | Use and Care Manual - Page 5
Instructions Operating Instructions SURFACE UNITS-ALL MODELS other glazed containers are suitable for cooktop service; others may break because of the should be turned toward the center of the range without extending over nearby surface units. s Instructions Troubleshooting Tips Consumer Support 5 - GE JAP02SNSS | Use and Care Manual - Page 6
not use aluminum foil to line the drip pans or anywhere in the oven except as described in this manual. Misuse could result in a shock, fire hazard or damage to the range. Installation Instructions Consumer Support Troubleshooting Tips READ AND FOLLOW THIS SAFETY INFORMATION CAREFULLY. SAVE THESE - GE JAP02SNSS | Use and Care Manual - Page 7
Instructions Using the surface units. Throughout this manual, features and appearance may vary from your model Troubleshooting Tips Consumer Support Instructions OFF LO HI 1 9 2 8 3 7 Medium low 4 6 5 Medium high Heat Setting Guide but generally cooks evenly . Keep range and hood - GE JAP02SNSS | Use and Care Manual - Page 8
Instructions Using the surface units. Throughout this manual, features and appearance may vary from your model. Min Burner On Surface de cuisson Max Min Hot Chaud Indicator Lights (on radiant glass models place hot cookware from the oven or surface on the Troubleshooting Tips Consumer Support - GE JAP02SNSS | Use and Care Manual - Page 9
and the Department of Agriculture Extension Service. To prevent burns from steam or cookware are slow to absorb heat, but generally cook evenly at low to medium heat settings unit more than 1 inch. Installation Instructions Troubleshooting Tips Consumer Support Wok Cooking We recommend that you use - GE JAP02SNSS | Use and Care Manual - Page 10
Consumer Support Troubleshooting Tips Care and Cleaning Operating Instructions Safety Instructions Using the oven controls. Throughout this manual, features and appearance may vary from your model. Oven Control, Clock and Timer Features and Settings BAKE Pad Touch this pad to select the bake - GE JAP02SNSS | Use and Care Manual - Page 11
shelf in. NOTE: The shelf is not designed to slide out at the special low shelf (R) position. D C B A The oven has 4 shelf positions. Oven shelf positions The oven has four shelf supports---- A (bottom), B, C and D (top). Installation Instructions Consumer Support Troubleshooting Tips 12 11 - GE JAP02SNSS | Use and Care Manual - Page 12
Safety Instructions Operating Instructions Care and Cleaning Troubleshooting Tips Consumer Support Using the oven. How to Set the Oven for Baking the wall. Aluminum Foil Do not use aluminum foil on the bottom of the oven. Never entirely cover a shelf with aluminum foil. This will disturb the heat - GE JAP02SNSS | Use and Care Manual - Page 13
Instructions Operating Instructions Using the clock and timer. (on some models) Not all features are on all models. To Set the Clock The clock must be set to the correct time of day for the automatic oven . Care and Cleaning Installation Instructions Troubleshooting Tips Consumer Support 13 - GE JAP02SNSS | Use and Care Manual - Page 14
you want. To Cancel the Timer Touch the TIMER pad twice. End of Cycle Tones (on some models) Clear the tones by pressing the pad of the function you are using. OR Power Outage If . Touch the START/ON pad. Care and Cleaning Installation Instructions Consumer Support Troubleshooting Tips 14 - GE JAP02SNSS | Use and Care Manual - Page 15
Consumer Support Troubleshooting Tips Care and Cleaning Operating Instructions Safety Instructions Using the timed baking and roasting features. (on some models) NOTE: Foods pad to check the length of cooking time you have set. When the oven turns on at the time of day you have set, the display - GE JAP02SNSS | Use and Care Manual - Page 16
Safety Instructions Operating Instructions Care and Cleaning Troubleshooting Tips Consumer Support Special features of your oven set in this special features mode. Fahrenheit or Celsius Temperature Selection Your oven control is set to use the Fahrenheit temperature selections but you may change - GE JAP02SNSS | Use and Care Manual - Page 17
Consumer Support Troubleshooting Tips Care and Cleaning Operating Instructions Safety Instructions Special features of your oven control. Tones at the End Touch the TIMER/CLOCK pad again to change to the 24 hour military time clock. The display will show 24 hr. If this is the choice you want touch - GE JAP02SNSS | Use and Care Manual - Page 18
Safety Instructions Operating Instructions Care and Cleaning Troubleshooting Tips Consumer Support Special features of your oven control. Cook and Hold Your new control has a cook and hold feature that keeps cooked foods warm for up to 3 hours after Timed Baking or - GE JAP02SNSS | Use and Care Manual - Page 19
Support Troubleshooting Tips Care and Cleaning Operating Instructions Safety Instructions Using the Sabbath Feature. (Designed for use on the Jewish Sabbath and Holidays.) (on some models and Automatic Stop NOTE: To understand how the oven control works, practice using regular (non-Sabbath) - GE JAP02SNSS | Use and Care Manual - Page 20
Safety Instructions Operating Instructions Care and Cleaning Troubleshooting Tips Consumer Support Using the Sabbath Feature. (Designed for use on the Jewish Sabbath and Holidays.) (on some models) How to Exit the Sabbath Feature Touch the CLEAR/OFF pad. If the oven is cooking, wait for a random - GE JAP02SNSS | Use and Care Manual - Page 21
Each notch changes the temperature by 10°F. Back of OVEN TEMP knob To Adjust the Thermostat on Other Models Touch the BAKE and BROIL pads at When you temperature in 1 degree increments. Installation Instructions Troubleshooting Tips Consumer Support The type of margarine will affect baking - GE JAP02SNSS | Use and Care Manual - Page 22
Safety Instructions Operating Instructions Care and Cleaning Troubleshooting Tips Consumer Support Using the self-cleaning oven. The oven door must be closed and all controls must be set correctly for the cycle to work properly. Before a Clean Cycle Wipe up heavy soil on the oven bottom. ( - GE JAP02SNSS | Use and Care Manual - Page 23
Consumer Support Troubleshooting Tips Care and Cleaning Operating Instructions Safety Instructions Using the self-cleaning oven. The oven door will show the start time. It will not be possible to open the oven door until the temperature drops below the lock temperature and the LOCKED DOOR light - GE JAP02SNSS | Use and Care Manual - Page 24
servicing or any reason, be sure the anti-tip device is re-engaged properly when the range is replaced. Failure to take this precaution could result in tipping of the range and cause injury. Operating Instructions Care and Cleaning Installation Instructions Oven Interior (non-self clean models - GE JAP02SNSS | Use and Care Manual - Page 25
and Drip Pans section. Operating Instructions Care and Cleaning Installation Instructions Slot Hinge lock Upper hinge arm Lower hinge arm Lift-Off Oven Door The oven door is removable, but it store a soiled broiler pan and grid anywhere in the range. 25 Consumer Support Troubleshooting Tips - GE JAP02SNSS | Use and Care Manual - Page 26
and dry with a clean cloth. NOTE: Take the shelves out of the oven before you begin the self-clean cycle or they may discolor. To make electrical power to the range. Installation Instructions Troubleshooting Tips Consumer Support Clean under the range. 26 Storage Drawer Removal (on some models - GE JAP02SNSS | Use and Care Manual - Page 27
Instructions Operating Instructions Care and cleaning of the range. Surface unit Receptacle Drip pan Surface Units (on some models . Guide the range. NOTE: Do not clean the drip pans in a self-cleaning oven. Care and Cleaning Installation Instructions Troubleshooting Tips Consumer Support 27 - GE JAP02SNSS | Use and Care Manual - Page 28
Camco Parts Store nearest you, please call our toll-free number: National Parts Center 1.800.626.2002 ge.com Glass Window (on some models) To clean the outside glass finish, use a glass cleaner. Rinse and polish with a dry cloth. Installation Instructions Consumer Support Troubleshooting Tips 28 - GE JAP02SNSS | Use and Care Manual - Page 29
Safety Instructions Operating Instructions Care and Cleaning Cleaning the glass cooktop. (on some models) Clean your cooktop after each spill. Use Ceramic Cooktop entire surface with Ceramic Cooktop Cleaner and a paper towel. Installation Instructions Troubleshooting Tips Consumer Support 29 - GE JAP02SNSS | Use and Care Manual - Page 30
Instructions Cleaning the glass cooktop. (on some models Instructions Care and Cleaning Installation Instructions Consumer Support Troubleshooting Remove hot pans. Wearing an oven mitt: a. Use a single-edge In this case, service will be necessary. toll-free number: National Parts Center ge.com - GE JAP02SNSS | Use and Care Manual - Page 31
Installation Instructions 24" GE Electric Ranges Questions? Call 800.GE.CARES (800.432.2737) or Visit our Website at: www.GEAppliances.com BEFORE YOU BEGIN Read these Instructions completely and carefully. IMPORTANT - Save these instructions for local inspector's use. IMPORTANT - Observe all - GE JAP02SNSS | Use and Care Manual - Page 32
SHIPPING MATERIALS Remove packaging materials. Failure to remove packaging materials could result in damage to the appliance. 32 Models JAS02 JAP02 A 44 3/4" 47" B C (recomended) D 24 3/4" 2" (5,08 cm) 41" (104,14 cm) 24 3/4" 2" (5,08 cm) 41" (104,14 cm) Flooring under the range Your range - GE JAP02SNSS | Use and Care Manual - Page 33
Instructions ELECTRICAL CONNECTIONS ELECTRICAL the oven frame. We recommend you have the electrical wiring and hookup of your range connected range is in position, flexible service conduit or cord must be used. NOTE: If conduit is being used, go to Step 3D and then to Step 6 or 7. • On some models - GE JAP02SNSS | Use and Care Manual - Page 34
Installation Instructions 3 POWER CORD AND STRAIN RELIEF INSTALLATION A Remove the wire cover (on the back of the range) by removing two (2) screws using a Phillips screw driver. Do not discard these screws. 2 screws to remove wire cover C For power cord installations only (see the - GE JAP02SNSS | Use and Care Manual - Page 35
Installation Instructions ELECTRICAL CONNECTIONS (CONT.) 4 3-WIRE POWER CORD INSTALLATION WARNING: screw into the power cord ground wire terminal ring, through the ground plate and into the frame of the range. D Insert the 3 power cord rings into each one of the teminals of the terminal block. Be - GE JAP02SNSS | Use and Care Manual - Page 36
Instructions 6 3-WIRE CONDUIT INSTALLATION A Loosen the 3 lower terminal screws from the terminal block. Insert the center bare wire (white/neutral) tip through the bottom center terminal block opening. On certain models the ground bare wire tip between the range frame and the ground plate (removed - GE JAP02SNSS | Use and Care Manual - Page 37
and the range back. 10 REMOVE STORAGE DRAWER A Pull the drawer out until it stops. B Lift the front of the drawer until the stops clear the guide. 2 screws tipping the range, the range must be secured by a properly installed anti-tip bracket. See installation instructions shipped with bracket - GE JAP02SNSS | Use and Care Manual - Page 38
Installation Instructions 11 LEVEL THE RANGE A Install the oven shelves in the oven and position the range where it will be installed. B Check for levelness by placing a spirit level or a cup, partially filled with Spirit level water, on one of the oven shelves. If using a spirit level, take two - GE JAP02SNSS | Use and Care Manual - Page 39
Instructions Operating Instructions Care and Cleaning Before you call for service... Troubleshooting Tips Save time and money! Review the charts on the following pages first and you may not need to call for service. Problem on a model with a Instructions Troubleshooting Tips Consumer Support 39 - GE JAP02SNSS | Use and Care Manual - Page 40
Safety Instructions Operating Instructions Care and Cleaning Before you call for service... Troubleshooting Tips Problem Coil Cooktops Surface units not functioning properly Oven-All Models Oven light does not work Oven will not work Food does not bake or roast properly Possible Causes What To - GE JAP02SNSS | Use and Care Manual - Page 41
Safety Instructions Operating Instructions Before you call for service... Problem Food does not broil properly Control signals after entering cooking time or Self-Clean Display flashes "bAd" then "linE" with a loud tone Possible Causes Oven is not set to BROIL. What To Do •On models with a - GE JAP02SNSS | Use and Care Manual - Page 42
Before you call for service... Troubleshooting Tips Operating Instructions Care and Cleaning Installation Instructions Problem Oven temperature too hot or too cold Clock and timer do not work Display goes blank Oven door is crooked Oven makes clicking noise "F-and a number or letter - GE JAP02SNSS | Use and Care Manual - Page 43
Safety Instructions Operating Instructions Care and Cleaning Before you call for service... Problem "Burning" or "oily" odor emitting from the oven vent Strong odor Self-Cleaning Models Oven will not self-clean Oven starts a self-clean cycle when you wanted to bake, roast or broil "Crackling" or - GE JAP02SNSS | Use and Care Manual - Page 44
more at ge.com, or call 800.626.2002 (during normal business hours). Have your model number ready. ge.com Surface Elements & Drip Pans Oven Racks Broiler Pan Oven Elements Light Bulbs Knobs Cleaner Cleaning Pads Scraper Installation Instructions Troubleshooting Tips Consumer Support 44 - GE JAP02SNSS | Use and Care Manual - Page 45
range, TV, VCR and much more---any brand! Plus there's no extra charge for emergency service GE and call us in the U.S. toll-free at 800.626.2224 for more information. *All brands covered, up to 20 years old, in the continental U.S. ✁ Cut here Please place in envelope and mail to: General Electric - GE JAP02SNSS | Use and Care Manual - Page 46
a safe place. It contains information you will need should you require service. Our service number is 800.GE.CARES (800.432.2737). 3 Read your Owner's Manual carefully. It will help you operate your new appliance properly. Model Number Serial Number Important: If you did not get a registration - GE JAP02SNSS | Use and Care Manual - Page 47
Safety Instructions Operating Instructions Care and Cleaning Electric Range Warranty. All warranty service provided by our Factory Service Centers, or an authorized Customer Care® technician. To schedule service, on-line, 24 hours a day, visit us at ge.com, or call 800.GE.CARES (800.432.2737). - GE JAP02SNSS | Use and Care Manual - Page 48
are accepted). Order on-line today, 24 hours every day or by phone at 800.626.2002 during normal business hours. Instructions contained in this manual cover procedures to be performed by any user. Other servicing generally should be referred to qualified service personnel. Caution must be exercised
-
 1
1 -
 2
2 -
 3
3 -
 4
4 -
 5
5 -
 6
6 -
 7
7 -
8
-
9
-
10
-
11
-
12
-
13
-
14
-
15
-
16
-
17
-
18
-
19
-
20
-
21
-
22
-
23
-
24
-
25
-
26
-
27
-
28
-
29
-
30
-
31
-
32
-
33
-
34
-
35
-
36
-
37
-
38
-
39
-
40
-
41
-
42
-
43
-
44
-
45
-
46
-
47
-
48
 |
 |

Coil Top and
Radiant Top Models
Standard
Clean Models
Self-Clean
Models
Write the model and serial
numbers here:
Model #
__________________
Serial #
____________________
You can find them on a label,
behind the storage drawer on the
oven frame.
Owner´s Manual and
Installation Instructions
Ranges
Electric Coil & Radiant
ge.com
JAS02
JAP02
183D9541P008
Pub number
31-21389
Safety Information
. . . . . . . . . . 2--6
Operating Instructions
Surface Units. . . . . . . . . . . . . . . . .7, 8
Cookware . . . . . . . . . . . . . . . . . . . . . 9
Controls
. . . . . . . . . . . . . . . . . . . . .10
Oven
. . . . . . . . . . . . . . . . . . . . .11--12
Clock
and
timer
. . .
. . . . . . . . 13, 14
Timed Baking and Roasting . . . . . 15
Special Features
. . . . . . . . . . . 16 --18
Sabbath Feature . . . . . . . . . . . 19, 20
Temperature Conversions
. . . . . . 20
Thermostat . . . . . . . . . . . . . . . . . . .21
Self Cleaning . . . . . . . . . . . .
. 22, 23
Care and Cleaning
. . . . . . . 24--30
Installation Instructions
. . . . 31--38
Troubleshooting Tips
. . . . . . 39--43
Accessories
. . . . . . . . . . . . . . . . . 44
Consumer Support
Consumer Support
. . . . . . . . . . . .45
Product Registration . . . . . . . . 45, 46
Warranty
. . . . . . . . . . . . . . . . . . . . 47