GE JT965SKSS Owners Manual - Page 46
Troubleshooting Tips - reviews
 |
View all GE JT965SKSS manuals
Add to My Manuals
Save this manual to your list of manuals |
Page 46 highlights
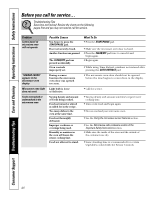
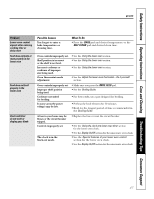
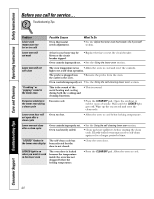
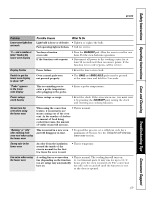
Consumer Support Troubleshooting Tips Care and Cleaning Operating Instructions Safety Instructions Before you call for service... Troubleshooting Tips Save time and money! Review the charts on the following pages first and you may not need to call for service. Problem Control panel on microwave oven will not operate "SENSOR ERROR" appears in the microwave oven display Microwave oven light does not work Foods overcooked or undercooked in the microwave oven Possible Causes You forgot to press the START/PAUSE pad. Door not securely closed. Another function was pressed. The CLEAR/OFF pad was pressed accidentally. Oven controls improperly set. What To Do • Press the START/PAUSE pad. • Make sure the microwave oven door is closed. • Press the CLEAR/OFF pad twice to cancel it and begin again. • Begin again. • While using Time Defrost, numbers not entered after pressing the AUTO DEFROST pad. During a sensor function the microwave oven door was opened too soon. • The microwave oven door should not be opened before the time begins to count down in the display. Light bulb is loose or defective. • Call for service. Varying density and amount of foods being cooked. Food not turned or stirred as called for in the recipe. Too many dishes in the oven at the same time. Food not thoroughly defrosted. Improper cookware or coverings being used. Humidity or moisture in the oven will lessen the sensor cooking time. Food not allowed to stand. • Varying density and amount sometimes require more cooking time. • Turn or stir food and begin again. • Do not overload your microwave oven. • See the Using the microwave sensor features section. • See the Microwave safe cookware section of the Important Safety Instructions section. • Make sure the inside of the oven and the outside of the containers are dry. • Some standing time is recommended for certain vegetables cooked with the Sensor Controls. 46
-
 1
1 -
2
-
3
-
4
-
5
-
6
-
7
-
8
-
9
-
10
-
11
-
12
-
13
-
14
-
15
-
16
-
17
-
18
-
19
-
20
-
21
-
22
-
23
-
24
-
25
-
26
-
27
-
28
-
29
-
30
-
31
-
32
-
33
-
34
-
35
-
36
-
37
-
38
-
39
-
40
-
 41
41 -
 42
42 -
 43
43 -
 44
44 -
 45
45 -
 46
46 -
 47
47 -
 48
48 -
 49
49 -
 50
50 -
 51
51 -
52
-
53
-
54
-
55
-
56
 |
 |
