GE JVM2052DNWW Installation Instructions - Page 8
Placement of Mounting Plate, Removing the Mounting Plate, Finding the Wall Studs
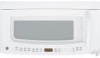 |
UPC - 084691188070
View all GE JVM2052DNWW manuals
Add to My Manuals
Save this manual to your list of manuals |
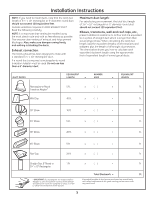
Page 8 highlights
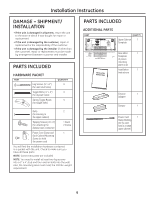
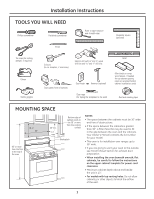
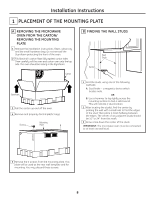
Installation Instructions 1 PLACEMENT OF THE MOUNTING PLATE A REMOVING THE MICROWAVE OVEN FROM THE CARTON/ REMOVING THE MOUNTING PLATE 1 Remove the installation instructions, filters, glass tray and the small hardware bag. Do not remove the Styrofoam protecting the front of the oven. 2 Fold back all 4 carton flaps fully against carton sides. Then carefully roll the oven and carton over onto the top side. The oven should be resting in the Styrofoam. Carton Styrofoam 3 Pull the carton up and off the oven. 4 Remove and properly discard plastic bags. Screws Mounting Plate B FINDING THE WALL STUDS Wall Studs Center 1 Find the studs, using one of the following methods: A. Stud finder - a magnetic device which locates nails. OR B. Use a hammer to tap lightly across the mounting surface to find a solid sound. This will indicate a stud location. 2 After locating the stud(s), find the center by probing the wall with a small nail to find the edges of the stud. Then place a mark halfway between the edges. The center of any adjacent studs should be 16″ or 24″ from this mark. 3 Draw a line down the center of the studs. IMPORTANT: The microwave oven must be connected to at least one wall stud. 5 Remove the 2 screws from the mounting plate. This plate will be used as the rear wall template and for mounting. You may discard these screws. 8
-
 1
1 -
2
-
 3
3 -
 4
4 -
 5
5 -
 6
6 -
 7
7 -
 8
8 -
 9
9 -
 10
10 -
 11
11 -
 12
12 -
 13
13 -
14
-
15
-
16
-
17
-
18
-
19
-
20
-
21
-
22
-
23
-
24
 |
 |
