GE PSB1200NWW Installation Instructions - Page 3
Design Information - parts
 |
UPC - 084691188780
View all GE PSB1200NWW manuals
Add to My Manuals
Save this manual to your list of manuals |
Page 3 highlights
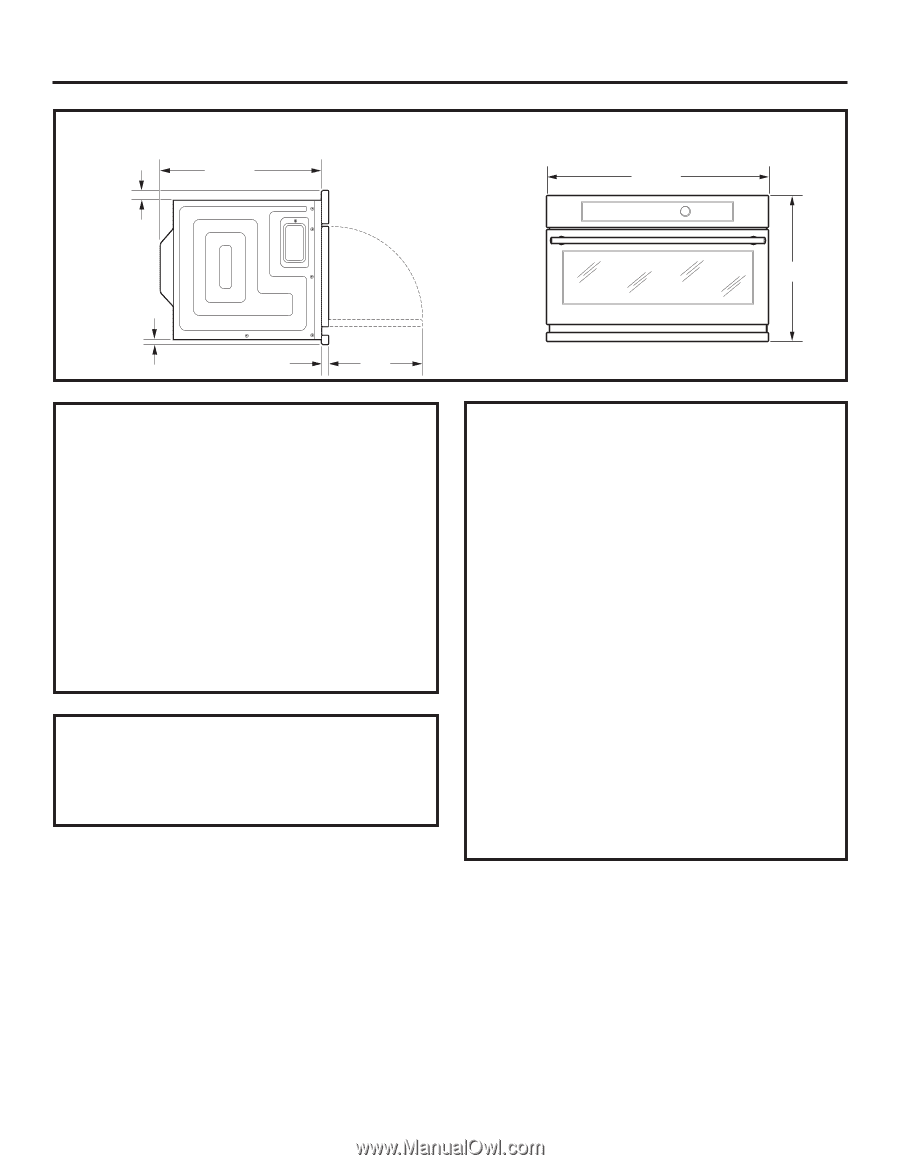
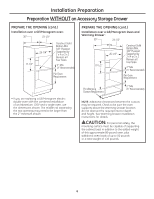
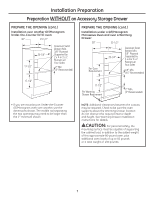
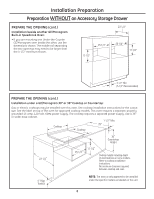
Design Information PRODUCT DIMENSIONS AND CLEARANCES NOTE: Appearance will vary by model. 1-1/8″ 21-1/2″ 2929-33//44"″ 13/16″ 5/8″ 13″ TOOLS AND PARTS REQUIRED (NOT SUPPLIED) • #2 Phillips screwdriver • Hand-held drill • High speed drill bit, 3/32″ diameter • 3/8″ slot-head screwdriver • Level • Saw • 2 x 4 or 2 x 2 lumber for installing runners or 3/8″ plywood for floor (if required) • Wood screws or other hardware for installing runner or shelf to support oven (if required) • Safety glasses or goggles PARTS SUPPLIED • 6 screws (3 required, 3 extra) • 5 color-matched screws (4 required, 1 extra) • Bottom trim (2) 19 119/3″2" ADVANCE PLANNING • These ovens may be installed directly into a 30″ wide oven cabinet. • Cutout dimensions are NOT the same for installation with or without an accessory storage drawer. Make sure to use the correct cutout when preparing the opening. NOTE: ZSC1202 models CANNOT be installed with an accessory storage drawer. See Installation Preparation Without an Accessory Storage Drawer for this model. • Allow for clearance to adjacent corners, walls, drawers, etc. The oven must be securely installed in a cabinet that is firmly attached to the house structure. Weight on the oven door could cause the oven to tip and result in injury. Never allow anyone to climb, sit, stand or hang on the oven door. If installing the drawer accessory, the drawer must be assembled to the oven prior to installation into the cabinet. See the Accessory Storage Drawer Assembly Instructions. 3
-
 1
1 -
 2
2 -
 3
3 -
 4
4 -
 5
5 -
 6
6 -
 7
7 -
 8
8 -
 9
9 -
10
-
11
-
12
-
13
-
14
-
15
-
16
-
17
-
18
-
19
-
20
 |
 |