Genie ChainLift 800 Owner's Manual - Page 6
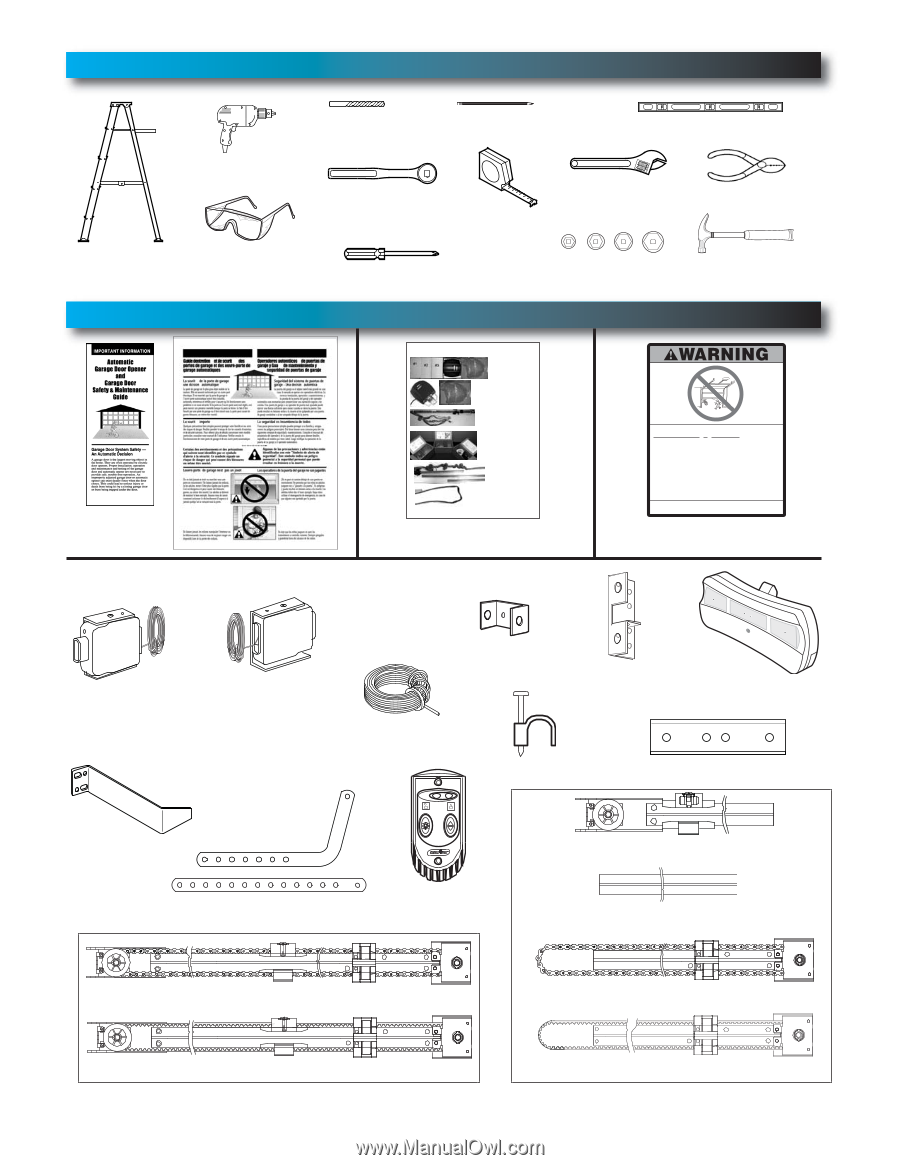
Recommended Tools, Parts Identification - in box
 |
View all Genie ChainLift 800 manuals
Add to My Manuals
Save this manual to your list of manuals |
Page 6 highlights
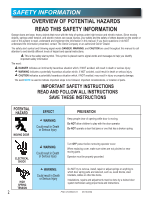
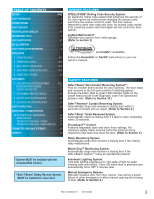
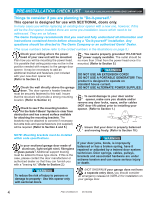
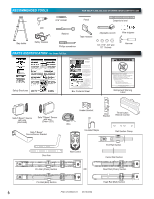
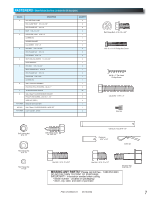
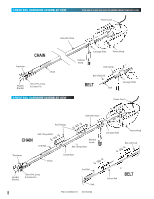
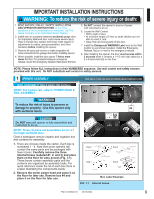
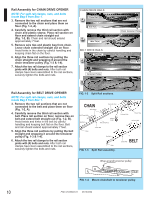
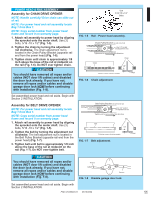
RECOMMENDED TOOLS FOR HELP-1.800.354.3643 OR WWW.GENIECOMPANY.COM 3/16" Drill Bit Pencil Carpenter's level Drill Step ladder Safety Glasses Ratchet Tape measure Phillips screwdriver PARTS IDENTIFICATION - Not Shown Full Size . Safety Brochures ©Overhead Door Corporation 02/2009 ARRANGING BOX CONTENTS FOR ASSEMBLY ORGANISATION DU CONTENU DE LA BOÎTE POUR LE MONTAGE DISPOSICIÓN DEL CONTENIDO DE LA BOLSA PARA EL MONTAJE Remove internal boxes. Enlever les boîtes internes. Quite las cajas internas. Remove lens Box and motor power head. Enlever la boîte des lentilles et la tête motorisée. Quite la caja de la lente y el motor de la caja de control. Carefully remove third rail (with chain or belt attached) and place on floor. Enlever soigneusement le troisième rail (avec la chaîne ou courroie attachée) et le placer sur le sol. Cuidadosamente quite el tercer riel (con la cadena o correa acoplada) y ponga en el piso. Arrange three small boxes for easy access. Arranger les trois petites boîtes de manière à pouvoir y accéder facilement. Disponga las tres cajas pequeñas para tener acceso fácil. Remove rail sections not connected to chain or belt. Enlever les sections de rail non connectées à la chaîne ou courroie. Quite las secciones de riel no conectadas a la cadena o correa. Arrange rails in line and pull plastic sleeve off chain or plastic tie off belt. Arranger les rails en ligne et tirer sur le manchon en plastique pour le dégager de la chaîne ou cravate en plastique outre de courroie. Disponga los rieles en línea y estire la camisa de plástico fuera de la cadena o lazo plástico de la correa. Follow instructions in the Installation Manual for assembly steps. Procéder selon les instructions stipumléoenstadgaenàs sleuimvraen.uel d'installation pour les étapes de Box Contents Sheet Adjustable wrench Wire strippers 1/4", 7/16", 3/8" and 1/2" Sockets Hammer Child can be pinned under automatic garage door. Death or serious injury can result. • Never let child walk or run under moving do.or. • Never let child use door opener controls. •Always keep moving door in sight. • If person is pinned, push control button or use emergency release. • Test door opener monthly: Refer Place to 11/ 2y-oinucr'hoowbnjeecr'ts(omra2nxu4alla. id flat) on floor. If door fails to reverse on contact, adjust opener. If opener still fails to reverse door, repair or replace opener. Do not remove or paint over this label. Mount wall control out of child's reach (at least 5 feet above floor). Place next to wall control. ©1999 Entrapment Warning Label Safe-T-Beam® Source with wire (Red LED) Safe-T-Beam® Sensor with wire (Green LED) Safe-T-Beam® Source/Sensor Bracket Door Arm Header Bracket Door Bracket Three-button Remote Control Wire Insulated Staple Rail Section Clamp Wall Control End Rail Section Center Rail Section Pro Rail (Chain) Section OR Head Rail (Chain) Section Pro Rail (Belt) Section Head Rail (Belt) Section 6 PN# 37026500123 05/15/2009
-
 1
1 -
 2
2 -
 3
3 -
 4
4 -
 5
5 -
 6
6 -
 7
7 -
 8
8 -
 9
9 -
 10
10 -
 11
11 -
 12
12 -
13
-
14
-
15
-
16
-
17
-
18
-
19
-
20
-
21
-
22
-
23
-
24
-
25
-
26
-
27
-
28
-
29
-
30
 |
 |