Gigabyte GA-990FXA-UD5 R5 Manual - Page 71
Storage Utility in the Operating System, Delete the RAID Array
 |
View all Gigabyte GA-990FXA-UD5 R5 manuals
Add to My Manuals
Save this manual to your list of manuals |
Page 71 highlights
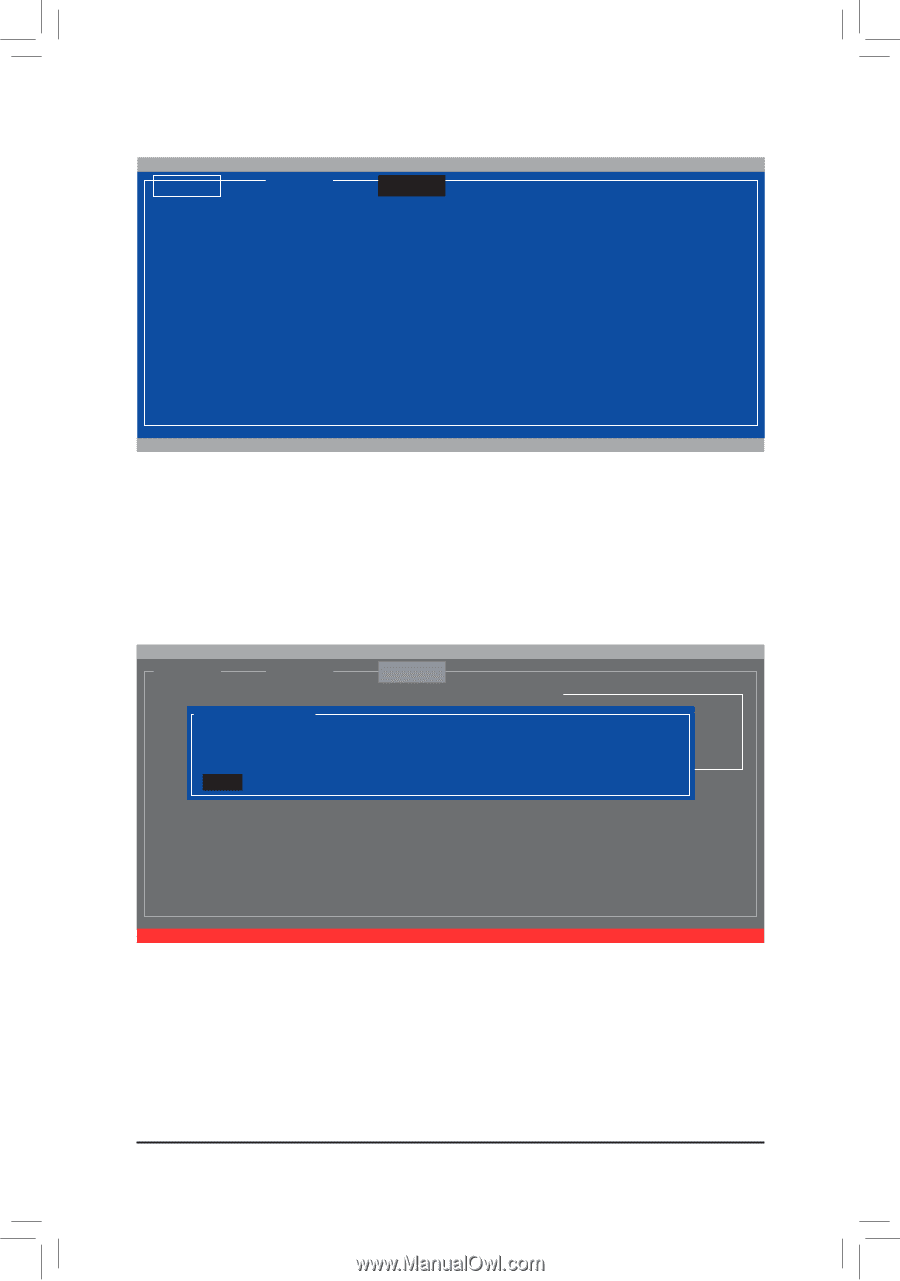
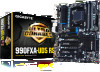
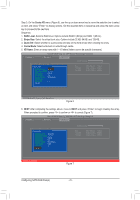
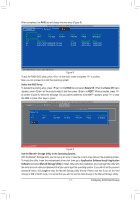
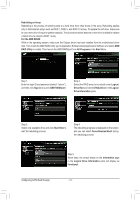
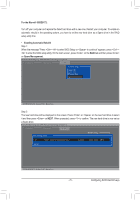
When completed, the RAID tab will display the new array (Figure 8). Marvell BIOS Setup (c) 2009 Marvell Technology Group Ltd. [ Adapter ] [ Devices ] [ RAID ] [Virtual Disks] ID Name Size Level 0 GBT 152.4GB RAID0 [Physical Disks] Port Disk Name S0 SATA: WDC WD800JD-22LSA0 S1 SATA: WDC WD800JD-22LSA0 Status ONLINE Size 76.3GB 76.3GB Stripe 64KB CacheMode WriteBack Max Speed Status SATA 3Gb/s ASSIGNED SATA 3Gb/s ASSIGNED ENTER/SPACE: Select, ESC: Back/Exit Figure 8 To exit the RAID BIOS utility, press on the main screen and press to confirm. Now, you can proceed to install the operating system. Delete the RAID Array: To deleted the existing array, press on the RAID tab and select Delete VD. When the Delete VD menu appears, press on the array to select it and then press on NEXT. When prompted, press to confirm (Figure 9). When the message "Do you want to delete the VD's MBR?" appears, press to clear the MBR or press other keys to ignore. [ Adapter ] Marvell BIOS Setup (c) 2009 Marvell Technology Group Ltd. [ Devices ] [ RAID ] Delete VD ID * 0 Name GBT Size 152.4GB Level RAID0 RAID Config Status ONLINE Stripe 64KB CacheMode WriteBack NEXT Delete the VD?[Y] Figure 9 Use the Marvell® Storage Utility in the Operating System: With the Marvell® Storage utility, you can set up an array or view the current array status in the operating system. To install the utility, insert the motherboard driver disk, then go to Application Software\Install Application Software and select Marvell Storage Utility to install. Note: After the installation, you must login the utility with the same account name and password that you use to login the operating system. If you did not set the account password before, click Login to enter the Marvell Storage Utility directly. Please note that if you set the hard drive(s) to IDE or AHCI mode, it is normal that you will not see the hard drive(s) in the Marvell Storage Utility. - 71 - Configuring SATA Hard Drive(s)
-
 1
1 -
2
-
3
-
4
-
5
-
6
-
7
-
8
-
9
-
10
-
11
-
12
-
13
-
14
-
15
-
16
-
17
-
18
-
19
-
20
-
21
-
22
-
23
-
24
-
25
-
26
-
27
-
28
-
29
-
30
-
31
-
32
-
33
-
34
-
35
-
36
-
37
-
38
-
39
-
40
-
41
-
42
-
43
-
44
-
45
-
46
-
47
-
48
-
49
-
50
-
51
-
52
-
53
-
54
-
55
-
56
-
57
-
58
-
59
-
60
-
61
-
62
-
63
-
64
-
65
-
 66
66 -
 67
67 -
 68
68 -
 69
69 -
 70
70 -
 71
71 -
 72
72 -
 73
73 -
 74
74 -
 75
75 -
 76
76 -
77
-
78
-
79
-
80
-
81
-
82
-
83
-
84
-
85
-
86
-
87
-
88
-
89
-
90
-
91
-
92
-
93
-
94
-
95
-
96
-
97
-
98
-
99
-
100
 |
 |