Gigabyte GA-M57SLI-S4 Manual - Page 26
SATAII1 / 2 / 3 / 4 / 5 / 6 SATA 3Gb/s Connectors, Controlled by nForce 570-SLI, BATTERY - driver
 |
UPC - 818313003058
View all Gigabyte GA-M57SLI-S4 manuals
Add to My Manuals
Save this manual to your list of manuals |
Page 26 highlights
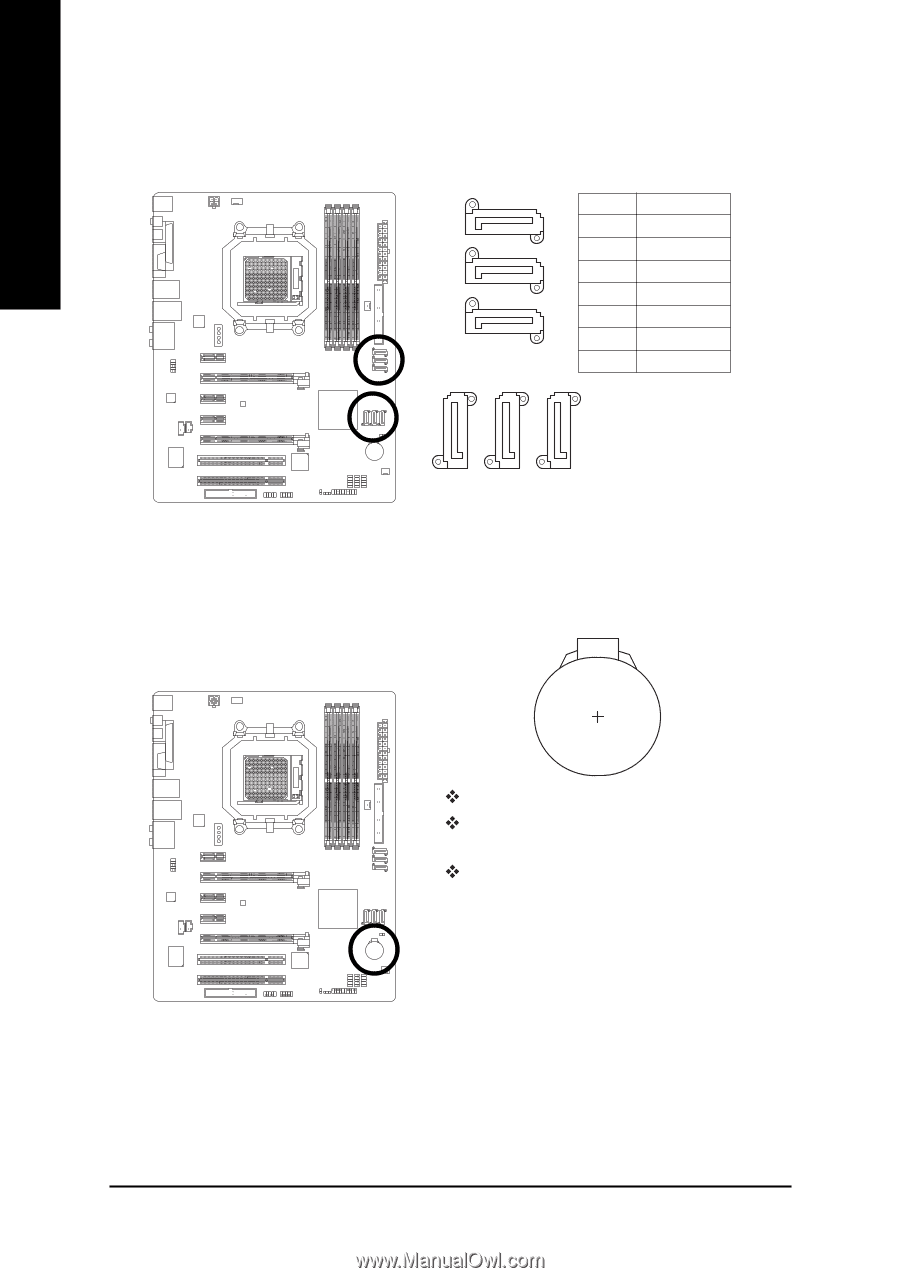
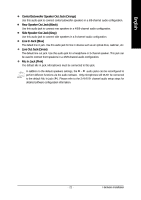
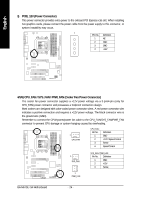
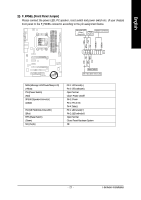
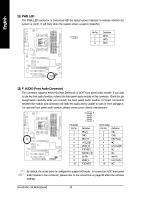
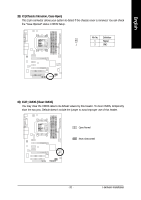
English SATAII1 SATAII2 SATAII3 9) SATAII1 / 2 / 3 / 4 / 5 / 6 (SATA 3Gb/s Connectors, Controlled by nForce 570-SLI) SATA 3Gb/s can provide up to 300 MB/s transfer rate. Please refer to the BIOS setting for the SATA 3Gb/s and install the proper driver in order to work properly. 7 1 SATAII6 SATAII5 SATAII4 Pin No. 1 2 3 4 5 6 7 Definition GND TXP TXN GND RXN RXP GND 1 7 10) BATTERY GA-M57SLI-S4 Motherboard Danger of explosion if battery is incorrectly replaced. Replace only with the same or equivalent type recommended by the manufacturer. Dispose of used batteries according to the manufacturer's instructions. If you want to erase CMOS... 1. Turn off the computer and unplug the power cord. 2. Gently take out the battery and put it aside for about one minute. (Or you can use a metal object to connect the positive and negative pins in the battery holder to make them short for five seconds.) 3. Re-install the battery. 4. Plug the power cord in and turn on the computer. - 26 -
-
 1
1 -
2
-
3
-
4
-
5
-
6
-
7
-
8
-
9
-
10
-
11
-
12
-
13
-
14
-
15
-
16
-
17
-
18
-
19
-
20
-
 21
21 -
 22
22 -
 23
23 -
 24
24 -
 25
25 -
 26
26 -
 27
27 -
 28
28 -
 29
29 -
 30
30 -
 31
31 -
32
-
33
-
34
-
35
-
36
-
37
-
38
-
39
-
40
-
41
-
42
-
43
-
44
-
45
-
46
-
47
-
48
-
49
-
50
-
51
-
52
-
53
-
54
-
55
-
56
-
57
-
58
-
59
-
60
-
61
-
62
-
63
-
64
-
65
-
66
-
67
-
68
-
69
-
70
-
71
-
72
-
73
-
74
-
75
-
76
-
77
-
78
-
79
-
80
-
81
-
82
-
83
-
84
-
85
-
86
-
87
-
88
 |
 |