Gigabyte GA-X170-EXTREME ECC User Manual - Page 75
Installing the SATA RAID/AHCI Driver and Operating System, A. Installing Windows
 |
View all Gigabyte GA-X170-EXTREME ECC manuals
Add to My Manuals
Save this manual to your list of manuals |
Page 75 highlights
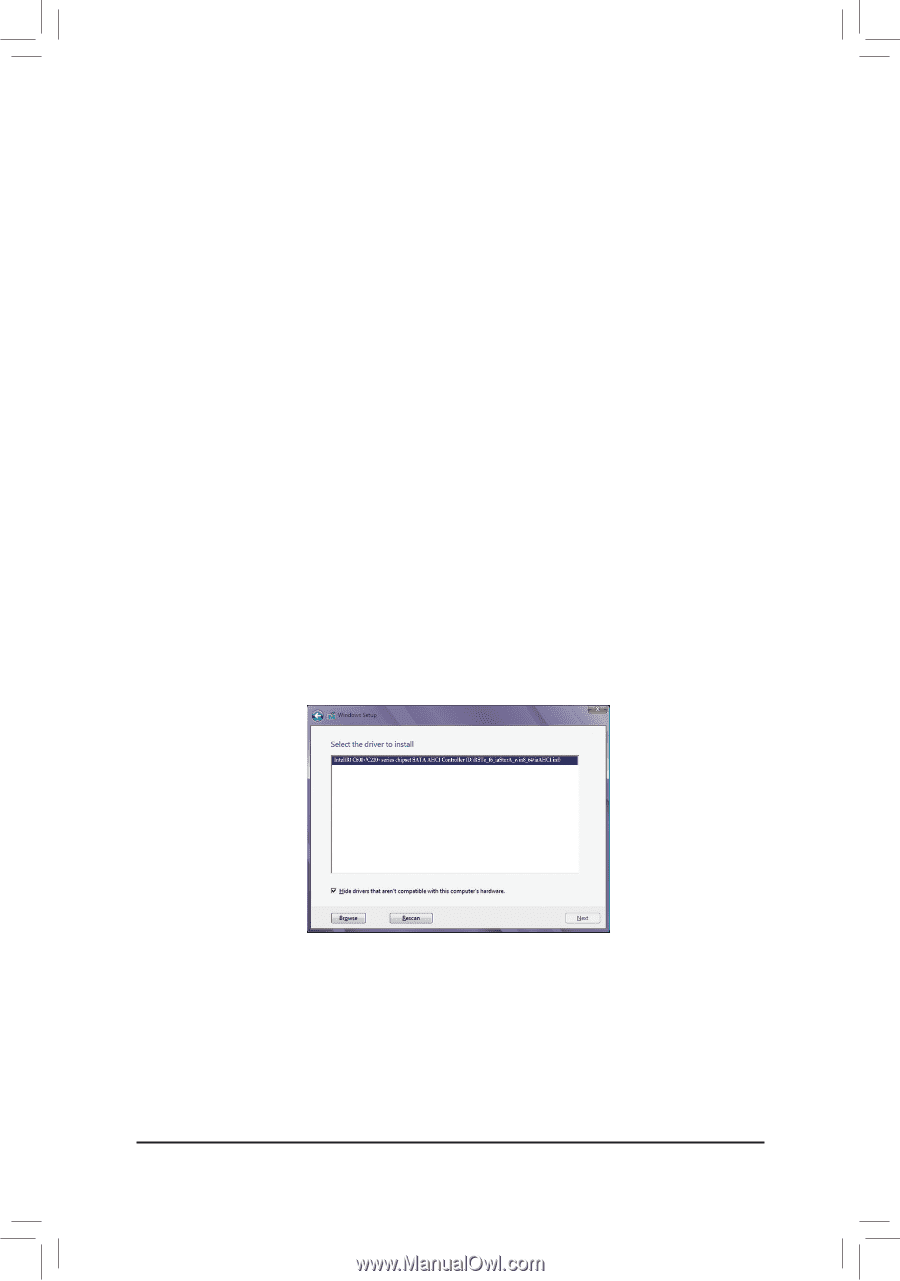
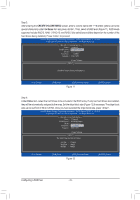
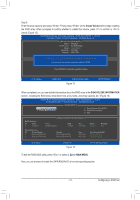
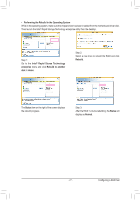
3-2 Installing the SATA RAID/AHCI Driver and Operating System With the correct BIOS settings, you are ready to install the operating system. A. Installing Windows As some operating systems already include Intel® SATA RAID/AHCI driver, you do not need to install separate RAID/AHCI driver during the Windows installation process. After the operating system is installed, we recommend that you install all required drivers from the motherboard driver disk using "Xpress Install" to ensure system performance and compatibility. If the operating system to be installed requires that you provide additional SATA RAID/AHCI driver during the OS installation process, please refer to the steps below: Step 1: Copy the RSTe_f6_iaStorA_win8_64 or RSTe_f6_iaStorA_win8_32 folder (depending on your OS version) under the \Boot\RSTe_4.3.0.1223_F6-Driver folder in the driver disk to your USB thumb drive. Step 2: Boot from the Windows setup disk and perform standard OS installation steps. When the screen requesting you to load the driver appears, select Browse. Step 3: Insert the USB thumb drive and then browse to the folder (RSTe_f6_iaStorA_win8_64 or RSTe_f6_iaStorA_ win8_32) that you previously copied. Step 4: When a screen as shown in Figure 1 appears, select Intel(R) C600+/C220+ series SATA AHCI Controller and click Next to load the driver and continue the OS installation. Figure 1 - 75 - Configuring a RAID Set
-
 1
1 -
2
-
3
-
4
-
5
-
6
-
7
-
8
-
9
-
10
-
11
-
12
-
13
-
14
-
15
-
16
-
17
-
18
-
19
-
20
-
21
-
22
-
23
-
24
-
25
-
26
-
27
-
28
-
29
-
30
-
31
-
32
-
33
-
34
-
35
-
36
-
37
-
38
-
39
-
40
-
41
-
42
-
43
-
44
-
45
-
46
-
47
-
48
-
49
-
50
-
51
-
52
-
53
-
54
-
55
-
56
-
57
-
58
-
59
-
60
-
61
-
62
-
63
-
64
-
65
-
66
-
67
-
68
-
69
-
 70
70 -
 71
71 -
 72
72 -
 73
73 -
 74
74 -
 75
75 -
 76
76 -
 77
77 -
 78
78 -
 79
79 -
 80
80 -
81
-
82
-
83
-
84
-
85
-
86
-
87
-
88
-
89
-
90
-
91
-
92
-
93
-
94
-
95
-
96
-
97
-
98
-
99
-
100
-
101
-
102
-
103
-
104
-
105
-
106
-
107
-
108
 |
 |