Gigabyte M6980X Manual - Page 5
Macro Editing - mouse
 |
View all Gigabyte M6980X manuals
Add to My Manuals
Save this manual to your list of manuals |
Page 5 highlights
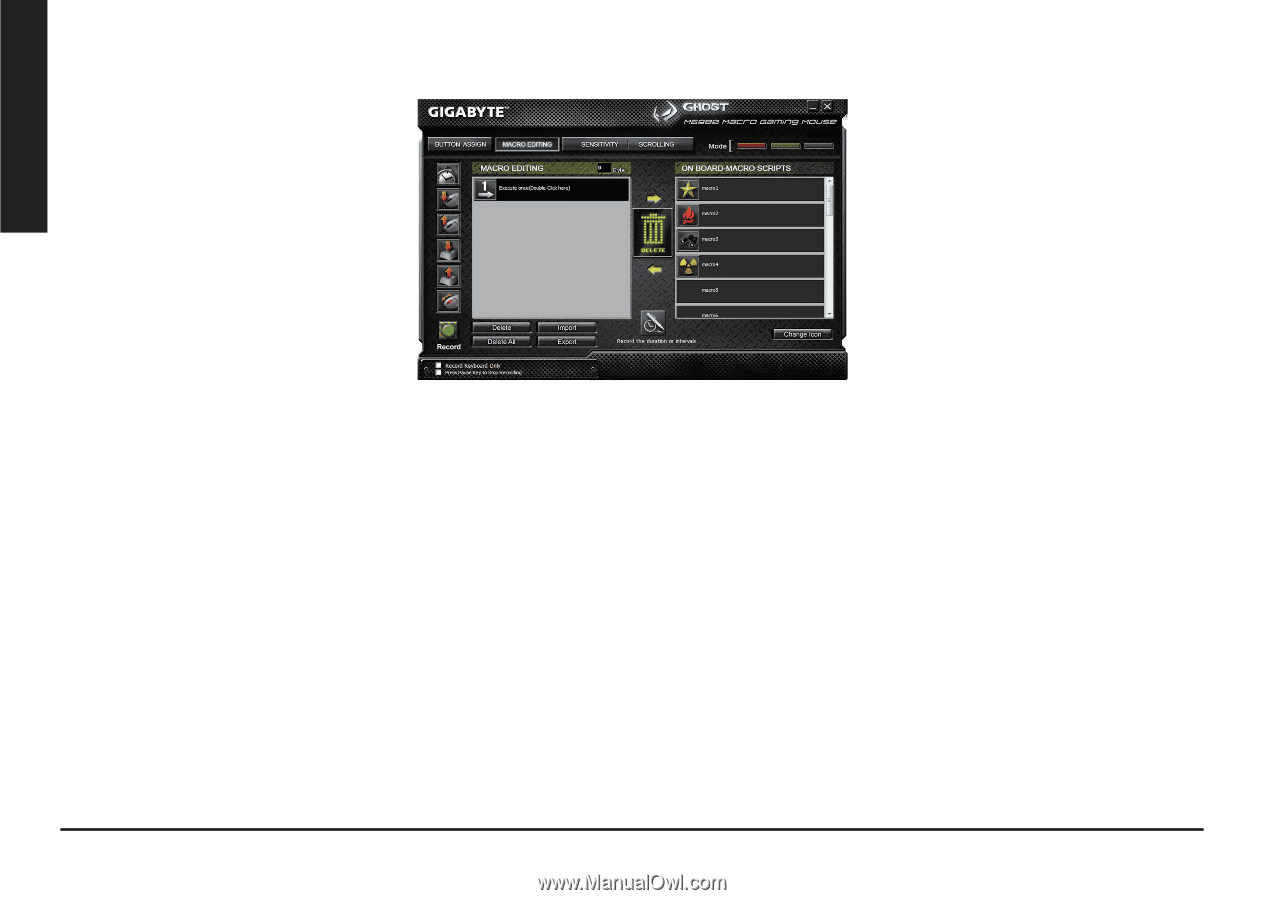
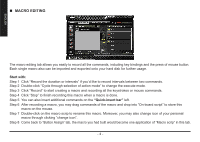
ENGLISH MACRO EDITING The macro editing tab allows you easily to record all the commands, including key bindings and the press of mouse button. Each single macro also can be imported and exported onto your hard disk for further usage. Start with: Step 1 Click "Record the duration or intervals" if you'd like to record intervals between two commands. Step 2 Double-click "Cycle through selection of action mode" to change the execute mode. Step 3 Click "Record" to start creating a macro and recording all the keystrokes or mouse commands. Step 4 Click "Stop" to finish recording this macro when a macro is done. Step 5 You can also insert additional commands on the "Quick-insert bar" left. Step 6 After recording a macro, you may drag commands of the macro and drop into "On-board script" to store this macro on the mouse. Step 7 Double-click on the macro scrip to rename this macro. Moreover, you may also change icon of your personal macro through clicking "change icon". Step 8 Come back to "Button Assign" tab, the macro you had built would become one application of "Macro scrip" in this tab. - 4 -
-
 1
1 -
 2
2 -
 3
3 -
 4
4 -
 5
5 -
 6
6 -
 7
7 -
 8
8 -
 9
9 -
 10
10 -
 11
11 -
12
-
13
-
14
-
15
-
16
-
17
-
18
-
19
-
20
-
21
-
22
-
23
-
24
-
25
-
26
-
27
-
28
-
29
-
30
-
31
-
32
-
33
-
34
-
35
-
36
-
37
-
38
-
39
-
40
-
41
-
42
-
43
-
44
-
45
-
46
-
47
-
48
-
49
-
50
-
51
-
52
-
53
-
54
-
55
-
56
-
57
-
58
-
59
-
60
-
61
-
62
-
63
-
64
-
65
-
66
-
67
-
68
-
69
-
70
-
71
-
72
-
73
 |
 |