Haier HCH2100ACS Installation Instructions - Page 15
Step 7 - Make Electrical Connection, Step 8 - Install Vent Covers
 |
View all Haier HCH2100ACS manuals
Add to My Manuals
Save this manual to your list of manuals |
Page 15 highlights
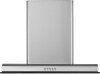
STEP 7 - MAKE ELECTRICAL CONNECTION WARNING Electrical Shock Hazard Plug into a grounded 3 prong outlet. Do not remove the ground prong from the power cord plug. Do not use an adapter. Do not use an extension cord. Failure to do so can result in death, re or electrical shock. 1. Plug into a grounded 3 prong outlet. STEP 8 - INSTALL VENT COVERS NOTE: Remove the white film from the vent covers, as needed, prior to assembly and installation. Handle the vent covers gently to avoid scratching the finish. 1. When using both upper and lower vent covers, push lower cover down onto hood and lift upper cover to ceiling and install with two 4 x 8 mm screws (provided). NOTE: For vented installations, the upper vent cover may be reversed to hide slots. a b c a 4 x 8 mm Screw b Slots c Upper Vent Cover d d Lower Vent Cover 2. Using two screws (provided) fasten the bottom of the duct to the hood. 13
-
 1
1 -
2
-
3
-
4
-
5
-
6
-
7
-
8
-
9
-
 10
10 -
 11
11 -
 12
12 -
 13
13 -
 14
14 -
 15
15 -
 16
16 -
 17
17 -
 18
18 -
 19
19 -
 20
20 -
21
-
22
-
23
-
24
-
25
-
26
-
27
-
28
-
29
-
30
-
31
-
32
-
33
-
34
-
35
-
36
-
37
-
38
-
39
-
40
-
41
-
42
-
43
-
44
-
45
-
46
-
47
-
48
-
49
-
50
-
51
-
52
-
53
-
54
-
55
-
56
-
57
-
58
-
59
-
60
-
61
-
62
-
63
-
64
-
65
-
66
-
67
-
68
 |
 |
