Haier HLP141E User Manual - Page 11
Wall Mounting Instructions
 |
View all Haier HLP141E manuals
Add to My Manuals
Save this manual to your list of manuals |
Page 11 highlights
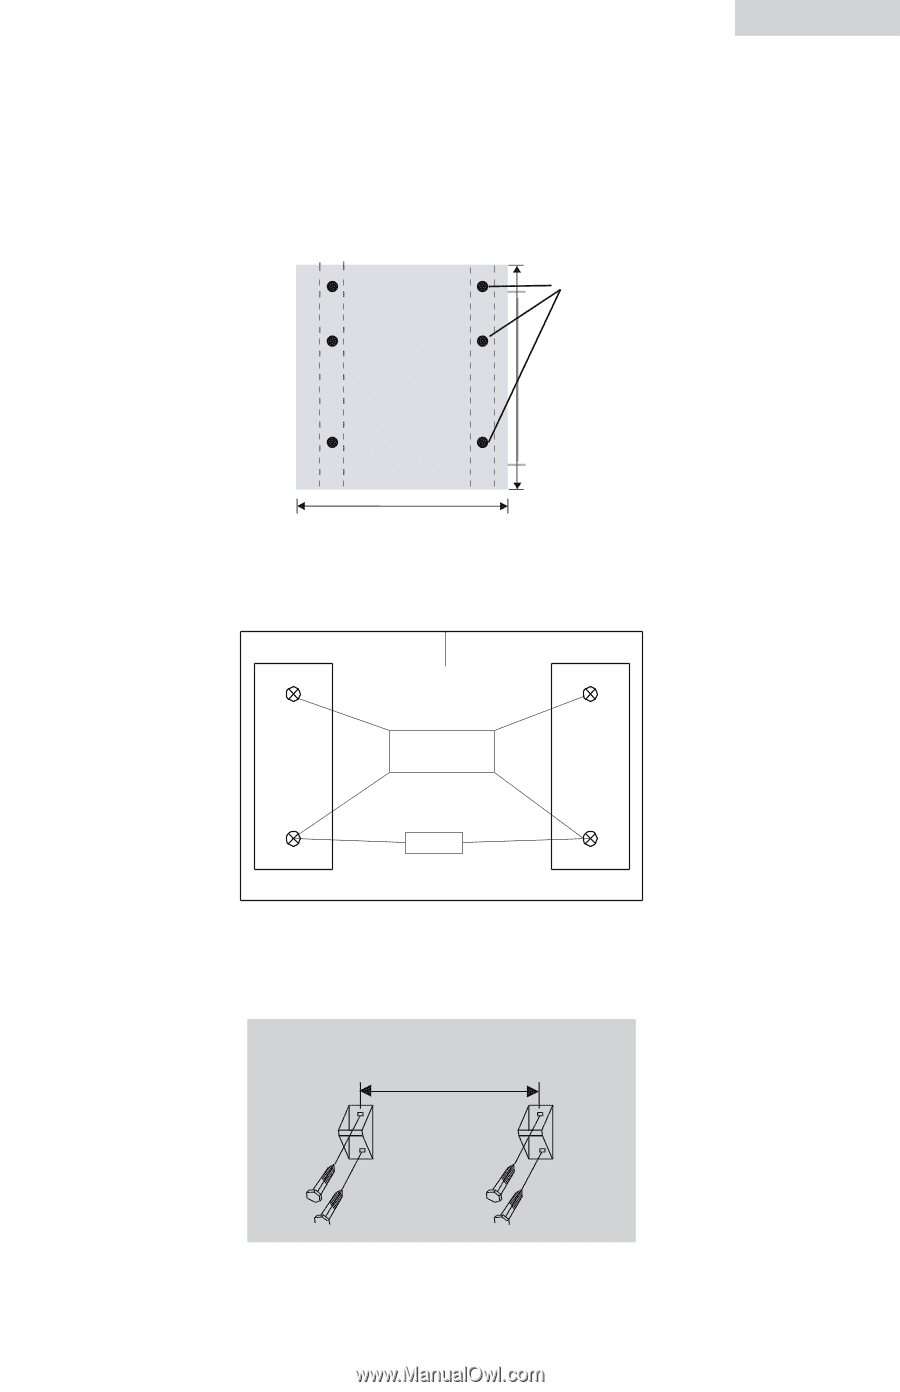
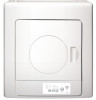
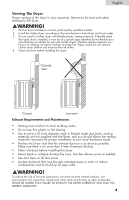
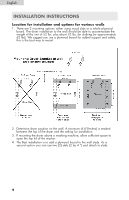
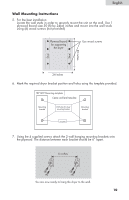
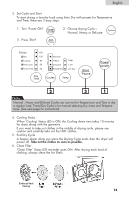
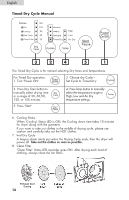
English Wall Mounting Instructions 5. For the best installation Locate the wall studs in order to securely mount the unit on the wall. Use 1 plywood board size 30 (h) by 24(w) inches and mount into the wall studs using (6) wood screws (not provided) Plywood board for supporting the dryer Use wood screws Stud Stud 30 inches 24 inches 6. Mark the required dryer bracket position and holes using the template provided. HLP141E Mounting template Center and level template Mounting bracket Drill holes for dryer mounting bracket Mounting bracket 6 inches 7. Using the 4 supplied screws attach the 2 wall hanging mounting brackets onto the plywood. The distance between each bracket should be 6" apart. 6 inches You are now ready to hang the dryer to the wall. 10
-
 1
1 -
2
-
3
-
4
-
5
-
 6
6 -
 7
7 -
 8
8 -
 9
9 -
 10
10 -
 11
11 -
 12
12 -
 13
13 -
 14
14 -
 15
15 -
 16
16 -
17
-
18
-
19
-
20
-
21
-
22
-
23
-
24
-
25
-
26
-
27
-
28
-
29
-
30
-
31
-
32
-
33
-
34
-
35
-
36
-
37
-
38
-
39
-
40
-
41
-
42
-
43
-
44
-
45
-
46
-
47
-
48
-
49
-
50
-
51
-
52
-
53
-
54
-
55
-
56
-
57
-
58
-
59
-
60
-
61
-
62
 |
 |