Haier HLP141E User Manual - Page 7
Set Up Instructions - parts
 |
View all Haier HLP141E manuals
Add to My Manuals
Save this manual to your list of manuals |
Page 7 highlights
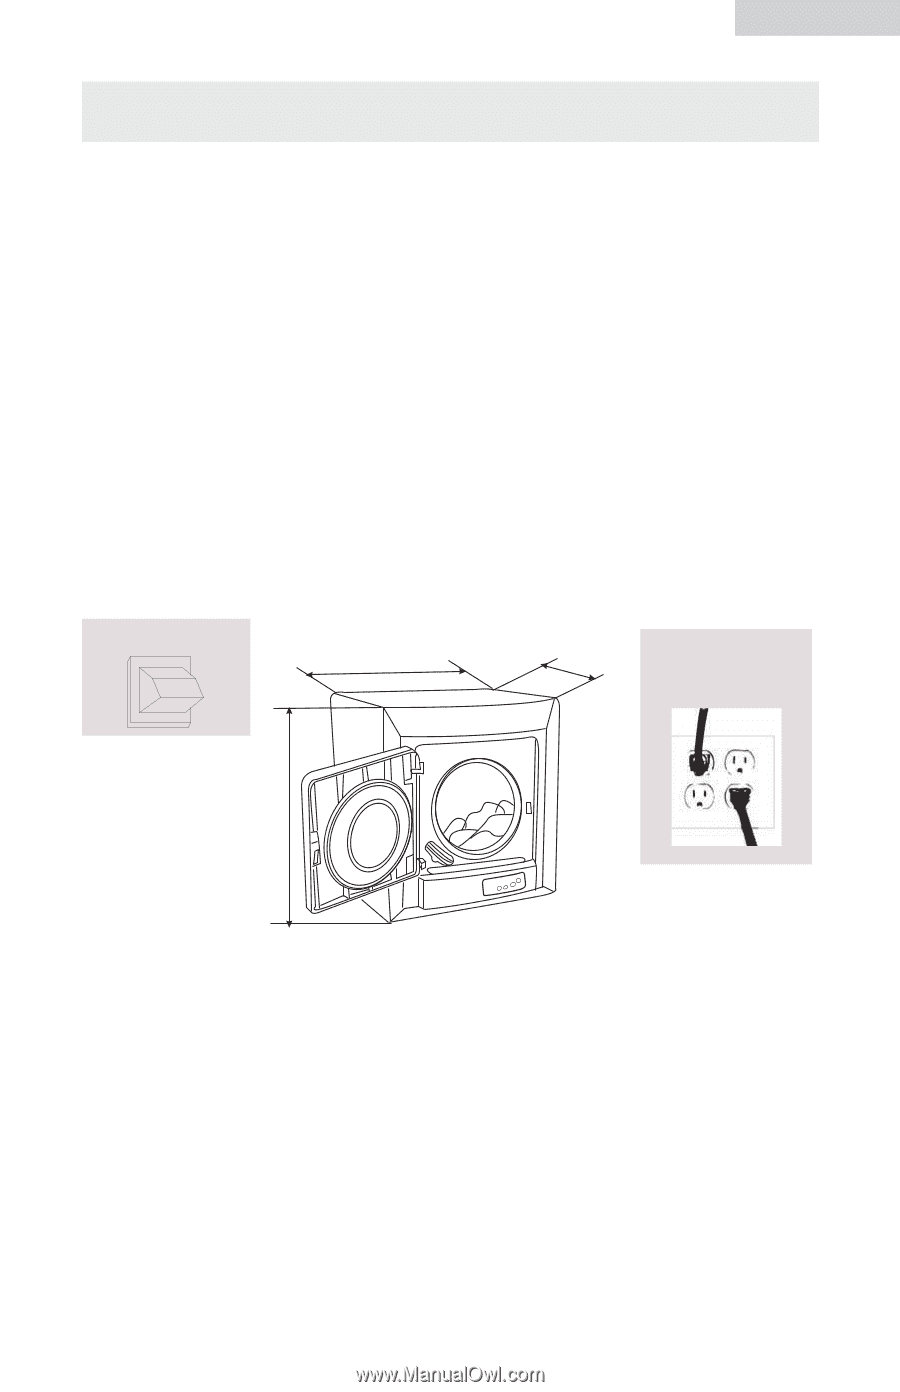
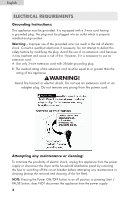
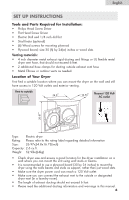
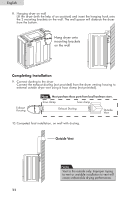
English SET UP INSTRUCTIONS Tools and Parts Required for Installation: • Philips Head Screw Driver • Flat Head Screw Driver • Electric Drill and 1/8 inch drill bit • Stud finder (optional) • (6) Wood screws for mounting plywood • Plywood board; size 30 (h) by 24(w) inches or wood slats Venting materials: • 4 inch diameter metal exhaust rigid ducting and fittings or UL flexible metal dryer vent hose, that should not exceed 6 feet. • 2 additional hose clamps for ducting outside exhaust vent hose • Metal Elbows or outdoor vents as needed. Location of Your Dryer First find a suitable location where you can mount the dryer on the wall and still have access to 120 Volt outlets and exterior venting. Vent to outside 24.8" 16.73" Nearest 120 Volt AC outlet 26.97" Type: Electric dryer Rating: Please refer to the rating label regarding detailed information Size: 26.97x24.8x16.73(inch) Capacity: 2.6 cu.ft. Weight: 52.9lbs(24kg) • Check dryer size and ensure a good location for the dryer installation on a wall where you can mount the unit using wall studs or beams. • It is recommended to use a plywood board (30 by 24 inches) to mount the dryer using the walls beams and studs as support, rather than just wood slats. • Make sure the dryer power cord can reach a 120 Volt outlet. • Make sure you can connect the exhaust vent to the outside or designated dryer vent (in a laundry room). • The length of exhaust ducting should not exceed 6 feet. • Please read the additional ducting information and warnings in this manual. 6
-
 1
1 -
 2
2 -
 3
3 -
 4
4 -
 5
5 -
 6
6 -
 7
7 -
 8
8 -
 9
9 -
 10
10 -
 11
11 -
 12
12 -
13
-
14
-
15
-
16
-
17
-
18
-
19
-
20
-
21
-
22
-
23
-
24
-
25
-
26
-
27
-
28
-
29
-
30
-
31
-
32
-
33
-
34
-
35
-
36
-
37
-
38
-
39
-
40
-
41
-
42
-
43
-
44
-
45
-
46
-
47
-
48
-
49
-
50
-
51
-
52
-
53
-
54
-
55
-
56
-
57
-
58
-
59
-
60
-
61
-
62
 |
 |