Haier HLT10 Instruction Manual - Page 12
Remote Control Preparation, Remote Control, Operation - parts
 |
View all Haier HLT10 manuals
Add to My Manuals
Save this manual to your list of manuals |
Page 12 highlights
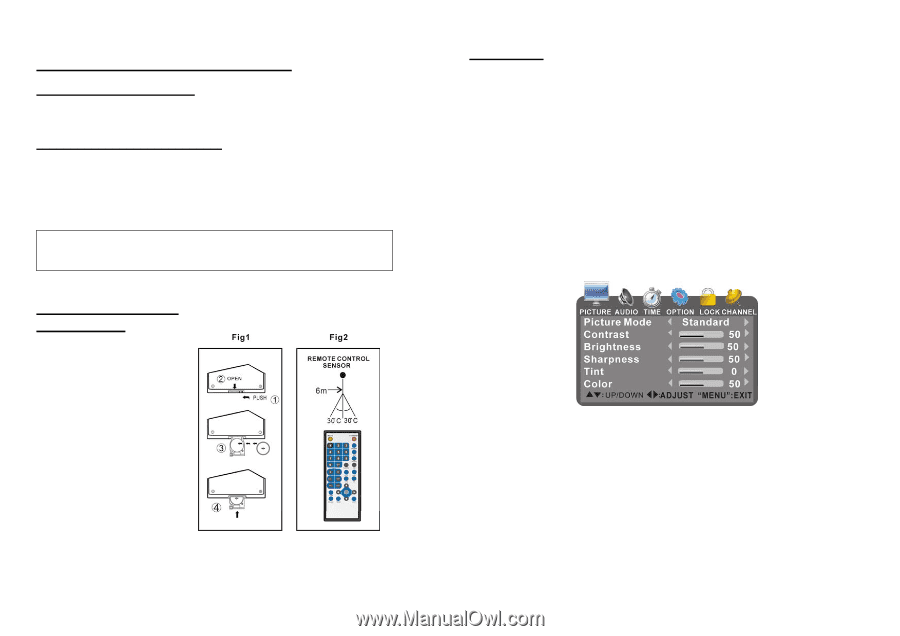
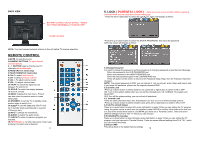
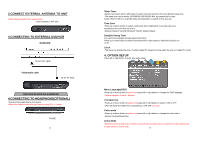
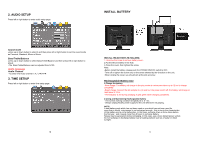
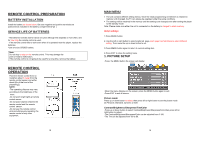
REMOTE CONTROL PREPARATION BATTERY INSTALLATION Install the battery as shown below. Be sure negative and positive terminals are positioned as indicated in the battery compartment.(Fig1 ) SERVICE LIFE OF BATTERIES -The batteries normally last for about one year although this depends on how often, and for how long the remote control is used. -If the remote control fails to work even when it is operated near the player, replace the batteries. -Use one size CR2025 battery. Note: Do not drop or step on the remote control. This may damage the parts or lead to malfunction. If the remote control is not going to be used for a long time, remove the battery. REMOTE CONTROL OPERATION Point the remote control from no morethan about 6 meter from the remote control sensor and within about 60o of the front of the player(Fig2). NOTE: -The operating distance may vary according to the brightness of the room. -Do not point bright lights at remote control sensor. -Do not place objects between the remote control and the remote control sensor. -Do not use this remote control while simultaneously operating the remote control of any other equipment. 10 MAIN MENU • The unit contains different setting menus. Once the initial programming is entered it is retained in memory until changed, the TV can always be operated under the same conditions. • The settings will be retained in the memory until the settings are changed even after setting the player to the standby mode. Note: Please make sure either the unit is connected on the battery is charged to retain memory. Initial settings 1.Press MENU button. 2. Use the left or right button to select preferred page, each page has Sub Menu to select different setting. Then move the up or down button to set. 3.Press MENU button again to return to current setting item. 4.Press EXIT to close the setting menu . 1. PICTURE SETUP -Press the MENU button the screen will display: -When the menu displays on the screen, press the MENU button again to exit. -Press EXIT to exit all menus. Picture mode Press up or down button to select, then press left or right button to set the picture mode as Personal, Standard, Dynamic or Soft. Contrast/Brightness/Sharpness/Tint/Color -Press up or down button to select Contrast/Brightness/Sharpness/Color,then press left or right button to adjust.. -The Contrast/Brightness/Sharpness/Color can be adjusted from 0-100. -The Tint can be adjusted from -50 to 50. 15
-
 1
1 -
2
-
3
-
4
-
5
-
6
-
 7
7 -
 8
8 -
 9
9 -
 10
10 -
 11
11 -
 12
12 -
 13
13 -
 14
14
 |
 |