Haier HPU-18CH13 HPU-123C01 User Manual - Page 26
Diameter, Fastening, Torque, Liquid, 35mm1/4, 18N.m, 7mm1/2, 55N.m, insulation, material, Drain,
 |
View all Haier HPU-18CH13 HPU-123C01 manuals
Add to My Manuals
Save this manual to your list of manuals |
Page 26 highlights
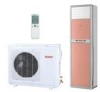
Installation Manual of Room Air Conditioner 3. Piping connection Connecting method To bent a pipe, give the roundness as large as possible not to crash the pipe. When connecting pipe, hold the pipe center to center then screw nut on by hand, refer to Fig. Be careful not to let foreign matters, such as sands enter the pipe. Forced fastening without careful centering may damage the threads and cause a leakage of gas. Pipe Diameter (0 ) Fastening Torque Liquid Side 6.35mm(1/4") Gas Side 12.7mm(1/2") 18N.m 55N.m Piping connection of the indoor unit 1. Arrangement of piping and drainage pipe After opening inlet grill, you will see a control box as shown in the Fig. Remove the cover before working. Cut away, with a hammer or a saw, the lid for piping according to piping direction. Heat insulation material 0 O Drain hose 0 Piping Pi.e su••ortin. plate Indoor/outdoor According to the piping method, connect the piping on indoor unit with union of connection pipe. Arrange the piping as per the wall hole and bind drain hose connecting electric cable and piping together with polyethylene tape. Insert the bound piping connecting electric cable and drain hoes through wall hole to connect with outdoor unit. 2. Arrangement drain hose Drain hose shall be placed in under place. There should be a slope when arrange drain hose. Avoid up and down waves in drain hose. If humidity is high, drain pipe(especially in room and indoor unit) must be covered with installation material. 25
-
 1
1 -
2
-
3
-
4
-
5
-
6
-
7
-
8
-
9
-
10
-
11
-
12
-
13
-
14
-
15
-
16
-
17
-
18
-
19
-
20
-
 21
21 -
 22
22 -
 23
23 -
 24
24 -
 25
25 -
 26
26 -
 27
27 -
 28
28 -
 29
29
 |
 |
