Haier HSU-09H03 User Manual - Page 2
Parts and Functions
 |
View all Haier HSU-09H03 manuals
Add to My Manuals
Save this manual to your list of manuals |
Page 2 highlights
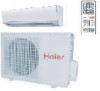
Parts and Functions Indoor Unit 1 2 3 5 45 7 6 8 1 Inlet 2 Inlet grille 3 Air Purifying Filter (inside) 54 Outlet 45 Horizontal flap (adjust up and down air flow Don't adjust it manually) 6 Vertical blade (adjust left and right air flow) 7 Anion generator(inside) Actual inlet grille may vary from the one shown in the manual according to the product purchased 8 Display board 1 2 34 5 6 7 89 1 Signal receiver hole 2 iFP display 3 HEALTH display (If the unit which you purchased has healthy function,follow it. If not,please ignore.) 4 TIMER OFF display TIMER ON display SLEEP display 5 Ambient temp.display When receiving the remote control signal, display the set temperature and in the rest time the room temperature is displayed and this room temperature is only for reference. 6 SMART display 7 COOL display 8 Dry display 9 HEAT display Air Filter cleaning Open the inlet grille by pulling it upward. Remove the filter. Push up the filter's center tab slightly until it is released from the stopper, and remove the filter downward. Clean the filter. Use a vacuum cleaner to remove dust, or wash the filter with water.After washing, dry the filter completely in the shade. Attach the filter. Attach the filter correctly so that the "FRONT" indication is facing to the front.Make sure that the filter is completely fixed behind the stopper.If the right and left filters are not attached correctly, that may cause defects. Close the inlet grille. Once every two weeks Outdoor Unit OUTLET INLET 1 CONNECTING PIPING AND ELECTRICAL WIRING 14 DRAIN HOSE Remote controller Outer side of the controller Signal sending end Signal sending display Operation mode display Display of each function status SMART button Used to set SMART operation. SMART COOL SET TEMP. ROOM TEMP. HEAT FAN DRY CTD AUTO FAN POWER SPEED SOFT AUTO AUTO ECO iFP TIMER ON OFF AM PM COOL button Used to set COOL operation. SMART ON/OFF HEAT button Used to set HEAT operation. DRY button Used to set DRY operation. COOL HEAT DRY ECONOMY button Used to set ECONOMY operation. iFP button Induce the movement of the human body, so as to control the airflow/energy saving functioning. ECONOMY iFP FAN SPEED FOLLOW EVADE TEMP display Remote controller: to display the TEMP. setting. FAN SPEED display SWING UP/DOWN display Left/right air flow display TIMER ON display TIMER OFF display CLOCK display ON/OFF button Used for unit start and stop. TEMP. button Used to select your desired temperature. FAN SPEED button Used to select fan speed: LOW,MED, HI, AUTO. FOOLLOW / EVADE button Detect the location where the human body is, adjust the air deflector to blow/avoid the body. Inner side of the controller SMART COOL SET TEMP. ROOM TEMP. HEAT FAN DRY CTD AUTO FAN POWER SPEED AUTO AUTO SOFT ECO iFP TIMER ON OFF AM PM NOTE: This function unavailable on this models SWING button Used to select up or down air sending direction. HEALTH button Used to set healthy operation. HEALTH AIRFLOW button Used to set the health airflow mode. SMART POWER / SOFT button Use to set power/soft function. LIGHT button Control the lightening and extinguishing of the indoor LED display board. INQUIRE button Inquire the external environmental temperature and the operating power of the machine. (e.g. when the panel display "01", the operating power is 100W; when the panel display "02", the operating power is 200W, and so forth). RESET button When the remote controller CODE button appears abnormal,use a sharp Used to select CODE A or B with a press, pointed article to press this button A or B will be displayed on LCD. to reset the remote controller normal. Please select A without special explanation. SWING button Used to select left or right air sending direction. FRESH button Used to set fresh operation. SLEEP button Used to select sleep mode. CLOCK button Used to set correct time. TIMER ON / OFF button Used to select TIMER ON, TIMER OFF,TIMER ON-OFF. HOUR button Used to set clock and timer setting. CANCEL/CONFIRM button Used to confirm timer and clock settings. LOCK button Used to lock buttons and LCD display. If pressed, the other buttons will be disabled and the lock condition display appears. Press it once again, lock will be cancelled and lock condition display disappears.
-
 1
1 -
 2
2 -
 3
3 -
 4
4 -
 5
5 -
 6
6 -
 7
7 -
 8
8
 |
 |
