Haier SC-310 User Manual - Page 10
Lamp decoration, illumination and switches
 |
View all Haier SC-310 manuals
Add to My Manuals
Save this manual to your list of manuals |
Page 10 highlights
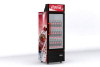
Lamp decoration, illumination and switches SC-310/410/510 have top light canopy and inner side lamp. Its parameter is shown as table. Lamp type light Model canopy Inner Side lamp Replacement of inner lamp Unplug, open the glass door at more than 90 degree. Loosen screws of the lamp-shade and the end cover, then take off them. Pull out connector parts at the ends of lamp, then take off the lamp tube. Install new lamp tube, installation procedure is reverse. Replacement of light canopy Unplug, loosen screws on canopy bond strip , draw out the lining board. Replace lamp tube with same power. Installation procedure is reverse. Light switch EMS part works as the 1st controller, and light switch at upper end cap of side lamp work as the 2nd controller. Under EMS's operation mode, light switch controls illumination. Under EMS's non-operation mode, light switch do not work, all lights are off. During the period "1"means on "0" means off If there is any malfunction with starter, ballast or tube please call professional people for replacement. Repair & maintenance for refrigeration cassette It is convenient for repair that the refrigeration units (compressor, evaporator, condensator, evaporation fan, condensation fan, filter, and etc) are designed as box-type and are placed inside. While repairing, the unit can be replaced directly. Disassembly procedure is as below, 1.Unplug, remove the fixing screws of the front cover, then take down the front cover. Front cover fixing screws. 2.Pull out connection plugs and all terminals Terminals that need to be unplugged 3.Remove fixing screws on 2 wrenches, adjust them to be upright, turn them inside together and do not stop unit the units fall steadily 4.Remove 2 wrenches, draw out the units, then replace or repair them 5.Assemble all parts as the reverse procedure after repair. Cleaning the air intake filter screen To guarantee the normal operation, please rinse the air intake filter screen (on front cover) regularly. The procedure is given below, 1.Open the door 2.Take the filter screen upside and get it out; 3.using soft brush to clean dust on the air intake filter screen 4.Install the screen after cleaning Notes Cleaning should be done every 5-6 months according to the operating ambient of the freezer . 9 10
-
 1
1 -
2
-
3
-
4
-
 5
5 -
 6
6 -
 7
7 -
 8
8 -
 9
9 -
 10
10
 |
 |
