Hamilton Beach 10090 Use & Care - Page 3
Parts and Features, To Dry Iron, To Change Voltage - travel iron
 |
UPC - 040094100903
View all Hamilton Beach 10090 manuals
Add to My Manuals
Save this manual to your list of manuals |
Page 3 highlights
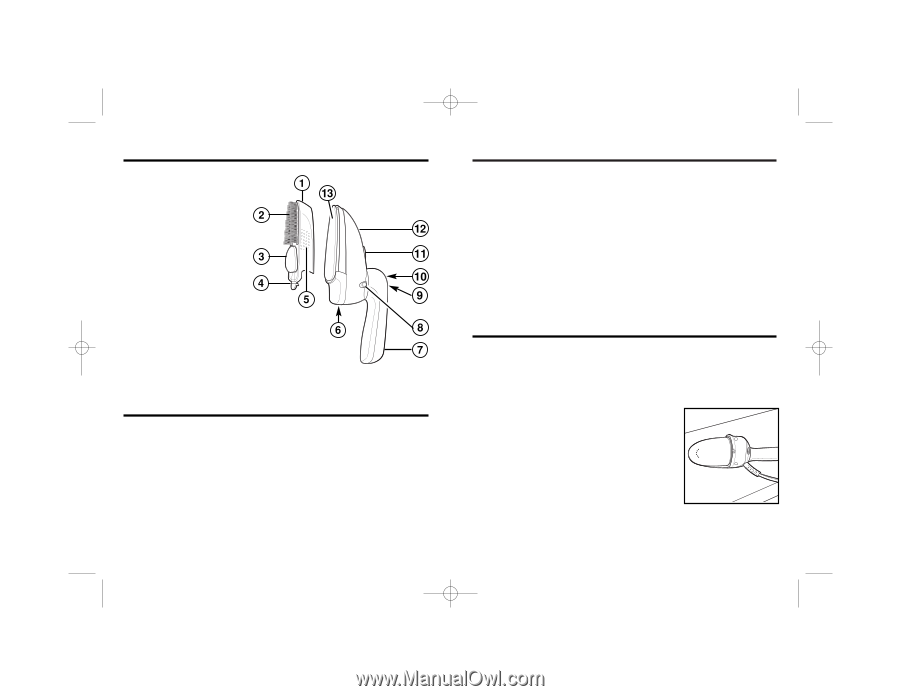
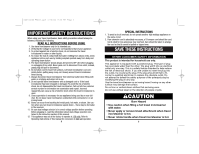
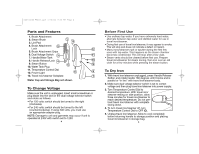
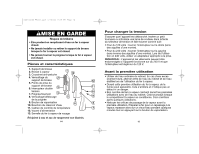
840124300 ENv02.qxd 3/16/04 9:28 AM Page 4 Parts and Features 1. Brush Attachment 2. Steam Brush 3. Lint Pad 4. Brush Attachment Lock 5. Brush Attachment Grips 6. Dual Voltage Switch 7. Handle/Water Tank 8. Handle Release/Lock 9. Steam Button 10. Water Tank Plug 11. Temperature Control Dial 12. Power Light 13. Travel iron/steamer Soleplate Water Cup and Storage Bag not shown. To Change Voltage Make sure the unit is unplugged. Insert small screwdriver or plug blade into the slot on the dual voltage selector switch and rotate as follows: • For 120 volts: switch should be turned to the right (clockwise). • For 240 volts: switch should be turned to the left (counterclockwise). If using 240 volts, you must use an appropriate adapter plug. NOTE: Damage to unit and garments may occur if unit is operated at 240V with switch set to 120V. 4 Before First Use • Use ordinary tap water. If you have extremely hard water, alternate between tap water and distilled water for use in travel iron/steamer. • During first use of travel iron/steamer, it may appear to smoke. This will stop and does not indicate a defect or hazard. • Many irons/steamers spit or sputter during the first few uses with tap water. This happens as the steam chamber becomes conditioned. This will stop after a few uses. • Steam vents should be cleared before first use. Prepare travel iron/steamer for steam ironing, then iron over an old cloth for a few minutes while pressing the steam button. To Dry Iron 1. With travel iron/steamer unplugged, press Handle Release Button and rotate handle 180 degrees until it locks and is parallel or "in line" with travel iron/steamer body. 2. Make sure dual voltage selector switch is set to correct voltage and then plug travel iron/steamer into power supply. 3. Turn Temperature Control Dial to desired temperature. With travel iron/ steamer resting on side position, allow three minutes for travel iron/steamer to reach desired temperature. Do not preheat travel iron/steamer with soleplate facing down. 4. To turn travel iron/steamer off, turn Temperature Control Dial to OFF (O). 5. Unplug travel iron/steamer. Allow to cool completely before returning handle to storage position and placing travel iron/steamer in storage bag. 5
-
 1
1 -
 2
2 -
 3
3 -
 4
4 -
 5
5 -
 6
6 -
 7
7 -
 8
8 -
 9
9 -
10
-
11
-
12
-
13
-
14
-
15
-
16
-
17
-
18
-
19
-
20
 |
 |