Harbor Freight Tools 38144 User Manual - Page 7
Safety, Operation, Maintenance, Setup
 |
View all Harbor Freight Tools 38144 manuals
Add to My Manuals
Save this manual to your list of manuals |
Page 7 highlights
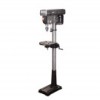
SAFETy SETUp Table and Support Arm to column 1. Remove the Rack (2B) from the Column by loosening the Collar Set Screw (11B) and removing the Collar (19B). The rack is stowed in this position only for transit purposes. 2. Lubricate the Worm Gear (18B) with light grease, and insert shaft first into Worm Gear Housing in the Arm which should fully mesh with the Helical Gear (17B). Hold it in this position. The Worm Gear Shaft will extend through the housing to be ready for the crank to be attached in a later step. 3. Gently slide the arm assembly over the column and hold it steady while inserting the Rack down through the Worm Gear Housing, meshing with the Helical Gear, ensuring the long smooth end of the rack is uppermost. The bottom end of the rack will be located in the groove formed by the column support and the column. 4. Hold the assembly in this position while replacing the collar on the column, and ensure that the end of the Rack is firmly engaged in the groove formed between the collar and the column. However, make sure the Rack is not pinched and there is a working clearance between the Rack and Collar. Head to column 1. It may be necessary to unscrew the Head Lock Set Screws (21A) slightly to ensure they do not protrude internally, as this would prevent the head from sliding fully into position. 2. With assistance, raise the Head (1A) and locate it on top of the Column. Installing the chuck 1. With the Chuck Guard (26) lifted clear of the spindle nose, slide the Table up the column to within 6″ of the spindle. 2. Open the jaws of the chuck to their maximum, using the Chuck Key supplied. 3. Put a piece of scrap wood on the table to protect the Chuck Nose. 4. Ensuring all parts are thoroughly clean and dry and burr free, insert the Arbor (14) firmly into the end of the Chuck (15). pulley cover Knob Locate the Knob (21) and Pan Head Screw (22) and attach to the Pulley Cover. Screw on tightly. 5. Firmly secure the Collar with the Collar Set Screw. 6. Thread the Arm Locking Handle (16B) in from the left, and tighten to secure the arm to the column. 7. Attach the Table Crank (8B) to its spigot and tighten the securing screw. 8. Slacken off the arm locking handle and turn the crank, testing to ensure that the arm will move the full length of the rack easily, without binding, and will also rotate about the column evenly, and without binding. 9. IF TOO TIGHT, Nudge up the Arm Locking Handle and slacken off the Collar Set Screw. Adjust to give a greater working clearance between the rack and collar, tighten the set screw, and test again. 10. Insert the Table (15B) into its housing on the arm and secure with the Table Clamp (13B). 3. Align the head with the base, and firmly secure with the Set Screws. 4. Screw the three Feed Handles (24A) firmly into the hub of the Spindle Feed Shaft (25A). 5. Insert the other end of the arbor, with the chuck now attached, into the end of the Spindle Shaft (13), turning, where necessary, to ensure that the point on the end of the arbor locates correctly with the drive slot in the spindle shaft. 6. Pull the spindle down using the feed handles, pressing the chuck nose hard against a piece of scrap wood on the table, to press the chuck into place. OpERATION MAINTENANcE Item 38144 For technical questions, please call 1-888-866-5797. Page 7
-
 1
1 -
 2
2 -
 3
3 -
 4
4 -
 5
5 -
 6
6 -
 7
7 -
 8
8 -
 9
9 -
 10
10 -
 11
11 -
 12
12 -
13
-
14
-
15
-
16
 |
 |
