Harbor Freight Tools 38144 User Manual - Page 8
Functions
 |
View all Harbor Freight Tools 38144 manuals
Add to My Manuals
Save this manual to your list of manuals |
Page 8 highlights
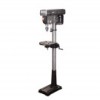
SAFETy Installing the Drive Belts 1. Undo the Belt Tension Locking Knobs (18A) on both sides of the head. Turn the Belt Tension Lever (19A) clockwise to bring the Motor Pulley (11A) close to the Spindle Pulley allowing the belts to be slipped on with ease. 2. Lubricate the Idler Pivot Shaft (20) and Idler Pulley (19), with light grease, and install in its mounting between the motor and spindle pulleys. Functions 3. Consult the chart inside the pulley cover (or Figure c on page 10), and install the Belts in the positions corresponding to spindle/drill speed required. 4. Turn the Belt Tension Lever counterclockwise so that tension is applied to the belts (see Head Assembly diagram). Tension is correct when the belts deflect by approximately 1/2″ at their centers of run when using reasonable thumb pressure. Lock the motor in this position with the locking knob. SETUp OpERATION MAINTENANcE Page 8 For technical questions, please call 1-888-866-5797. Item 38144
-
 1
1 -
2
-
 3
3 -
 4
4 -
 5
5 -
 6
6 -
 7
7 -
 8
8 -
 9
9 -
 10
10 -
 11
11 -
 12
12 -
 13
13 -
14
-
15
-
16
 |
 |
