Harbor Freight Tools 61614 User Manual - Page 8
High Altitude Operation Above 3000 feet
 |
View all Harbor Freight Tools 61614 manuals
Add to My Manuals
Save this manual to your list of manuals |
Page 8 highlights
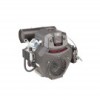
SAFETY High Altitude Operation Above 3000 feet WARNING! TO pREVENT SERIOUS INJURY FROM FIRE: Follow instructions in a well-ventilated area away from ignition sources. If the engine is hot from use, shut the engine off and wait for it to cool before proceeding. Do not smoke. NOTICE: Warranty void if necessary adjustments are not made for high altitude use. At high altitudes, the engine's carburetor, governor (if so equipped), and any other parts that control the fuel-air ratio will need to be adjusted by a qualified mechanic to allow efficient high-altitude use and to prevent damage to the engine and any other devices used with this product. The fuel system on this engine may be influenced by operation at higher altitudes. Proper operation can be ensured by installing an altitude kit at altitudes higher than 3000 ft. above sea level. At elevations above 8000 ft, the engine may experience decreased performance, even with the proper main jet. Operating this engine without the proper altitude kit installed may increase the engine's emissions and decrease fuel economy and performance. The kit should be installed by a qualified mechanic. High Altitude Kit parts List - A part Description Qty A1 Left Main Jet 3000-6000 ft. 1 A2 Right Main Jet 3000-6000 ft. 1 A3 Left Main Jet 6000-8000 ft. 1 Disassembly 1. Turn off the engine. 2. Close the fuel valve, if equipped. If no fuel valve is equipped, then clamp the fuel hose closed right before the filter. Be careful to avoid damaging the fuel hose. 3. Remove the Air Cleaner Top Knob (142a) and the two Air Cleaner Front Knobs (102). See Figure A. Air Cleaner Top Knob (142a) Air Cleaner Front Knob (102) part Description Qty A4 Right Main Jet 6000-8000 ft. 1 137d Outer Bowl O-ring (replacement) 2 137e Inner Bowl O-ring (replacement) 2 4. Remove the Air Cleaner Front Cover (101), pulling it up then out. See Figure B. Air Cleaner Front Cover (101) SETUp OpERATION MAINTENANCE Figure A: Remove Knobs Figure B: Remove Front Cover Page 8 For technical questions, please call 1-888-866-5797. ITEM 61614
-
 1
1 -
2
-
 3
3 -
 4
4 -
 5
5 -
 6
6 -
 7
7 -
 8
8 -
 9
9 -
 10
10 -
 11
11 -
 12
12 -
 13
13 -
14
-
15
-
16
-
17
-
18
-
19
-
20
-
21
-
22
-
23
-
24
-
25
-
26
-
27
-
28
-
29
-
30
-
31
-
32
 |
 |
