Harbor Freight Tools 61849 User Manual
Harbor Freight Tools 61849 - 90 Amp Flux Wire Welder Manual
 |
View all Harbor Freight Tools 61849 manuals
Add to My Manuals
Save this manual to your list of manuals |
Harbor Freight Tools 61849 manual content summary:
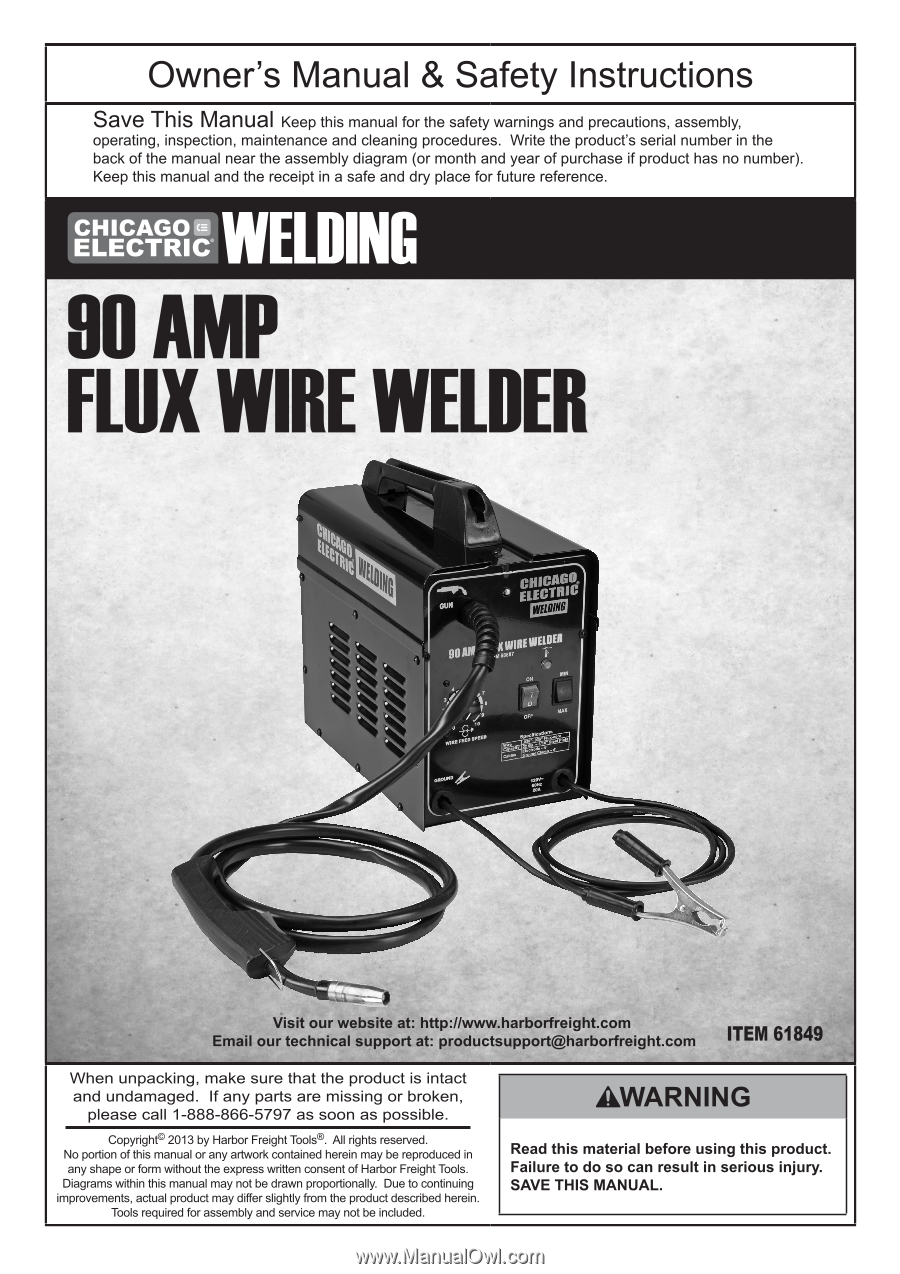
- Harbor Freight Tools 61849 | User Manual - Page 1
- Harbor Freight Tools 61849 | User Manual - Page 2
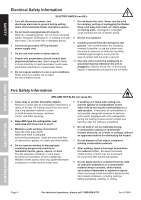
Never leave the Welder unattended while energized. Turn power off if you have to leave. 8. The warnings, precautions, and instructions discussed in this instruction manual cannot cover all possible conditions and situations that may occur. It must be understood by the operator that common sense and - Harbor Freight Tools 61849 | User Manual - Page 3
only if it is well-ventilated, or while wearing an air-supplied respirator. 6. Have a recognized specialist in Industrial Hygiene or Environmental Services check the operation and air quality and make recommendations for the specific welding situation. Follow OSHA guidelines for Permissible Exposure - Harbor Freight Tools 61849 | User Manual - Page 4
ELECTRIC SHOCK can KILL. 1. Turn off, disconnect power, and discharge electrode to ground before setting down torch/electrode holder and before service. 2. Do not touch energized electrical parts. Wear dry, insulating gloves. Do not touch electrode holder, electrode, welding torch, or welding wire - Harbor Freight Tools 61849 | User Manual - Page 5
children and do not allow persons unfamiliar with the Welder or these instructions to operate the Welder. Welders are dangerous in the hands of untrained different from those intended could result in a hazardous situation. Service Specific Safety Information 1. Maintain welders. Check for misalignment - Harbor Freight Tools 61849 | User Manual - Page 6
installed by a certified electrician. Do not use the Welder if the power cord or plug is damaged. If damaged, have it repaired by a service facility before use. If the plug will not fit the outlet, have a proper outlet installed by a qualified electrician. Grounded Welders 1. The grounding prong - Harbor Freight Tools 61849 | User Manual - Page 7
1000 * Amperes) IPM Inches Per Minute AWG American Wire Gauge Setup Read the ENTIRE IMPORTANT SAFETY INFORMATION section at the beginning of this manual including all text under subheadings therein before set up or use of this product. TO PREVENT SERIOUS INJURY FROM ACCIDENTAL OPERATION: Turn the - Harbor Freight Tools 61849 | User Manual - Page 8
Spool and all remaining wire from the liners. 4. Place the new flux-core Wire Spool over the Spool Spindle. To prevent wire feed problems, set the Spool so that it will unwind counterclockwise . Knob Spring Top Plate Wire Spool Spindle BASIC WELDING WELDING TIPS .030″ MAINTENANCE 5. Replace - Harbor Freight Tools 61849 | User Manual - Page 9
and crimped wire. Make sure that the cut end has no burrs or sharp edges; cut again if needed. 9. Keep tension on the wire and guide at least 12 inches of wire into the Wire Liners. 10. Swing the Feed Swing Arm closed, and swing the Feed Tensioner across the tip - Harbor Freight Tools 61849 | User Manual - Page 10
SAFETY SETUP BASIC WELDING WARNING The following steps require applying power to the Welder with the cover open. To prevent serious injury from fire or electric shock: 1. Do not touch anything, especially not the Ground Clamp, with the Gun or welding wire or an arc will be ignited. 2. Do not - Harbor Freight Tools 61849 | User Manual - Page 11
SAFETY 2-3″ SETUP BASIC WELDING 16. To check the wire's drive tension, feed the wire against a piece of wood from 2 to 3 inches away. If the wire stops instead of bending, turn the Welder to OFF, unplug it, slightly tighten the Feed Tensioner clockwise , and try again. If the wire bends from the - Harbor Freight Tools 61849 | User Manual - Page 12
SAFETY SETUP BASIC WELDING Basic Welding Read the ENTIRE IMPORTANT SAFETY INFORMATION section at the beginning of this manual including all text under subheadings therein before welding. TO PREVENT SERIOUS INJURY: Protective gear must be worn when using the Welder; minimum shade number 10 - Harbor Freight Tools 61849 | User Manual - Page 13
SAFETY SETUP BASIC WELDING Control Panel Layout Gun Cable Wire Speed Dial Ground Cable GUN 90 AMP FLUX WIRE WELDER ITEM 61207 ON MIN OFF MAX WIRE FEED SPEED Specifications Wire 0.030" - 0.035" Flux-Core Capacity 18 Ga. - 3/16" Steel Plate Weldable Mild, Low Alloy Steel Materials ( - Harbor Freight Tools 61849 | User Manual - Page 14
unit overheats, it automatically shuts 90 AMP FLUX WIRE WELDER ITEM 61207 down and the Overload Indicator lights. The Welder automatically returns to service after cooling off. ON MIN Rest the Gun on an electrically non-conductive, heat-proof surface, such as a concrete slab, well clear of - Harbor Freight Tools 61849 | User Manual - Page 15
SAFETY Setting Up The Weld 1. Make practice welds on pieces of scrap the same thickness as your intended workpiece to practice technique before welding anything of value. Clean the weld surfaces thoroughly with a wire brush or angle grinder; there must be no rust, paint, oil, or other materials on - Harbor Freight Tools 61849 | User Manual - Page 16
SAFETY SETUP Basic Welding Technique 1. Press (and hold) Trigger and contact area to be welded with electrode wire to ignite arc. 2. For a narrow weld, you can usually draw the wire in a steady straight line. This is called a stringer bead. For a wider weld, draw the wire back and forth across the - Harbor Freight Tools 61849 | User Manual - Page 17
SAFETY SETUP BASIC WELDING GUN Note: If Welder is used too long, the amber Overload 90 AMP FLUX WIRE WELDER ITEM 61207 Indicator will light and the Welder Gun will shut off until the Welder cools. If this happens, rest the Gun on an electrically non-conductive, heat-resistant surface, ON - Harbor Freight Tools 61849 | User Manual - Page 18
after it has cooled and the slag has been removed. Then, better welding can be learned by adjusting your welding technique to remedy any problems found. Cleaning the Weld TO PREVENT SERIOUS INJURY: Continue to wear ANSI-approved safety goggles and protective wear when cleaning a weld. Sparks or - Harbor Freight Tools 61849 | User Manual - Page 19
SAFETY Weld Diagnosis Workpiece Heat Control / Weld Penetration INADEQUATE PENETRATION PROPER PENETRATION EXCESS PENETRATION OR BURN-THROUGH Not hot enough Ideal heat Too hot How to increase workpiece heat and increase penetration: (to weld THICKER workpieces properly) a.Use MAX setting c. - Harbor Freight Tools 61849 | User Manual - Page 20
SAFETY Weld Problems Penetration (Workpiece Heat Control) EXCESS PENETRATION OR BURN-THROUGH Weld droops on top and underneath or falls through entirely, making a hole. PROPER PENETRATION Weld is - Harbor Freight Tools 61849 | User Manual - Page 21
Stickout too long: Reduce stickout. Crooked/Wavy Bead TOP VIEW Excessive Spatter Fine spatter is normal. Spatter that is grainy and large is a problem. TOP VIEW POSSIBLE CAUSES AND SOLUTIONS 1. Dirty workpiece or welding wire: Clean workpiece down to bare metal. Make certain that wire is clean and - Harbor Freight Tools 61849 | User Manual - Page 22
surface, and allow all parts of the Welder to cool thoroughly before service. 1. Periodically remove the Right and Left side panels, and using compressed should not be oblong or have any bulges in it. 5. If any problems are noted, Contact Tip replacement would be advisable. Make sure to select - Harbor Freight Tools 61849 | User Manual - Page 23
SAFETY Troubleshooting IMPORTANT! Be CERTAIN to shut off the Welder, disconnect it from Incorrect wire feed roll size: Replace with the proper wire feed roll - follow the Wire Spool Installation instructions, starting on page 8. Flip over wire feed roll if necessary. 3. Damaged Gun, cable, or liner - Harbor Freight Tools 61849 | User Manual - Page 24
cord is needed, refer to the guidelines on page 6. Welding Arc Not Stable POSSIBLE CAUSES AND SOLUTIONS 1. Wire not feeding properly: See first Troubleshooting section - Wire feed motor runs but wire does not feed properly. 2. Incorrect contact tip size: Replace with the proper tip for 0.030" wire - Harbor Freight Tools 61849 | User Manual - Page 25
Parts List and Diagrams Wiring Schematic Item 61849 For technical questions, please call 1-888-866-5797. S1-1 L AC120V 60Hz S1-2 N PE MIN TR1 S2 MAX FM Overheat Indicator TH t+ CN4 CR1 CN3 CN2 C1 630V104K TR2 FUSE2 0.5A R4 620Ω R3 1KΩ ~ OUTPUT ~ D2 W08 R2 47Ω JQX-29F-A 12VDC CR1 - Harbor Freight Tools 61849 | User Manual - Page 26
SAFETY SETUP Parts List and Diagrams (continued) Parts List Part Description Qty Part Description Qty 1 Power Cord and Plug 1 19 Conducting Strip 1 2 Cable Grommet 2 20 Heat Relay 1 3 Ground Clamp and Cable 1 21 Middle Panel 1 4 Torch 1 22 Right Panel 1 5 Torch Cable Sheath - Harbor Freight Tools 61849 | User Manual - Page 27
Assembly Diagram SAFETY SETUP BASIC WELDING WELDING TIPS MAINTENANCE Item 61849 For technical questions, please call 1-888-866-5797. Page 27 - Harbor Freight Tools 61849 | User Manual - Page 28
PLEASE READ THE FOLLOWING CAREFULLY THE MANUFACTURER AND/OR DISTRIBUTOR HAS PROVIDED THE PARTS DIAGRAM IN THIS MANUAL AS A REFERENCE TOOL ONLY. NEITHER THE MANUFACTURER NOR DISTRIBUTOR MAKES ANY REPRESENTATION OR WARRANTY OF ANY KIND TO THE BUYER THAT HE OR SHE IS
-
 1
1 -
 2
2 -
 3
3 -
 4
4 -
 5
5 -
 6
6 -
 7
7 -
8
-
9
-
10
-
11
-
12
-
13
-
14
-
15
-
16
-
17
-
18
-
19
-
20
-
21
-
22
-
23
-
24
-
25
-
26
-
27
-
28
 |
 |