Harbor Freight Tools 98179 User Manual - Page 9
Specifications, Unpacking, Instructions For, Putting Into Use, Operating Instructions
 |
View all Harbor Freight Tools 98179 manuals
Add to My Manuals
Save this manual to your list of manuals |
Page 9 highlights
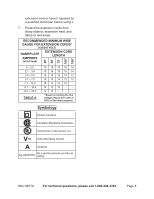
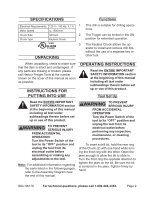
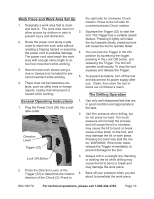
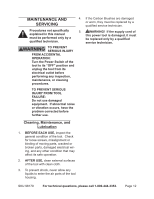
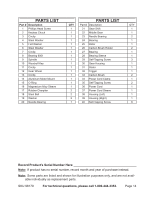
Specifications Functions Electrical Requirements 120 V~ / 60 Hz / 4.1 A Motor Speed Chuck Size n0 1500/min 3/8 Inch Chuck Type Keyless Chuck 90SM E194601 Unpacking 1. This drill is suitable for drilling operations. 2. The Trigger can be locked in the ON position for extended operation. 3. The Keyless Chuck allows the operator to install and remove drill bits without the use of a separate key or other tool. When unpacking, check to make sure that the item is intact and undamaged. If any parts are missing or broken, please call Harbor Freight Tools at the number shown on the cover of this manual as soon as possible. Instructions for putting into use Operating Instructions Read the entire Important Safety Information section at the beginning of this manual including all text under subheadings therein before set up or use of this product. Tool Set Up Read the entire Important Safety Information section at the beginning of this manual including all text under subheadings therein before set up or use of this product. To prevent serious injury from accidental operation: Turn the Power Switch of the tool to its "OFF" position and unplug the tool from its electrical outlet before assembling or making any adjustments to the tool. Note: For additional information regarding the parts listed in the following pages, refer to the Assembly Diagram near the end of this manual. To prevent serious injury from accidental operation: Turn the Power Switch of the tool to its "OFF" position and unplug the tool from its electrical outlet before performing any inspection, maintenance, or cleaning procedures. To insert a drill bit, hold the rear ring of the Chuck (2) with one hand while turning the front ring with the other. Open the jaws enough to allow the bit to slide in. Turn the front ring the opposite direction to tighten the jaws on the bit. Be sure the bit is centered in the jaws. Tighten firmly by hand. SKU 98179 For technical questions, please call 1-800-444-3353. Page 9
-
 1
1 -
2
-
3
-
 4
4 -
 5
5 -
 6
6 -
 7
7 -
 8
8 -
 9
9 -
 10
10 -
 11
11 -
 12
12 -
 13
13 -
 14
14 -
15
-
16
-
17
-
18
-
19
-
20
-
21
-
22
-
23
-
24
-
25
-
26
-
27
-
28
-
29
-
30
-
31
-
32
-
33
-
34
 |
 |
