Harman Kardon TDC33 Owners Manual - Page 11
integrated
 |
View all Harman Kardon TDC33 manuals
Add to My Manuals
Save this manual to your list of manuals |
Page 11 highlights
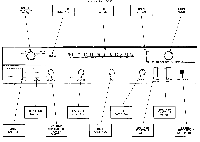
RECORDING PROCEDURE 4-Track Stereophonic Recording: 6. Adjust the LOUDNESS CONTROL for your integrated receiver to the desired listening level. 7. After the tape has been played, reverse and invert the reels to play 1) Carefully thread the tape onto the recorder, as outlined in the pre- the other side of the tape. ceding paragraph "Threading the Tape". 2) Turn the power "ON" for both the tape recorder and your integrated receiver. 3) Place the "function selector" switch for the integrated receiver in the mode appropriate to the material you wish to record. (Example: PHONO, AUX, FM). 4. Select the tape speed desired by moving the "Tape Speed Selector" lever appropriately. 5. Return the "Tape Counter" to zero by depressing the "Tape Counter Reset Button". 6. Depress and hold down BOTH "record buttons" while simultaneously turning the "Tape Function Selector " to the Run position. The "record buttons" will interlock in the DOWN position and the tape will start moving from the left (supply) reel to the right (take up) reel. 7. Turn the recorder "Function Selector" to the PAUSE position the moment the tape begins to move forward to hold the tape in position while setting the controls for the record function. 8. Rotate the left and right channel "level controls" in a clockwise direction until their meter pointers deflect to the boundary of the red area. If you find the VU meter pointer well into the red area, the recording level is set too high and your recording will be distorted. NOTE: The "record buttons" will be kept interlocked while the "function selector" is in RUN or PAUSE position. When the selector is turned to STOP or FAST FORWARD position, the record buttons will be automatically released. 9. After the proper recording levels have been set on both channels, return the "Function Selector" to the RUN position. The recorder will now begin the recording process. To monitor the program information the second after it has been recorded, refer to the paragraph MODE SWITCH. 10. If, in process of recording, you want to interrupt the recording to cut out unwanted program material, move the "function selector" to the PAUSE position. To resume recording, place the "function selector" to the RUN position. 11. When you have completed your recording, move the recorder "function selector" to the STOP position. PLAYING TAPES 4-TRACK STEREOPHONIC PLAYBACK 1. Take a 4-track pre-recorded tape with side 1 of the tape (tracks 1 and 3) facing up, and place it on the SUPPLY REEL spindle (left side). 2. Place an empty reel on the TAKEUP spindle (right side). 3. Thread the tape onto the recorder. 4. Turn the power ON for the tape recorder AND the integrated receiver. 5. Place the MODE SWITCH of your integrated receiver in the MONITOR/ PLAYBACK position. NOTE: Rotate the LEFT and RIGHT MONITOR VOLUME CONTROLS clockwise to the TAPE POSITION. 4-Track Monaural Recording: To record monaural program information from your integrated receiver, please follow the steps outlined below: 1. Thread the tape onto the recorder. 2. Select the desired tape speed and reset the "tape counter" to zero. 3. Switch the "Function Selector switch" for your integrated receiver to the desired monaural program material that you wish to record. Example: PHONO AUX, FM. 4. Depress and hold down the Left channel "record button" and, simultaneously, turn the tape "Function Selector" through the RUN position to the PAUSE position. 5. While the tape is held in place, adjust the "Left Record Level control" observing the corresponding "Level Meter" to attain the proper recording level, as explained in Step #8 covering "4-Track Stereophonic Recording". 6. When the proper recording level has been set, move the "selector switch" to the RUN position to put your tape in motion. 7. When you have completed recording the entire portion of the tape and the feed reel (left side) is now empty, place the "Function Selector" in the STOP position. DO NOT REWIND THE TAPE. 8. Remove the empty reel from the "feed reel" spindle. 9. Take the full reel of tape from the "takeup reel" spindle (right side). Turn it over and place it on the "feed reel" spindle (left side). 10. Now take the empty reel and place it on the "takeup reel" spindle (right side). 11. Thread the tape onto the recorder. 12. Depress and hold down the LEFT channel "record button" while simultaneously turning the "function selector" to the RUN position to continue your recording. NOTE: It is not necessary to reset the "Record Level control" if you are continuing to record the same program material. 13. To record on the remaining two (2) tracks, simply repeat steps 7 through 11 above. 14. Depress and hold down the RIGHT channel "record button" while simultaneously turning the "tape function selector" through the RUN position to the PAUSE position. 15. Repeat Step #5, using the "RIGHT Record Level control" to set the proper recording level. 16. When the proper recording level has been set, move the "Selector Switch" to the RUN position to put your tape in motion. 17. When you have completed recording the entire portion of the tape and the feed reel is empty, place the "Function Selector" in the STOP position. DO NOT REWIND THE TAPE. 18. Reverse and invert the reels as explained in steps 8, 9, and 10. 19. Thread the tape onto the recorder to record the last remaining track for 4-track monaural recording, observing the steps outlined above. 10
-
 1
1 -
2
-
3
-
4
-
5
-
 6
6 -
 7
7 -
 8
8 -
 9
9 -
 10
10 -
 11
11 -
 12
12 -
 13
13 -
 14
14
 |
 |
