Hayward HL32950VSP VS Omni Residential Troubleshooting Guide - Page 23
Access Controller PCB, Test Controller PCB Input
 |
View all Hayward HL32950VSP manuals
Add to My Manuals
Save this manual to your list of manuals |
Page 23 highlights
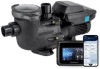
1. Controller: Blank Display (cont.) The controller enclosure is deigned to be water resistant, with a gasket seal. Care should be taken during reassembly. Access Controller PCB Step 1E Test Controller PCB Input Step 1F On the back of the controller, remove the 4 screws that secure the controller display to the housing. This provides access to the controller PCB. Once complete, go to step 1F. Test cable that plugs into controller PCB for 12vDC between terminals 1 & 3 (left to right). IF power is present, replace controller (HLHCONTROL). IF no/low voltage replace controller cable (HLX485100). 23
-
 1
1 -
2
-
3
-
4
-
5
-
6
-
7
-
8
-
9
-
10
-
11
-
12
-
13
-
14
-
15
-
16
-
17
-
 18
18 -
 19
19 -
 20
20 -
 21
21 -
 22
22 -
 23
23 -
 24
24 -
 25
25 -
 26
26 -
 27
27 -
 28
28 -
29
-
30
-
31
-
32
-
33
-
34
-
35
-
36
-
37
-
38
-
39
-
40
-
41
-
42
-
43
-
44
-
45
-
46
-
47
-
48
-
49
-
50
 |
 |

23
The controller enclosure is deigned to be water resistant, with a gasket seal.
Care
should be taken during reassembly.
On the back of the controller, remove the 4 screws that
secure the controller display to the housing. This
provides access to the controller PCB. Once complete,
go to step 1F.
Test cable that plugs into controller PCB for 12vDC
between terminals 1 & 3 (left to right). IF power is
present, replace controller (
HLHCONTROL
). IF no/low
voltage replace controller cable (
HLX485100
).
Access Controller PCB
Step 1E
Step 1F
Test Controller PCB Input
1. Controller: Blank Display (cont.)