Hayward HPC4-ACT-AQC ECOMMAND-4-Operation-Manual-092420ARevF - Page 26
Set the Chlorinator Output for external chlorinator, Start/Stop Super chlorinate for external
 |
View all Hayward HPC4-ACT-AQC manuals
Add to My Manuals
Save this manual to your list of manuals |
Page 26 highlights
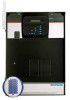
NOTE: Separate temperatures for the pool and spa must be set. If the valves are in the pool-only or spa spillover positions, then the heater will use the pool setting. If the valves are in the spa-only position then the heater will operate according to the spa setting. Set the Chlorinator Output (for external chlorinator) 1. Press the "MENU" button repeatedly until "Settings Menu" is displayed. 2. Press the ">" button repeatedly until the "Spa Chlorinator" or "Pool Chlorinator" is displayed. 3. Press the "+" or "-" buttons repeatedly to adjust the setting. If you adjust the setting to 0% the chlorinator will be off all the time. NOTE: Separate chlorinator output levels for the pool and spa must be set. If the valves are in the pool-only or spa spillover positions, then the chlorinator will operate according the pool setting. If the valves are in the spa-only position then the chlorinator will operate according to the spa setting. The actual amount of chlorine introduced into the pool/spa is determined by: this output setting, the amount of time the filter pump is running, the water temperature, and the amount of salt in the water. Also see Start/Stop Super chlorinate below. Start/Stop Super chlorinate (for external chlorinator) 1. Press the "MENU" button repeatedly until "Settings Menu" is displayed. 2. Press the ">" button repeatedly until "Super Chlorinate" is displayed. 3. The display will show whether super chlorinate is "on" or "off". 4. Press "+" or "-" to toggle between "on" and "off". NOTE: Once started, super chlorinate will run for the programmed number of hours (Timers Menu/ Super Chlorinate Hours) or until you manually turn it off. Super chlorinate may be temporarily interrupted for a programmed spa operation. Program a Timeclock 1. Press the "MENU" button repeatedly until "Timers Menu" is displayed. 2. Press the ">" button repeatedly until "xxx-all" or "xxx-wkend" (where xxx is the parameter that you want to program) is displayed. 3. Use the "+" and "-" buttons to set the desired start time, then press ">" to switch to the off time. Use the "+" and "-" buttons to adjust the off time. If you are setting the "weekend" timeclock, press ">" to go to the "weekday" settings. NOTE: During the programmed time, there may be other automatic or manual operations that prevent the relay/valve from operating-see a more detailed discussion under Automatic System Operation/Timers Menu/Aux Timeclock or in Troubleshooting/Diagnostic Information. Program a Countdown Timer 1. Press the "MENU" button repeatedly until "Timers Menu" is displayed. 2. Press the ">" button repeatedly until the "xxx-Timer" (where xxx is the parameter that you want to program) is displayed. 3. Use the "+" and "-" buttons to set the desired timer period. NOTE: A setting of 0:00 will display as "manual on/off". The countdown automatic turn off function is disabled but manual operation is still permitted. There may be other automatic or manual operations that prevent the relay/valve from operating-see a more detailed discussion under Automatic System Operation/Timers Menu/Aux Timeclock or in Troubleshooting/Diagnostic Information. 25 USE ONLY HAYWARD GENUINE REPLACEMENT PARTS
-
 1
1 -
2
-
3
-
4
-
5
-
6
-
7
-
8
-
9
-
10
-
11
-
12
-
13
-
14
-
15
-
16
-
17
-
18
-
19
-
20
-
 21
21 -
 22
22 -
 23
23 -
 24
24 -
 25
25 -
 26
26 -
 27
27 -
 28
28 -
 29
29 -
 30
30 -
 31
31 -
32
 |
 |
