HP 10622 10000 Series Rack Reference Guide - Page 38
Installation Overview, in a rack. You should install zero U devices first, such as PDUs, switch boxes
 |
View all HP 10622 manuals
Add to My Manuals
Save this manual to your list of manuals |
Page 38 highlights
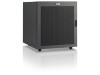
Installing Components Installation Overview NOTE: The stabilizer feet should be installed prior to any component installation. IMPORTANT: The installation instructions below are for standard installations. For specific installation instructions, refer to the documentation included with your component. The following steps outline the sequence for installing rack-mountable components in a rack. You should install zero U devices first, such as PDUs, switch boxes, and so on. 1. Use the template to measure and mark the rack for correct placement of the installation hardware. 2. Install the cage nuts into the rack. 3. Prepare and install the adjustable fixed and/or sliding rails. 4. Prepare the component for mounting in the rack. 5. Install the component into the rack and secure it. 6. Attach the cable management arm to the rack and then to the component. 7. Attach any cables and power cords, being sure that you adhere to all cautions and warnings contained in the individual component installation instructions. 8. Remove the cable access panel and route the cables. 4-4 HP 10000 Series Rack Reference Guide
-
 1
1 -
2
-
3
-
4
-
5
-
6
-
7
-
8
-
9
-
10
-
11
-
12
-
13
-
14
-
15
-
16
-
17
-
18
-
19
-
20
-
21
-
22
-
23
-
24
-
25
-
26
-
27
-
28
-
29
-
30
-
31
-
32
-
 33
33 -
 34
34 -
 35
35 -
 36
36 -
 37
37 -
 38
38 -
 39
39 -
 40
40 -
 41
41 -
 42
42 -
 43
43 -
44
-
45
-
46
-
47
-
48
-
49
-
50
-
51
-
52
-
53
-
54
-
55
-
56
-
57
-
58
-
59
-
60
-
61
-
62
-
63
-
64
-
65
-
66
-
67
-
68
-
69
-
70
-
71
-
72
-
73
-
74
-
75
 |
 |
