HP 15-ba100 Maintenance and Service Guide - Page 43
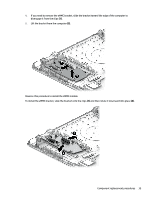
and then rotate it downward into place, To install the eMMC bracket, slide the bracket onto the clips
 |
View all HP 15-ba100 manuals
Add to My Manuals
Save this manual to your list of manuals |
Page 43 highlights
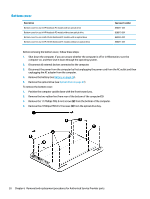
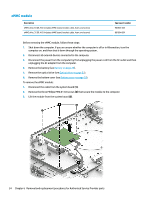
4. If you need to remove the eMMC bracket, slide the bracket toward the edge of the computer to disengage it from the clips (1). 5. Lift the bracket from the computer (2). Reverse this procedure to install the eMMC module. To install the eMMC bracket, slide the bracket onto the clips (1) and then rotate it downward into place (2). Component replacement procedures 35
-
 1
1 -
2
-
3
-
4
-
5
-
6
-
7
-
8
-
9
-
10
-
11
-
12
-
13
-
14
-
15
-
16
-
17
-
18
-
19
-
20
-
21
-
22
-
23
-
24
-
25
-
26
-
27
-
28
-
29
-
30
-
31
-
32
-
33
-
34
-
35
-
36
-
37
-
 38
38 -
 39
39 -
 40
40 -
 41
41 -
 42
42 -
 43
43 -
 44
44 -
 45
45 -
 46
46 -
 47
47 -
 48
48 -
49
-
50
-
51
-
52
-
53
-
54
-
55
-
56
-
57
-
58
-
59
-
60
-
61
-
62
-
63
-
64
-
65
-
66
-
67
-
68
-
69
-
70
-
71
-
72
-
73
-
74
-
75
-
76
-
77
-
78
-
79
-
80
-
81
-
82
-
83
-
84
-
85
-
86
-
87
-
88
-
89
-
90
-
91
-
92
-
93
-
94
-
95
-
96
-
97
-
98
-
99
-
100
-
101
-
102
 |
 |
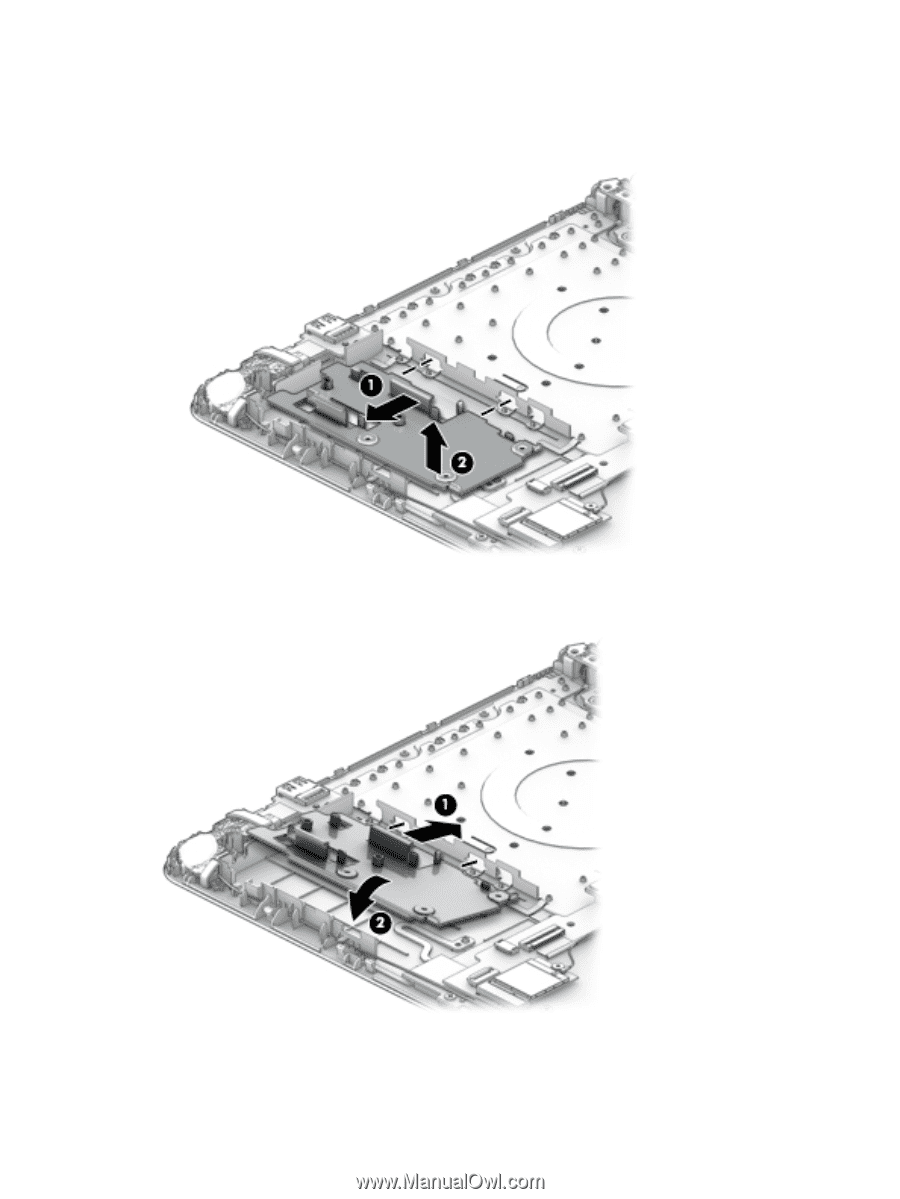
4.
If you need to remove the eMMC bracket, slide the bracket toward the edge of the computer to
disengage it from the clips
(1)
.
5.
Lift the bracket from the computer
(2)
.
Reverse this procedure to install the eMMC module.
To install the eMMC bracket, slide the bracket onto the clips
(1)
and then rotate it downward into place
(2)
.
Component replacement procedures
35