HP 3845 HP Deskjet 3840 Printer series - (Windows) User's Guide - Page 16
Maximum dpi - printer driver
 |
UPC - 829160434186
View all HP 3845 manuals
Add to My Manuals
Save this manual to your list of manuals |
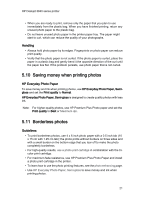
Page 16 highlights
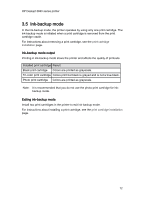
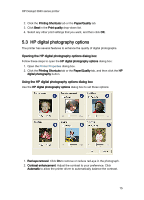
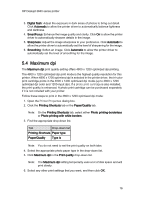
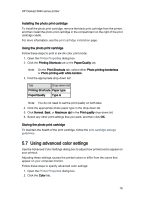
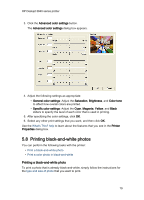
HP Deskjet 3840 series printer 3. Digital flash: Adjust the exposure in dark areas of photos to bring out detail. Click Automatic to allow the printer driver to automatically balance lightness and darkness. 4. SmartFocus: Enhance the image quality and clarity. Click On to allow the printer driver to automatically sharpen details in the image. 5. Sharpness: Adjust the image sharpness to your preference. Click Automatic to allow the printer driver to automatically set the level of sharpening for the image. 6. Smoothing: Soften an image. Click Automatic to allow the printer driver to automatically set the level of smoothing for the image. 5.4 Maximum dpi The Maximum dpi print quality setting offers 4800 x 1200 optimized dpi printing. The 4800 x 1200 optimized dpi print mode is the highest quality resolution for this printer. When 4800 x 1200 optimized dpi is selected in the printer driver, the tri-color print cartridge prints in the 4800 x 1200 optimized dpi mode (up to 4800 x 1200 optimized dpi color and 1200-input dpi). If a photo print cartridge is also installed, the print quality is enhanced. A photo print cartridge can be purchased separately if it is not included with your printer. Follow these steps to print in the 4800 x 1200 optimized dpi mode: 1. Open the Printer Properties dialog box. 2. Click the Printing Shortcuts tab or the Paper/Quality tab. Note: On the Printing Shortcuts tab, select either Photo printing-borderless or Photo printing-with white borders. 3. Find the appropriate drop-down list: Tab Drop-down list Printing Shortcuts Paper type Paper/Quality Type is Note: You do not need to set the print quality on both tabs. 4. Select the appropriate photo paper type in the drop-down list. 5. Click Maximum dpi in the Print quality drop-down list. Note: The Maximum dpi setting temporarily uses a lot of disk space and will print slowly. 6. Select any other print settings that you want, and then click OK. 16
-
 1
1 -
2
-
3
-
4
-
5
-
6
-
7
-
8
-
9
-
10
-
 11
11 -
 12
12 -
 13
13 -
 14
14 -
 15
15 -
 16
16 -
 17
17 -
 18
18 -
 19
19 -
 20
20 -
 21
21 -
22
-
23
-
24
-
25
-
26
-
27
-
28
-
29
-
30
-
31
-
32
-
33
-
34
-
35
-
36
-
37
-
38
-
39
-
40
-
41
-
42
-
43
-
44
-
45
-
46
-
47
-
48
-
49
-
50
-
51
-
52
-
53
-
54
-
55
-
56
-
57
-
58
-
59
-
60
-
61
-
62
-
63
-
64
-
65
-
66
-
67
-
68
-
69
-
70
-
71
-
72
-
73
-
74
-
75
-
76
-
77
-
78
-
79
-
80
-
81
-
82
-
83
-
84
-
85
-
86
-
87
-
88
-
89
-
90
-
91
-
92
-
93
-
94
-
95
-
96
 |
 |