HP 4415s Drives - Windows XP - Page 26
to which the keyboard cable is attached, and then disconnect the, Release the ZIF connector
 |
UPC - 884962601167
View all HP 4415s manuals
Add to My Manuals
Save this manual to your list of manuals |
Page 26 highlights
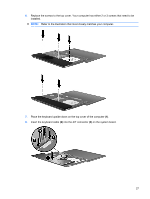
11. Remove the screws from the keyboard. Your computer has either 2 or 3 screws that need to be removed. NOTE: Refer to the illustration that most closely matches your computer. 12. Slide the keyboard (1) towards the display assembly, and then turn the keyboard upside down (2) so that the keyboard cable is accessible. 13. Release the ZIF connector (1) to which the keyboard cable is attached, and then disconnect the keyboard cable (2) from the system board by pulling upward. 22 Chapter 6 Replacing the hard drive
-
 1
1 -
2
-
3
-
4
-
5
-
6
-
7
-
8
-
9
-
10
-
11
-
12
-
13
-
14
-
15
-
16
-
17
-
18
-
19
-
20
-
 21
21 -
 22
22 -
 23
23 -
 24
24 -
 25
25 -
 26
26 -
 27
27 -
 28
28 -
 29
29 -
 30
30 -
 31
31 -
32
-
33
-
34
-
35
-
36
-
37
-
38
-
39
-
40
-
41
-
42
-
43
-
44
 |
 |
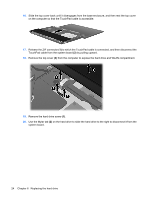
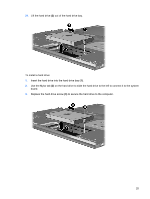
11.
Remove the screws from the keyboard. Your computer has either 2 or 3 screws that need to be
removed.
NOTE:
Refer to the illustration that most closely matches your computer.
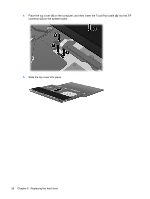
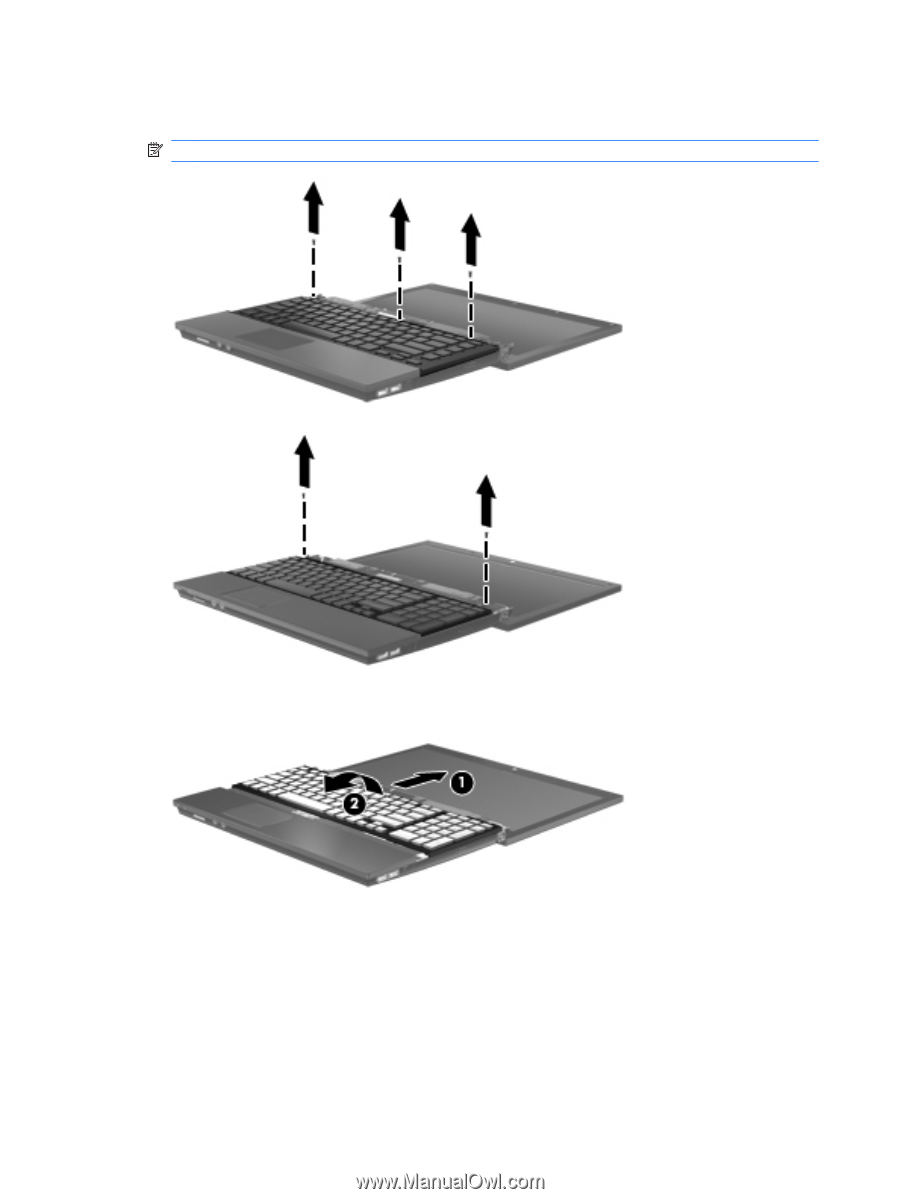
12.
Slide the keyboard
(1)
towards the display assembly, and then turn the keyboard upside down
(2)
so that the keyboard cable is accessible.
13.
Release the ZIF connector
(1)
to which the keyboard cable is attached, and then disconnect the
keyboard cable
(2)
from the system board by pulling upward.
22
Chapter 6
Replacing the hard drive