HP 4415s Drives - Windows XP - Page 28
Use the Mylar tab, Remove the hard drive screw
 |
UPC - 884962601167
View all HP 4415s manuals
Add to My Manuals
Save this manual to your list of manuals |
Page 28 highlights
16. Slide the top cover back until it disengages from the base enclosure, and then rest the top cover on the computer so that the TouchPad cable is accessible. 17. Release the ZIF connector (1) to which the TouchPad cable is connected, and then disconnect the TouchPad cable from the system board (2) by pulling upward. 18. Remove the top cover (3) from the computer to expose the hard drive and WLAN compartment. 19. Remove the hard drive screw (1). 20. Use the Mylar tab (2) on the hard drive to slide the hard drive to the right to disconnect it from the system board. 24 Chapter 6 Replacing the hard drive
-
 1
1 -
2
-
3
-
4
-
5
-
6
-
7
-
8
-
9
-
10
-
11
-
12
-
13
-
14
-
15
-
16
-
17
-
18
-
19
-
20
-
21
-
22
-
 23
23 -
 24
24 -
 25
25 -
 26
26 -
 27
27 -
 28
28 -
 29
29 -
 30
30 -
 31
31 -
 32
32 -
 33
33 -
34
-
35
-
36
-
37
-
38
-
39
-
40
-
41
-
42
-
43
-
44
 |
 |
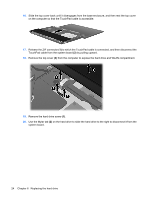
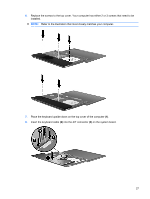
16.
Slide the top cover back until it disengages from the base enclosure, and then rest the top cover
on the computer so that the TouchPad cable is accessible.
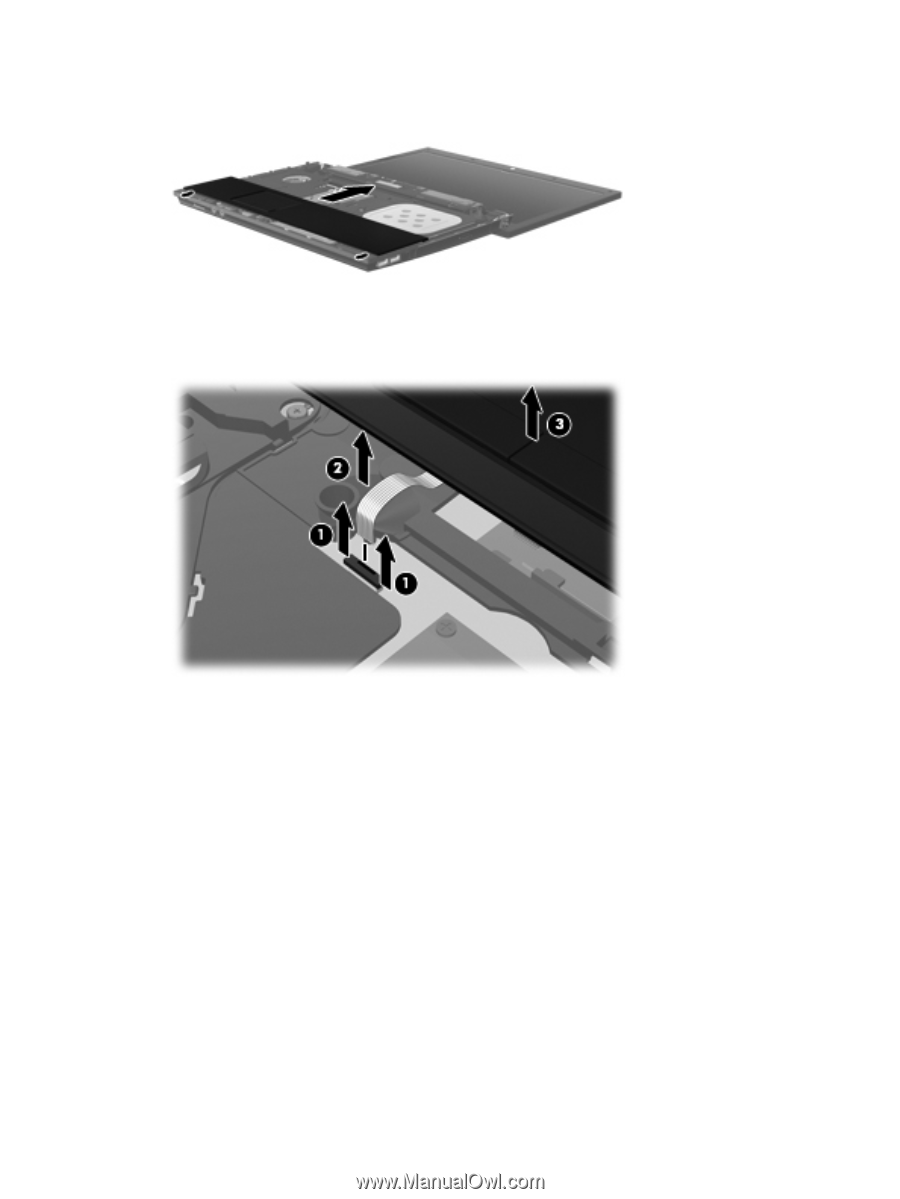
17.
Release the ZIF connector
(1)
to which the TouchPad cable is connected, and then disconnect the
TouchPad cable from the system board
(2)
by pulling upward.
18.
Remove the top cover
(3)
from the computer to expose the hard drive and WLAN compartment.
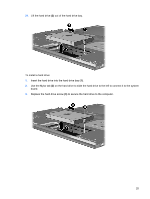
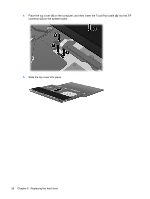
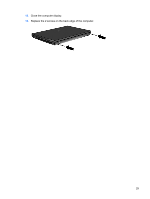
19.
Remove the hard drive screw
(1)
.
20.
Use the Mylar tab
(2)
on the hard drive to slide the hard drive to the right to disconnect it from the
system board.
24
Chapter 6
Replacing the hard drive