HP 450c Service Manual - Page 8

Removal and Installation, Preventive Maintenance - belt

Page 8 highlights

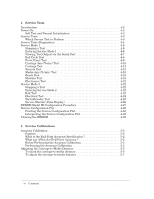
8 Removal and Installation Introduction 8Ć3 Reassembly 8Ć3 Safety Precautions 8Ć3 Electrostatic Discharge (ESD) Precautions 8Ć4 Required Tools 8Ć5 Installing a RAM or ROM SIMM 8Ć6 Removing the Bail Assembly 8Ć7 Removing the Top Cover 8Ć8 Removing the Rollfeed Assembly 8Ć9 Removing the Left EndĆCover 8Ć10 Removing the Right EndĆCover 8Ć11 Removing the FrontĆPanel Assembly 8Ć12 Removing the Electronics Module 8Ć13 Removing the Encoder Strip 8Ć15 Removing the Right Bracket 8Ć17 Removing the Carriage Motor 8Ć18 Removing the Spittoon 8Ć20 Removing the Cutter Assembly 8Ć21 Removing the DriveĆRoller Gear 8Ć22 Removing the Media Motor Assembly 8Ć23 Removing the PinchĆArm Mechanism 8Ć24 Removing the Primer Assembly 8Ć25 Removing the Service Station 8Ć26 Removing the BailĆLift Mechanism 8Ć28 Removing the EngagingĆLever Support 8Ć32 Removing the Trailing Cable 8Ć34 Removing the TrailingĆCable Guide 8Ć36 Removing the Carriage Assembly 8Ć37 Removing the Drive Belt 8Ć41 Removing the DriveĆBelt Pulley 8Ć42 Removing the Drive Roller 8Ć44 Reinstalling the Drive Roller 8Ć45 Removing the PinchĆArm Lift Mechanism 8Ć47 Removing the Overdrive Assembly (including the Overdrive Roller, Media Separator, Media Deflectors and Media Sensor 8Ć50 Removing the Entry Platen 8Ć52 9 Preventive Maintenance Moisture on Printer 9Ć2 Level of Printer Usage 9Ć2 Friction on Slider Rod 9Ć2 Noisy Carriage Wheel 9Ć2 Ink Spilling 9Ć3 Belt Swelling 9Ć3 Cleaning the Printer 9Ć4 General Cleaning 9Ć4 Cleaning the Drive Roller 9Ć4 vi Contents HP DesignJet 430, 450C and 455CA Printers

  • 1
  • 2
  • 3
  • 4
  • 5
  • 6
  • 7
  • 8
  • 9
  • 10
  • 11
  • 12
  • 13
  • 14
  • 15
  • 16
  • 17
  • 18
  • 19
  • 20
  • 21
  • 22
  • 23
  • 24
  • 25
  • 26
  • 27
  • 28
  • 29
  • 30
  • 31
  • 32
  • 33
  • 34
  • 35
  • 36
  • 37
  • 38
  • 39
  • 40
  • 41
  • 42
  • 43
  • 44
  • 45
  • 46
  • 47
  • 48
  • 49
  • 50
  • 51
  • 52
  • 53
  • 54
  • 55
  • 56
  • 57
  • 58
  • 59
  • 60
  • 61
  • 62
  • 63
  • 64
  • 65
  • 66
  • 67
  • 68
  • 69
  • 70
  • 71
  • 72
  • 73
  • 74
  • 75
  • 76
  • 77
  • 78
  • 79
  • 80
  • 81
  • 82
  • 83
  • 84
  • 85
  • 86
  • 87
  • 88
  • 89
  • 90
  • 91
  • 92
  • 93
  • 94
  • 95
  • 96
  • 97
  • 98
  • 99
  • 100
  • 101
  • 102
  • 103
  • 104
  • 105
  • 106
  • 107
  • 108
  • 109
  • 110
  • 111
  • 112
  • 113
  • 114
  • 115
  • 116
  • 117
  • 118
  • 119
  • 120
  • 121
  • 122
  • 123
  • 124
  • 125
  • 126
  • 127
  • 128
  • 129
  • 130
  • 131
  • 132
  • 133
  • 134
  • 135
  • 136
  • 137
  • 138
  • 139
  • 140
  • 141
  • 142
  • 143
  • 144
  • 145
  • 146
  • 147
  • 148
  • 149
  • 150
  • 151
  • 152
  • 153
  • 154
  • 155
  • 156
  • 157
  • 158
  • 159
  • 160
  • 161
  • 162
  • 163
  • 164
  • 165
  • 166
  • 167
  • 168
  • 169
  • 170
  • 171
  • 172
  • 173
  • 174
  • 175
  • 176
  • 177
  • 178
  • 179
  • 180
  • 181
  • 182
  • 183
  • 184
  • 185
  • 186
  • 187
  • 188
  • 189
  • 190
  • 191
  • 192
  • 193
  • 194
  • 195
  • 196
  • 197
  • 198
  • 199
  • 200
  • 201
  • 202
  • 203
  • 204
  • 205
  • 206
  • 207
  • 208

vi
Contents
HP DesignJet 430, 450C and 455CA Printers
8
Removal and Installation
Introduction
8Ć3
..........................................................
Reassembly
8Ć3
...........................................................
Safety Precautions
8Ć3
.....................................................
Electrostatic Discharge (ESD) Precautions
8Ć4
...............................
Required Tools
8Ć5
........................................................
Installing a RAM or ROM SIMM
8Ć6
........................................
Removing the Bail Assembly
8Ć7
............................................
Removing the Top Cover
8Ć8
...............................................
Removing the Rollfeed Assembly
8Ć9
........................................
Removing the Left EndĆCover
8Ć10
...........................................
Removing the Right EndĆCover
8Ć11
.........................................
Removing the FrontĆPanel Assembly
8Ć12
.....................................
Removing the Electronics Module
8Ć13
.......................................
Removing the Encoder Strip
8Ć15
............................................
Removing the Right Bracket
8Ć17
............................................
Removing the Carriage Motor
8Ć18
...........................................
Removing the Spittoon
8Ć20
.................................................
Removing the Cutter Assembly
8Ć21
..........................................
Removing the DriveĆRoller Gear
8Ć22
.........................................
Removing the Media Motor Assembly
8Ć23
....................................
Removing the PinchĆArm Mechanism
8Ć24
....................................
Removing the Primer Assembly
8Ć25
.........................................
Removing the Service Station
8Ć26
...........................................
Removing the BailĆLift Mechanism
8Ć28
......................................
Removing the EngagingĆLever Support
8Ć32
..................................
Removing the Trailing Cable
8Ć34
............................................
Removing the TrailingĆCable Guide
8Ć36
......................................
Removing the Carriage Assembly
8Ć37
........................................
Removing the Drive Belt
8Ć41
...............................................
Removing the DriveĆBelt Pulley
8Ć42
.........................................
Removing the Drive Roller
8Ć44
..............................................
Reinstalling the Drive Roller
8Ć45
............................................
Removing the PinchĆArm Lift Mechanism
8Ć47
................................
Removing the Overdrive Assembly (including the Overdrive Roller,
Media Separator, Media Deflectors and Media Sensor)
8Ć50
.....................
Removing the Entry Platen
8Ć52
.............................................
9
Preventive Maintenance
Moisture on Printer
9Ć2
....................................................
Level of Printer Usage
9Ć2
.................................................
Friction on Slider Rod
9Ć2
..................................................
Noisy Carriage Wheel
9Ć2
..................................................
Ink Spilling
9Ć3
...........................................................
Belt Swelling
9Ć3
..........................................................
Cleaning the Printer
9Ć4
...................................................
General Cleaning
9Ć4
...................................................
Cleaning the Drive Roller
9Ć4
...........................................