HP 750c HP DesignJet 700/750C Plus Plotters Quick Reference Guide - C4705-9004 - Page 6
the end of the roll.
 |
View all HP 750c manuals
Add to My Manuals
Save this manual to your list of manuals |
Page 6 highlights
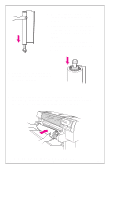
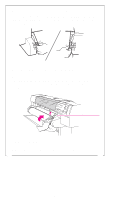
6 Rest the spindle upright on the floor with media stop (A) at the bottom 7 Place the new roll on the spindle, so that the media's leading edge winds clockwise, viewed from above. If the media stop (A) falls off, push it back in until it snaps into A position. B 8 Push the end-cap back in, so that the tabs are flush against the end of the roll. 9 Insert the spindle with media stop (A) to the right and end-cap (B) to the left. Push in firmly on both ends, making sure the media remains flush against media stop (A). B A The media should wind up from behind the roll. 0015 1837 0016 4
-
 1
1 -
 2
2 -
 3
3 -
 4
4 -
 5
5 -
 6
6 -
 7
7 -
 8
8 -
 9
9 -
 10
10 -
 11
11 -
 12
12 -
13
-
14
-
15
-
16
-
17
-
18
-
19
-
20
-
21
-
22
-
23
-
24
-
25
-
26
-
27
-
28
-
29
-
30
-
31
-
32
 |
 |
4
B
6
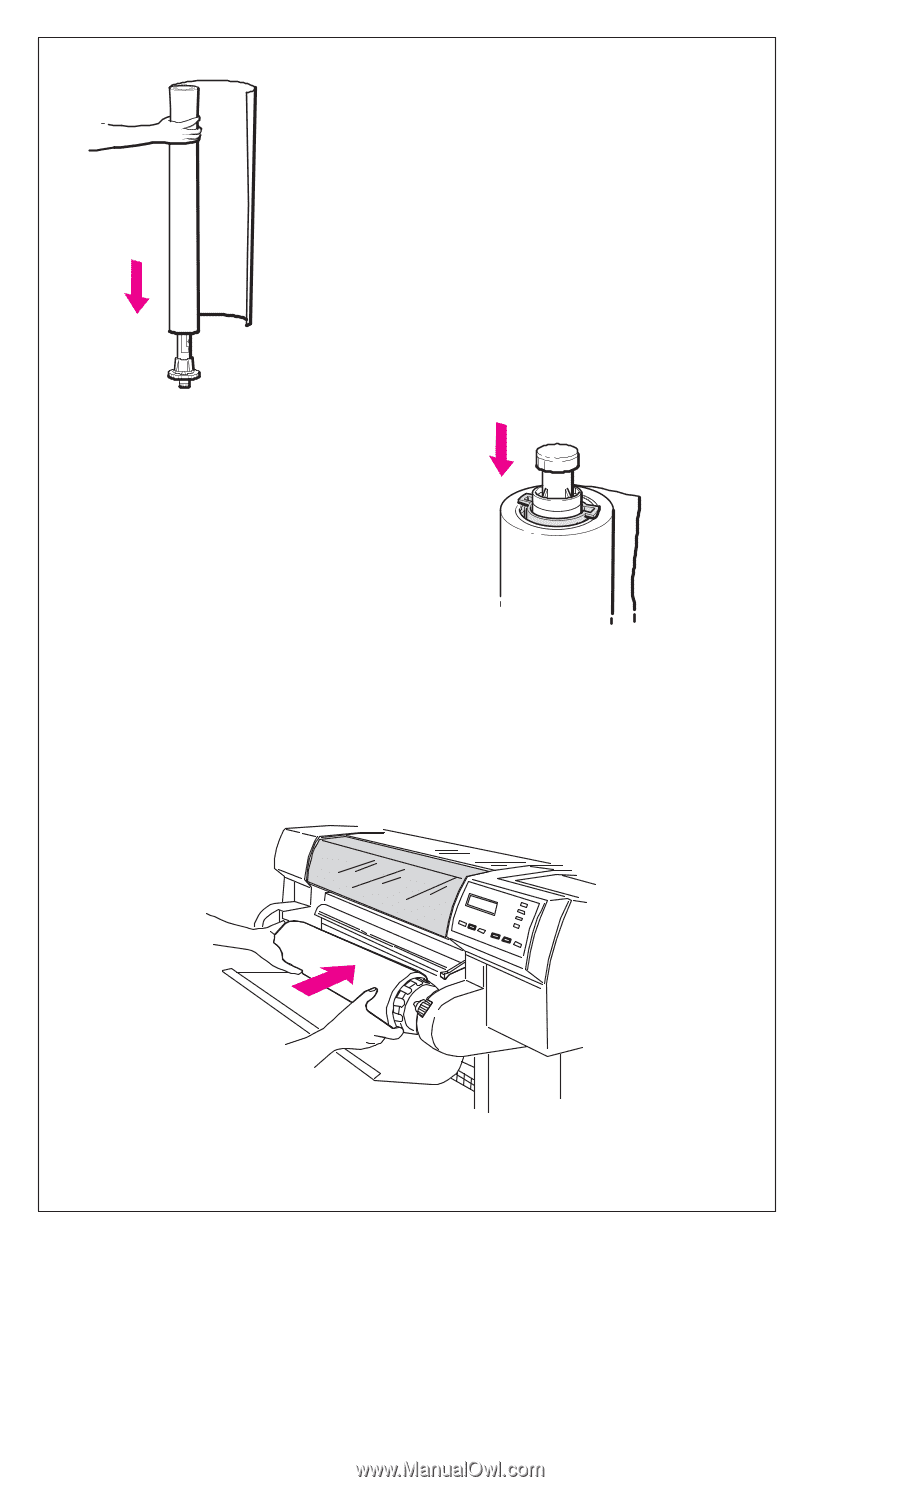
Rest the spindle upright on the
floor with media stop (A) at the
bottom
7
Place the new roll on the spindle,
so that the media’s leading edge
winds
clockwise,
viewed from
above.
If the media stop (A) falls off,
push it back in until it snaps into
position.
A
8
Push the end–cap back in, so
that the tabs are flush against
the end of the roll.
9
Insert the spindle with media stop (A) to the right and
end–cap (B) to the left. Push in firmly on both ends, making
sure the media remains flush against media stop (A).
The media should wind up from behind the roll.
B
0015
1837
0016
A