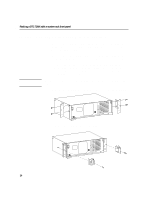
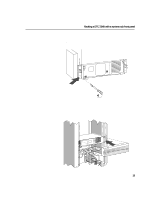
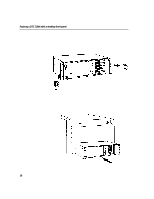
HP 800 HP DTC Cabling and Racking Guide - Page 23
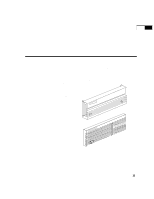
accessories kit in place. Push it onto the power switch through the DTC
 |
View all HP 800 manuals
Add to My Manuals
Save this manual to your list of manuals |
Page 23 highlights
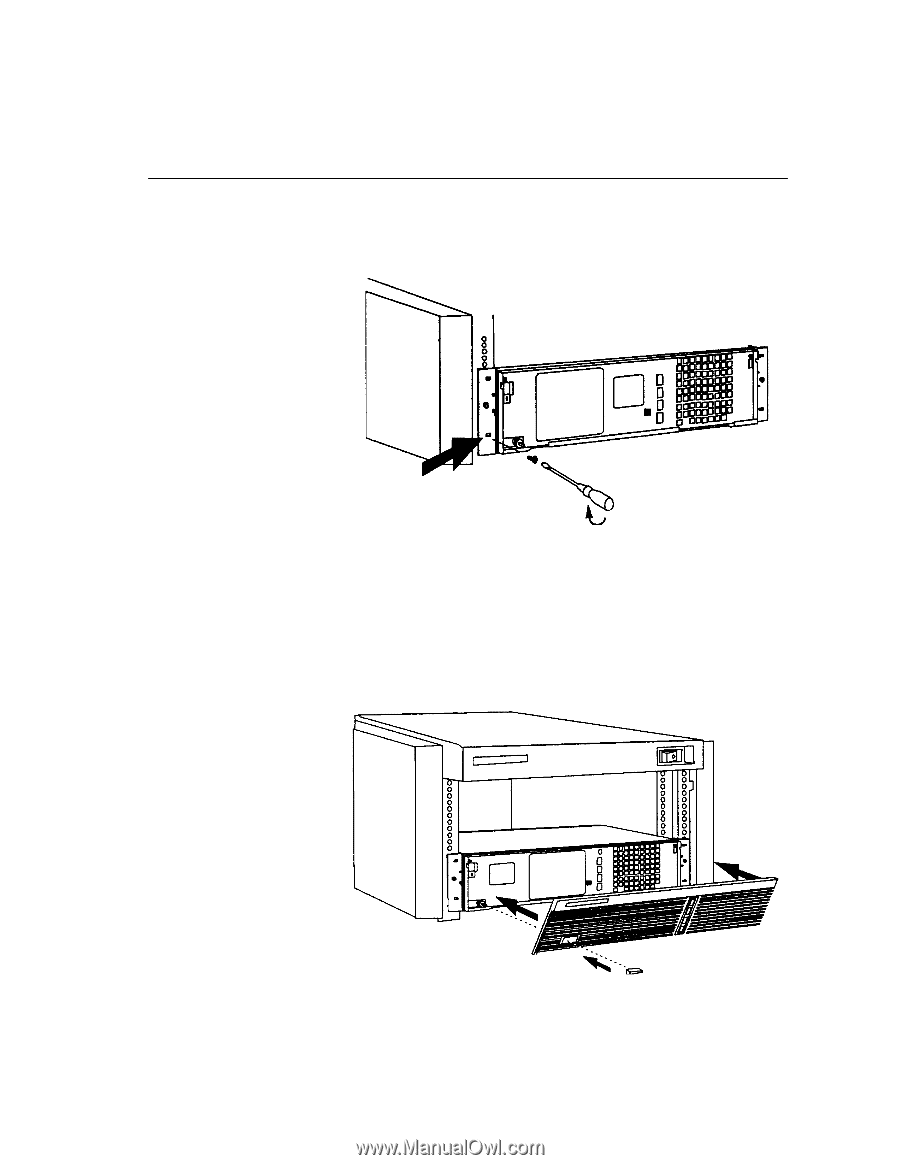
4 Racking a DTC 72MX with a desktop front panel 3 Screw the side brackets to the rack using four screws and washers supplied with your mounting kit. 4 The desktop panel is attached by slotting it into the lower edge of the DTC and pushing it in at the top. Put the power button from the accessories kit in place. Push it onto the power switch through the DTC front panel. 17
-
 1
1 -
2
-
3
-
4
-
5
-
6
-
7
-
8
-
9
-
10
-
11
-
12
-
13
-
14
-
15
-
16
-
17
-
 18
18 -
 19
19 -
 20
20 -
 21
21 -
 22
22 -
 23
23 -
 24
24 -
 25
25 -
 26
26 -
 27
27 -
 28
28 -
29
-
30
-
31
-
32
-
33
-
34
-
35
-
36
-
37
-
38
-
39
-
40
-
41
-
42
-
43
-
44
-
45
-
46
-
47
-
48
-
49
-
50
-
51
-
52
-
53
-
54
-
55
-
56
-
57
-
58
-
59
-
60
-
61
-
62
-
63
-
64
-
65
-
66
-
67
-
68
-
69
-
70
-
71
-
72
-
73
-
74
-
75
-
76
-
77
-
78
-
79
-
80
-
81
-
82
-
83
-
84
-
85
-
86
-
87
-
88
-
89
-
90
-
91
-
92
-
93
-
94
-
95
-
96
-
97
-
98
-
99
-
100
-
101
-
102
-
103
-
104
-
105
-
106
-
107
-
108
-
109
-
110
-
111
-
112
-
113
-
114
 |
 |
17
Racking a DTC 72MX with a desktop front panel
4
3
Screw the side brackets to the rack using four screws and washers
supplied with your mounting kit.
4
The desktop panel is attached by slotting it into the lower edge of the
DTC and pushing it in at the top. Put the power button from the
accessories kit in place. Push it onto the power switch through the DTC
front panel.