HP Brio 71xx hp brio 71xx, self-repair instructions - Page 4
Task 8 Replacing Expansion Cards
 |
View all HP Brio 71xx manuals
Add to My Manuals
Save this manual to your list of manuals |
Page 4 highlights
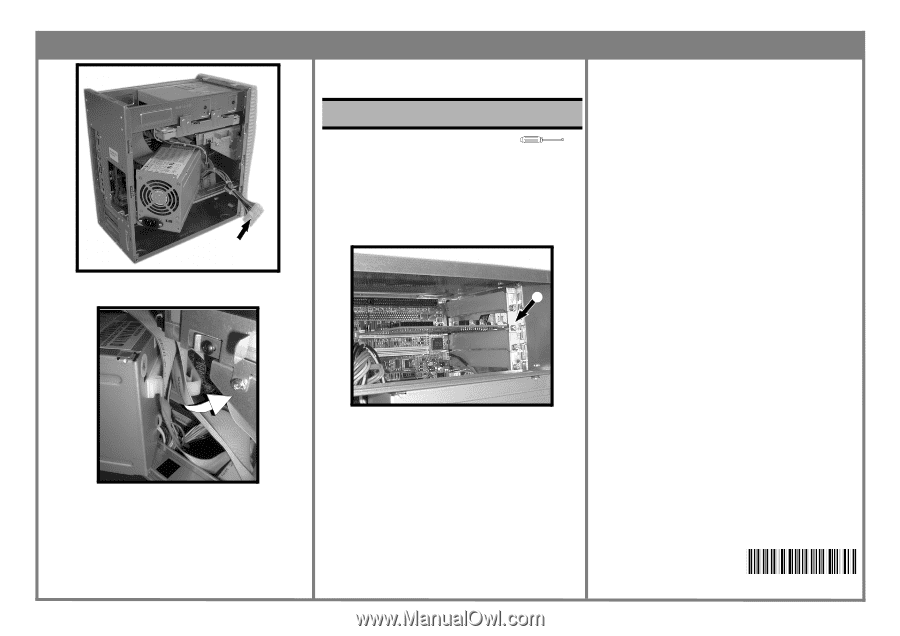
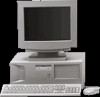
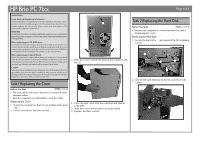
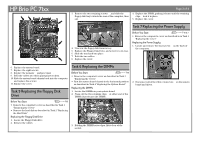
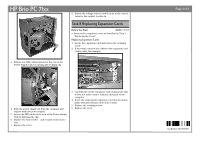
HP Brio PC 71xx ƒ 3. Release any IDE cables fastened at the rear of the Power Supply Unit, by opening the securing clip. 8. Ensure the voltage selector switch is set to the correct value for the country you live in. Task 8 Replacing Expansion Cards Before You Start T-15 • Remove the computer's cover as described in Task 1 "Replacing the Cover". Replacing Expansion Cards 1. Locate the expansion card and remove the retaining screw ‚. 2. If necessary, remove any cables to the expansion card (audio cable, for example). ‚ 4. Slide the power supply out from the computer and replace with new power supply. 5. Secure the IDE cables at the rear of the Power Supply Unit by fastening the clip. 6. Replace the four screws ‚ and reconnect all connectors ƒ. 7. Replace the cover. 3. Carefully lift out the expansion card, making sure that it does not make contact with any other part of the computer. 4. Insert the replacement expansion card into the appropriate slot and refit any cables if necessary. 5. Replace the retaining screw ‚. 6. Replace the cover. Page 4 of 4 Part Number 5967-9529-EN
-
 1
1 -
 2
2 -
 3
3 -
 4
4
 |
 |