HP Brocade BladeSystem 4/24 HP StorageWorks Fabric OS 6.1.1 administrator guid - Page 27
Configuring the Ethernet interface
 |
View all HP Brocade BladeSystem 4/24 manuals
Add to My Manuals
Save this manual to your list of manuals |
Page 27 highlights
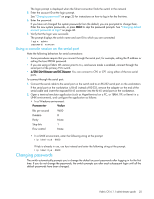
To skip a single prompt press Enter. To skip all of the remaining prompts press Ctrl-c. login: admin Password: Please change your passwords now. Use Control-C to exit or press 'Enter' key to proceed. for user - root Changing password for root Enter new password: ******** Password changed. Saving password to stable storage. Password saved to stable storage successfully. Please change your passwords now. for user - factory Changing password for factory Enter new password: ******** Password changed. Saving password to stable storage. Password saved to stable storage successfully. Please change your passwords now. for user - admin Changing password for admin Enter new password: ******** Password changed. Saving password to stable storage. Password saved to stable storage successfully. Please change your passwords now. for user - user Changing password for user Enter new password: ******** Password changed. Saving password to stable storage. Password saved to stable storage successfully. switch:admin> Configuring the Ethernet interface You can use Dynamic Host Configuration Protocol (DHCP) for the Ethernet network interface configuration. The Ethernet (network) interface provides management access, including direct access to the Fabric OS CLI, and allows other tools, such as Web Tools, to interact with the switch. You can continue to use a static Ethernet addressing system or allow the DHCP client to automatically acquire Ethernet addresses. Configure the Ethernet interface IP, subnet mask, and gateway addresses in one of the following manners: • "Setting static Ethernet addresses" on page 28 • "Activating DHCP" on page 29 When you change the Ethernet interface settings, open connections such as SSH or Telnet may be dropped. Reconnect using the new Ethernet IP information or change the Ethernet settings using a console session through the serial port to maintain your session through the change. You must connect through the serial port to set the Ethernet IP address if the Ethernet network interface is not configured already. Displaying the network interface settings If an IP address has not been assigned to the network interface (Ethernet), you must connect to the Fabric OS CLI using a console session on the serial port. Otherwise, connect using SSH. For more information, see "Using a console session on the serial port" on page 25. To display the network interface settings: 1. Connect to the switch and log in using an account assigned to the admin role. Fabric OS 6.1.1 administrator guide 27
-
 1
1 -
2
-
3
-
4
-
5
-
6
-
7
-
8
-
9
-
10
-
11
-
12
-
13
-
14
-
15
-
16
-
17
-
18
-
19
-
20
-
21
-
 22
22 -
 23
23 -
 24
24 -
 25
25 -
 26
26 -
 27
27 -
 28
28 -
 29
29 -
 30
30 -
 31
31 -
 32
32 -
33
-
34
-
35
-
36
-
37
-
38
-
39
-
40
-
41
-
42
-
43
-
44
-
45
-
46
-
47
-
48
-
49
-
50
-
51
-
52
-
53
-
54
-
55
-
56
-
57
-
58
-
59
-
60
-
61
-
62
-
63
-
64
-
65
-
66
-
67
-
68
-
69
-
70
-
71
-
72
-
73
-
74
-
75
-
76
-
77
-
78
-
79
-
80
-
81
-
82
-
83
-
84
-
85
-
86
-
87
-
88
-
89
-
90
-
91
-
92
-
93
-
94
-
95
-
96
-
97
-
98
-
99
-
100
-
101
-
102
-
103
-
104
-
105
-
106
-
107
-
108
-
109
-
110
-
111
-
112
-
113
-
114
-
115
-
116
-
117
-
118
-
119
-
120
-
121
-
122
-
123
-
124
-
125
-
126
-
127
-
128
-
129
-
130
-
131
-
132
-
133
-
134
-
135
-
136
-
137
-
138
-
139
-
140
-
141
-
142
-
143
-
144
-
145
-
146
-
147
-
148
-
149
-
150
-
151
-
152
-
153
-
154
-
155
-
156
-
157
-
158
-
159
-
160
-
161
-
162
-
163
-
164
-
165
-
166
-
167
-
168
-
169
-
170
-
171
-
172
-
173
-
174
-
175
-
176
-
177
-
178
-
179
-
180
-
181
-
182
-
183
-
184
-
185
-
186
-
187
-
188
-
189
-
190
-
191
-
192
-
193
-
194
-
195
-
196
-
197
-
198
-
199
-
200
-
201
-
202
-
203
-
204
-
205
-
206
-
207
-
208
-
209
-
210
-
211
-
212
-
213
-
214
-
215
-
216
-
217
-
218
-
219
-
220
-
221
-
222
-
223
-
224
-
225
-
226
-
227
-
228
-
229
-
230
-
231
-
232
-
233
-
234
-
235
-
236
-
237
-
238
-
239
-
240
-
241
-
242
-
243
-
244
-
245
-
246
-
247
-
248
-
249
-
250
-
251
-
252
-
253
-
254
-
255
-
256
-
257
-
258
-
259
-
260
-
261
-
262
-
263
-
264
-
265
-
266
-
267
-
268
-
269
-
270
-
271
-
272
-
273
-
274
-
275
-
276
-
277
-
278
-
279
-
280
-
281
-
282
-
283
-
284
-
285
-
286
-
287
-
288
-
289
-
290
-
291
-
292
-
293
-
294
-
295
-
296
-
297
-
298
-
299
-
300
-
301
-
302
-
303
-
304
-
305
-
306
-
307
-
308
-
309
-
310
-
311
-
312
-
313
-
314
-
315
-
316
-
317
-
318
-
319
-
320
-
321
-
322
-
323
-
324
-
325
-
326
-
327
-
328
-
329
-
330
-
331
-
332
-
333
-
334
-
335
-
336
-
337
-
338
-
339
-
340
-
341
-
342
-
343
-
344
-
345
-
346
-
347
-
348
-
349
-
350
-
351
-
352
-
353
-
354
-
355
-
356
-
357
-
358
-
359
-
360
-
361
-
362
-
363
-
364
-
365
-
366
-
367
-
368
-
369
-
370
-
371
-
372
-
373
-
374
-
375
-
376
-
377
-
378
-
379
-
380
-
381
-
382
-
383
-
384
-
385
-
386
-
387
-
388
-
389
-
390
-
391
-
392
-
393
-
394
-
395
-
396
-
397
-
398
-
399
-
400
-
401
-
402
-
403
-
404
-
405
-
406
-
407
-
408
-
409
-
410
-
411
-
412
-
413
-
414
-
415
-
416
-
417
-
418
-
419
-
420
-
421
-
422
-
423
-
424
-
425
-
426
-
427
-
428
-
429
-
430
-
431
-
432
-
433
-
434
-
435
-
436
-
437
-
438
-
439
-
440
-
441
-
442
-
443
-
444
-
445
-
446
-
447
-
448
-
449
-
450
-
451
-
452
-
453
-
454
-
455
-
456
-
457
-
458
-
459
-
460
-
461
-
462
-
463
-
464
-
465
-
466
-
467
-
468
-
469
-
470
-
471
-
472
-
473
-
474
-
475
-
476
-
477
-
478
-
479
-
480
-
481
-
482
-
483
-
484
-
485
-
486
-
487
-
488
-
489
-
490
-
491
-
492
-
493
-
494
-
495
-
496
 |
 |