HP Color LaserJet CM6030/CM6040 HP Color LaserJet CM6040/CM6030 MFP Series - J - Page 6
Load saddle stitch staples - color laserjet and mfp series
 |
View all HP Color LaserJet CM6030/CM6040 manuals
Add to My Manuals
Save this manual to your list of manuals |
Page 6 highlights
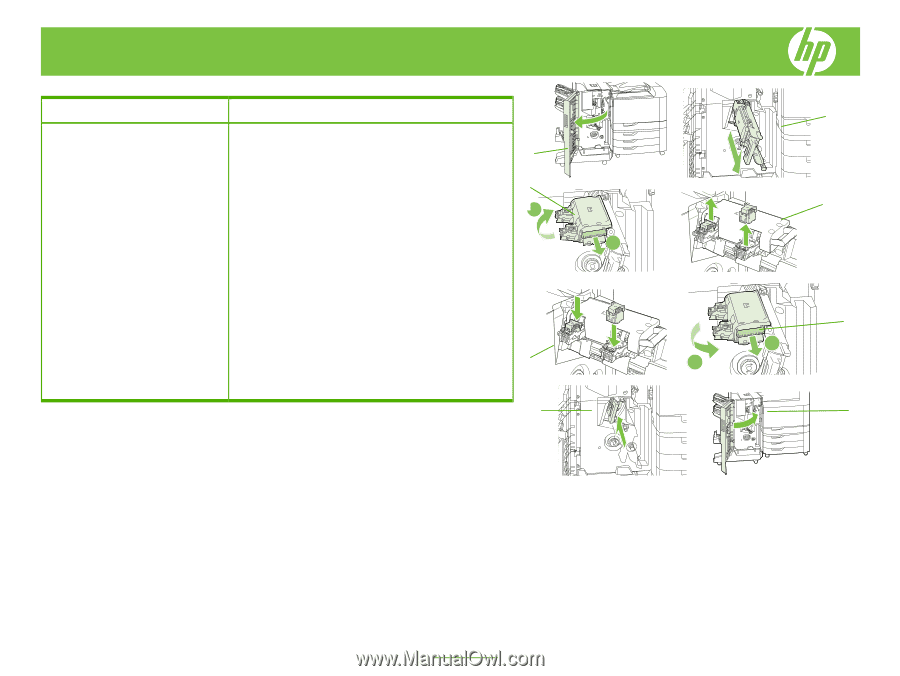
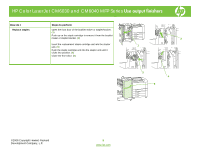
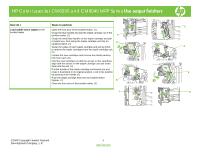
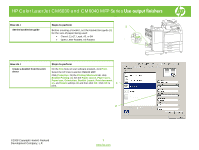
HP Color LaserJet CM6030 and CM6040 MFP Series Use output finishers How do I Steps to perform Load saddle stitch staples in the booklet maker Open the front door of the booklet maker. (1) Grasp the blue handle and pull the staple carriage out of the booklet maker. (2) 1 Grasp the small blue handle on the staple cartridge and pull it toward you, then swing the staple cartridge unit into an upright position. (3) 3 Grasp the edges of each staple cartridge and pull up firmly 2 to remove the staple cartridges from the staple cartridge unit. (4) Unpack the new cartridges and remove the plastic packing 1 lock from each one. Hold the new cartridges so that the arrows on the cartridges align with the arrows on the staple cartridge unit and insert them into the unit. (5) Pull the handle of the staple cartridge unit toward you and rotate it downward to its original position. Lock it into position by pushing in the handle (6) Push the staple carriage back into the booklet maker finisher. (7) 5 Close the front door of the booklet maker. (8) 7 2 4 6 1 2 8 ©2008 Copyright Hewlett-Packard Development Company, L.P. 6 www.hp.com
-
 1
1 -
 2
2 -
 3
3 -
 4
4 -
 5
5 -
 6
6 -
 7
7 -
 8
8
 |
 |