HP DL320 Upgrading to Microsoft Windows Server 2003 with Service Pack 1 on Pro - Page 7
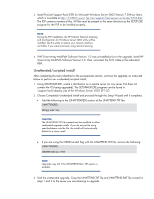
Unattended/scripted install
 |
UPC - 829160513218
View all HP DL320 manuals
Add to My Manuals
Save this manual to your list of manuals |
Page 7 highlights
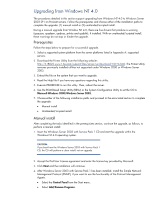
• Click the Add/Remove Windows Components button. • Select Management and Monitoring Tools from the list of components. • Click the Details button. • Select Simple Network Management Protocol so that a checkmark is displayed in the checkbox. • Click the OK button and then the Next button. • Click the Finish button. 5. Download and install the latest ProLiant Support Pack (PSP) from HP website: http://h18023.www1.hp.com/support/files/server/us/locate/3376.html. Unattended/scripted install After completing the tasks identified in the prerequisites section, for an unattended install, create an answer file (UNATTEND.TXT) and a distribution point (I386 folder) where you can save all the necessary files for installation. Microsoft offers a utility, SETUPMGR.EXE that allows you to create an answer file and helps you set up a distribution point. For additional information, refer to the following Microsoft document: HOW TO: Use Setup Manager to Create an Answer File in the Windows Server Family (Q323438). CAUTION: Make sure you add the following line in the unattended section of the UNATTEND.TXT file. [UNATTENDED] NtUpgrade=Yes If you do not add this line, then Setup will continue with a fresh install, not an upgrade. CAUTION: If you are using the OEMPreinstall flag with the UNATTEND.TXT file, remove the following: [UNATTENDED] OEMPREINSTALL=YES Upgrades may fail if the OEMPREINSTALL=YES option is enabled. Depending on the requirement for the applications being installed, a system administrator can write a very detailed script file to perform many tasks. In our scenario, HP engineers created two batch files that performed a fully automated upgrade by performing the following steps: 1. Allow administrator to log on without entering the password. 2. Launch the upgrade (WINNT32.EXE) from the distribution point/server. 3. Provide the license key provided by Microsoft and other necessary information until the installation completes. 7
-
 1
1 -
 2
2 -
 3
3 -
 4
4 -
 5
5 -
 6
6 -
 7
7 -
 8
8 -
 9
9 -
 10
10 -
 11
11 -
 12
12 -
13
-
14
-
15
 |
 |
