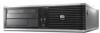
HP Dc7800 Service Reference Guide - HP Compaq dc7800 Business PC - Page 8

Using the Smart Cover FailSafe Key to Remove the Smart Cover Lock - business desktop small form factor

Page 8 highlights

System Board Drive Connections 78 Drive Positions ...79 Installing a 3.5-inch Hard Drive into an Internal Drive Bay 80 Removing and Replacing a Removable 3.5-inch SATA Hard Drive 82 Installing a 5.25-inch or 3.5-inch Drive into an External Drive Bay 87 ReadyBoost Card ...89 Front I/O Device and Power Switch 90 Fan Shroud ...91 Heatsink ...92 Processor ...93 Speaker ...94 Rear Chassis Fan ...95 Inner Chassis Fan ...96 Serial Port ...97 Power Supply ...98 System Board ...99 Battery ...100 Type 1 Battery Holder ...101 Type 2 Battery Holder ...101 Type 3 Battery Holder ...102 Changing from a Desktop to a Minitower Configuration 103 Changing from a Minitower to a Desktop Configuration 105 8 Removal and Replacement Procedures Small Form Factor (SFF) Chassis Preparation for Disassembly ...107 Unlocking the Smart Cover Lock ...108 Smart Cover FailSafe Key 108 Using the Smart Cover FailSafe Key to Remove the Smart Cover Lock 109 External Security Devices ...110 Installing a Security Lock 110 Cable Lock ...110 Padlock ...110 HP Business PC Security Lock 111 Computer Access Panel ...113 Front Bezel ...114 Bezel Blanks ...115 Installing Additional Memory ...116 DIMMs ...116 DDR2-SDRAM DIMMs ...116 Populating DIMM Sockets 117 Installing DIMMs ...118 Expansion Cards ...120 Cable Management ...124 Cable Connections ...125 Drives ...126 Drive Positions ...126 Installing and Removing Drives 127 System Board Drive Connections 129 Removing an Optical Drive 130 Installing an Optical Drive into the 5.25-inch Drive Bay 131 viii

  • 1
  • 2
  • 3
  • 4
  • 5
  • 6
  • 7
  • 8
  • 9
  • 10
  • 11
  • 12
  • 13
  • 14
  • 15
  • 16
  • 17
  • 18
  • 19
  • 20
  • 21
  • 22
  • 23
  • 24
  • 25
  • 26
  • 27
  • 28
  • 29
  • 30
  • 31
  • 32
  • 33
  • 34
  • 35
  • 36
  • 37
  • 38
  • 39
  • 40
  • 41
  • 42
  • 43
  • 44
  • 45
  • 46
  • 47
  • 48
  • 49
  • 50
  • 51
  • 52
  • 53
  • 54
  • 55
  • 56
  • 57
  • 58
  • 59
  • 60
  • 61
  • 62
  • 63
  • 64
  • 65
  • 66
  • 67
  • 68
  • 69
  • 70
  • 71
  • 72
  • 73
  • 74
  • 75
  • 76
  • 77
  • 78
  • 79
  • 80
  • 81
  • 82
  • 83
  • 84
  • 85
  • 86
  • 87
  • 88
  • 89
  • 90
  • 91
  • 92
  • 93
  • 94
  • 95
  • 96
  • 97
  • 98
  • 99
  • 100
  • 101
  • 102
  • 103
  • 104
  • 105
  • 106
  • 107
  • 108
  • 109
  • 110
  • 111
  • 112
  • 113
  • 114
  • 115
  • 116
  • 117
  • 118
  • 119
  • 120
  • 121
  • 122
  • 123
  • 124
  • 125
  • 126
  • 127
  • 128
  • 129
  • 130
  • 131
  • 132
  • 133
  • 134
  • 135
  • 136
  • 137
  • 138
  • 139
  • 140
  • 141
  • 142
  • 143
  • 144
  • 145
  • 146
  • 147
  • 148
  • 149
  • 150
  • 151
  • 152
  • 153
  • 154
  • 155
  • 156
  • 157
  • 158
  • 159
  • 160
  • 161
  • 162
  • 163
  • 164
  • 165
  • 166
  • 167
  • 168
  • 169
  • 170
  • 171
  • 172
  • 173
  • 174
  • 175
  • 176
  • 177
  • 178
  • 179
  • 180
  • 181
  • 182
  • 183
  • 184
  • 185
  • 186
  • 187
  • 188
  • 189
  • 190
  • 191
  • 192
  • 193
  • 194
  • 195
  • 196
  • 197
  • 198
  • 199
  • 200
  • 201
  • 202
  • 203
  • 204
  • 205
  • 206
  • 207
  • 208
  • 209
  • 210
  • 211
  • 212
  • 213
  • 214
  • 215
  • 216
  • 217
  • 218
  • 219
  • 220
  • 221
  • 222
  • 223
  • 224
  • 225
  • 226
  • 227
  • 228
  • 229
  • 230
  • 231
  • 232
  • 233
  • 234
  • 235
  • 236
  • 237
  • 238
  • 239
  • 240
  • 241
  • 242
  • 243
  • 244
  • 245
  • 246
  • 247
  • 248
  • 249
  • 250
  • 251
  • 252
  • 253
  • 254
  • 255
  • 256
  • 257
  • 258
  • 259
  • 260
  • 261
  • 262
  • 263
  • 264
  • 265
  • 266
  • 267
  • 268
  • 269
  • 270
  • 271
  • 272
  • 273
  • 274
  • 275
  • 276

System Board Drive Connections
......................................................................................
78
Drive Positions
...................................................................................................................
79
Installing a 3.5-inch Hard Drive into an Internal Drive Bay
................................................
80
Removing and Replacing a Removable 3.5-inch SATA Hard Drive
..................................
82
Installing a 5.25-inch or 3.5-inch Drive into an External Drive Bay
....................................
87
ReadyBoost Card
...............................................................................................................................
89
Front I/O Device and Power Switch
...................................................................................................
90
Fan Shroud
.........................................................................................................................................
91
Heatsink
.............................................................................................................................................
92
Processor
...........................................................................................................................................
93
Speaker
..............................................................................................................................................
94
Rear Chassis Fan
...............................................................................................................................
95
Inner Chassis Fan
..............................................................................................................................
96
Serial Port
...........................................................................................................................................
97
Power Supply
.....................................................................................................................................
98
System Board
.....................................................................................................................................
99
Battery
..............................................................................................................................................
100
Type 1 Battery Holder
......................................................................................................
101
Type 2 Battery Holder
......................................................................................................
101
Type 3 Battery Holder
......................................................................................................
102
Changing from a Desktop to a Minitower Configuration
...................................................................
103
Changing from a Minitower to a Desktop Configuration
...................................................................
105
8
Removal and Replacement Procedures Small Form Factor (SFF) Chassis
Preparation for Disassembly
............................................................................................................
107
Unlocking the Smart Cover Lock
......................................................................................................
108
Smart Cover FailSafe Key
...............................................................................................
108
Using the Smart Cover FailSafe Key to Remove the Smart Cover Lock
.........................
109
External Security Devices
................................................................................................................
110
Installing a Security Lock
.................................................................................................
110
Cable Lock
......................................................................................................
110
Padlock
...........................................................................................................
110
HP Business PC Security Lock
.......................................................................
111
Computer Access Panel
...................................................................................................................
113
Front Bezel
.......................................................................................................................................
114
Bezel Blanks
.....................................................................................................................................
115
Installing Additional Memory
............................................................................................................
116
DIMMs
.............................................................................................................................
116
DDR2-SDRAM DIMMs
....................................................................................................
116
Populating DIMM Sockets
...............................................................................................
117
Installing DIMMs
..............................................................................................................
118
Expansion Cards
..............................................................................................................................
120
Cable Management
..........................................................................................................................
124
Cable Connections
...........................................................................................................................
125
Drives
...............................................................................................................................................
126
Drive Positions
.................................................................................................................
126
Installing and Removing Drives
.......................................................................................
127
System Board Drive Connections
...................................................................
129
Removing an Optical Drive
.............................................................................
130
Installing an Optical Drive into the 5.25-inch Drive Bay
..................................
131
viii