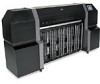
HP Designjet H35000 HP Designjet H35000 and H45000 Printer Series - Release No - Page 2
Update instructions
 |
View all HP Designjet H35000 manuals
Add to My Manuals
Save this manual to your list of manuals |
Page 2 highlights
Update instructions Update instructions The printer embedded software is updated by copying the new version from the RIP to the printer. 1. Make sure the printer is online. 2. Wait until the printer has finished printing. 3. If you are using the Caldera or Onyx RIPs, configure and load media before proceeding to the next step. 4. Locate the update file DJHxxxxx.BIN (on disc provided by your reseller or downloaded from the HP web site at www.hp.com/go/graphicarts > Support and Drivers) that matches the model of your printer (for example, DJH35500.BIN for the DesignJet H35500 printer). 5. Copy the file to the printer according to the RIP you are using: • HP RIP Software - Copy the update file to a Hot Folder that is routed to the printer. • Onyx - Select Configure Printer from the top menu bar. Select the Device tab and the select Features. With Update Printer Firmware highlighted, select Configure. Finally, locate the update file using the browse for file option, and select Open. • Scanvec - Select Setup from the top menu bar, and then select Color Profile. Select Create ICC Output. Select Driver Options. Finally, select Browse to locate the update file, and then select Open. • Caldera - Select the printer from the main application box, click the wrench icon. Note After restarting (or powering up) the printer, it will be approximately 30 seconds before the software displays anything on the control panel. 6. Verify the software update. To display the software version number on the printer's control panel, press the top center area of the Front Page display. The version number appears: 0706430 Revision M 2
-
 1
1 -
 2
2 -
 3
3 -
 4
4 -
 5
5 -
 6
6 -
 7
7 -
 8
8 -
9
-
10
-
11
-
12
-
13
-
14
-
15
-
16
-
17
-
18
 |
 |
