HP Deskjet 1125c HP DeskJet 1125C Professional Series - (English) Getting Star - Page 19
Setting Up, Step 1, Unpack, Step 2 - Install the Output Tray - printer installer
 |
View all HP Deskjet 1125c manuals
Add to My Manuals
Save this manual to your list of manuals |
Page 19 highlights
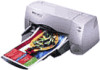
Section 1 - Getting Started Setting Up Step 1 - Unpack 1 Check that the following items are included with the printer: • Power Cord • Black Print Cartridge • Color Print Cartridge • Printer Software • User's Guide • Output Tray • Starter CD • Print Kit 2 Remove the packaging material and the four pieces of tape securing the printer (one at the back). 3 Open the top cover and remove the fifth piece of tape and white packing material from the inside of the printer. Step 2 - Install the Output Tray 1 Remove the output tray from its plastic cover. 2 Align the guides on the output tray with the grooves on the printer. 3 Push the tray in to lock the left side then the right side. 4 Lower the tray to its horizontal position. 4 2 3 4
-
 1
1 -
2
-
3
-
4
-
5
-
6
-
7
-
8
-
9
-
10
-
11
-
12
-
13
-
 14
14 -
 15
15 -
 16
16 -
 17
17 -
 18
18 -
 19
19 -
 20
20 -
 21
21 -
 22
22 -
 23
23 -
 24
24 -
25
-
26
-
27
-
28
-
29
-
30
-
31
-
32
-
33
-
34
-
35
-
36
-
37
-
38
-
39
-
40
-
41
-
42
-
43
-
44
 |
 |

4
Section 1 - Getting Started
Step 1 -
Unpack
1
Check that the following items are included with the printer:
•
Power Cord
•
Black Print Cartridge
•
Color Print Cartridge
•
Printer Software
•
User’s Guide
•
Output Tray
•
Starter CD
•
Print Kit
2
Remove the packaging material and the four pieces of tape securing the printer
(one at the back).
3
Open the top cover and remove the fifth piece of tape and white packing material
from the inside of the printer.
Step 2 - Install the Output Tray
1
Remove the output tray from its plastic cover.
2
Align the guides on the output tray with the grooves on the printer.
3
Push the tray in to lock the left side then the right side.
4
Lower the tray to its horizontal position.
Setting Up
2
3
4