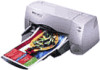
HP Deskjet 1125c HP DeskJet 1125C Professional Series - (English) Getting Star - Page 5
USB Installation, Windows 98 - driver
 |
View all HP Deskjet 1125c manuals
Add to My Manuals
Save this manual to your list of manuals |
Page 5 highlights
Section 2 - USB USB Installation Use the USB cable only if your computer is running Windows 98 or Windows 2000 and has a USB port. If your computer is not properly configured to use USB, use a parallel cable to connect your computer to the printer. To connect the parallel cable to your printer, locate the slider on the back of the printer, move it to the right so that it covers the USB port, and connect the parallel cable to the printer's parallel port. Note: The slider on the back of the printer allows you to choose either a parallel cable or USB cable connection. Windows 98 1 Turn on the printer and insert the Windows Starter CD into your CD-ROM drive. Do not click the Printer Driver icon. Proceed to step 2. 2 a On the back of the printer, locate the slider covering the USB port. A B b Move the slider to the left so that it covers the parallel port. Connect the USB cable (purchased separately; part number C6518A) from your computer to the printer's USB port. If the computer is properly configured to use USB, Windows will detect the printer. 3 The Add New Hardware Wizard dialog box appears. a Click Next until you are asked to specify a location for the software. b Click Browse, and double-click the CD icon (typically the D: drive). c Select the \driver\win\\win98usb directory in the Windows Starter CD and click OK. See page 9 for a list of the 3-character language codes for . d Click Next to see the subsequent dialog boxes and then click Finish. e Click Back if the driver could not be located and repeat steps 3a to 3d. 4 When the new driver is successfully installed, the HP DeskJet Setup Wizard screen appears. 5 Follow the instructions on the screen to complete installation of the printer software. 3
-
 1
1 -
 2
2 -
 3
3 -
 4
4 -
 5
5 -
 6
6 -
 7
7 -
 8
8 -
 9
9 -
 10
10 -
 11
11 -
12
-
13
-
14
-
15
-
16
-
17
-
18
-
19
-
20
-
21
-
22
-
23
-
24
-
25
-
26
-
27
-
28
-
29
-
30
-
31
-
32
-
33
-
34
-
35
-
36
-
37
-
38
-
39
-
40
-
41
-
42
-
43
-
44
 |
 |
