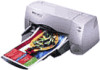
HP Deskjet 1125c HP DeskJet 1125C Professional Series - (English) Getting Star - Page 7
Setting Up Your Printer in Windows 2000, Setting Up Your Printer on a Macintosh Computer - printer driver
 |
View all HP Deskjet 1125c manuals
Add to My Manuals
Save this manual to your list of manuals |
Page 7 highlights
Section 3 - Macintosh Setting Up Your Printer on a Macintosh Computer You can connect the printer to the latest models of Macintosh computers (Mac OS 8.1 or later) through the USB port. To connect older models without a USB port, you can either connect the Macintosh to a HP JetDirect print server (JetDirect 300x), or visit Apple's web site (http://www.apple.com) for USB solutions. Configuration Requirements Before connecting your printer to the computer, ensure that your configuration meets these requirements: • Your computer must support USB • You need a USB-compliant interface cable • Your computer must be running Mac OS 8.1 or later Installing the Printer Software 1 Connect the USB cable (purchased separately; part number C6518A). For instructions on how to connect the USB cable to your printer, see step 2 of "USB Installation" on page 3. 2 Insert the Macintosh Starter CD into your CD-ROM drive. Double-click the Installer icon. 3 Follow the instructions on the screen to complete the installation. 4 Select Chooser from the Apple menu. 5 Click the printer's icon from the left side of the Chooser window. Then, click HP DeskJet 1125C from the right side of the Chooser window. Close the Chooser. Setting Up Your Printer in Windows 2000 Note: This section shows you how to set up your printer in Windows 2000 using a parallel cable connection. For USB connection in Windows 2000, see "USB Installation" on page 4. Information pertaining to Windows NT 4.0 in the HP DeskJet 1120C User's Guide and on-line help applies to Windows 2000 unless stated otherwise below. Configuration Requirements Before installing the printer software in Windows 2000, ensure your computer has at least 64 MB of RAM available. Installing the Printer Software 1 Start Microsoft Windows and ensure that no other application is running. 2 Insert the Windows Starter CD into the CD-ROM drive. The installation program runs automatically. 3 Select the Printer Driver option on the CD menu to install your printer software. 5 Section 4 - Windows 2000
-
 1
1 -
 2
2 -
 3
3 -
 4
4 -
 5
5 -
 6
6 -
 7
7 -
 8
8 -
 9
9 -
 10
10 -
 11
11 -
 12
12 -
13
-
14
-
15
-
16
-
17
-
18
-
19
-
20
-
21
-
22
-
23
-
24
-
25
-
26
-
27
-
28
-
29
-
30
-
31
-
32
-
33
-
34
-
35
-
36
-
37
-
38
-
39
-
40
-
41
-
42
-
43
-
44
 |
 |
